Sony DCR-TRV350 Operating Instructions - Page 98
Dubbing a tape easily – Easy Dubbing, Step 1: Connecting the VCR
 |
View all Sony DCR-TRV350 manuals
Add to My Manuals
Save this manual to your list of manuals |
Page 98 highlights
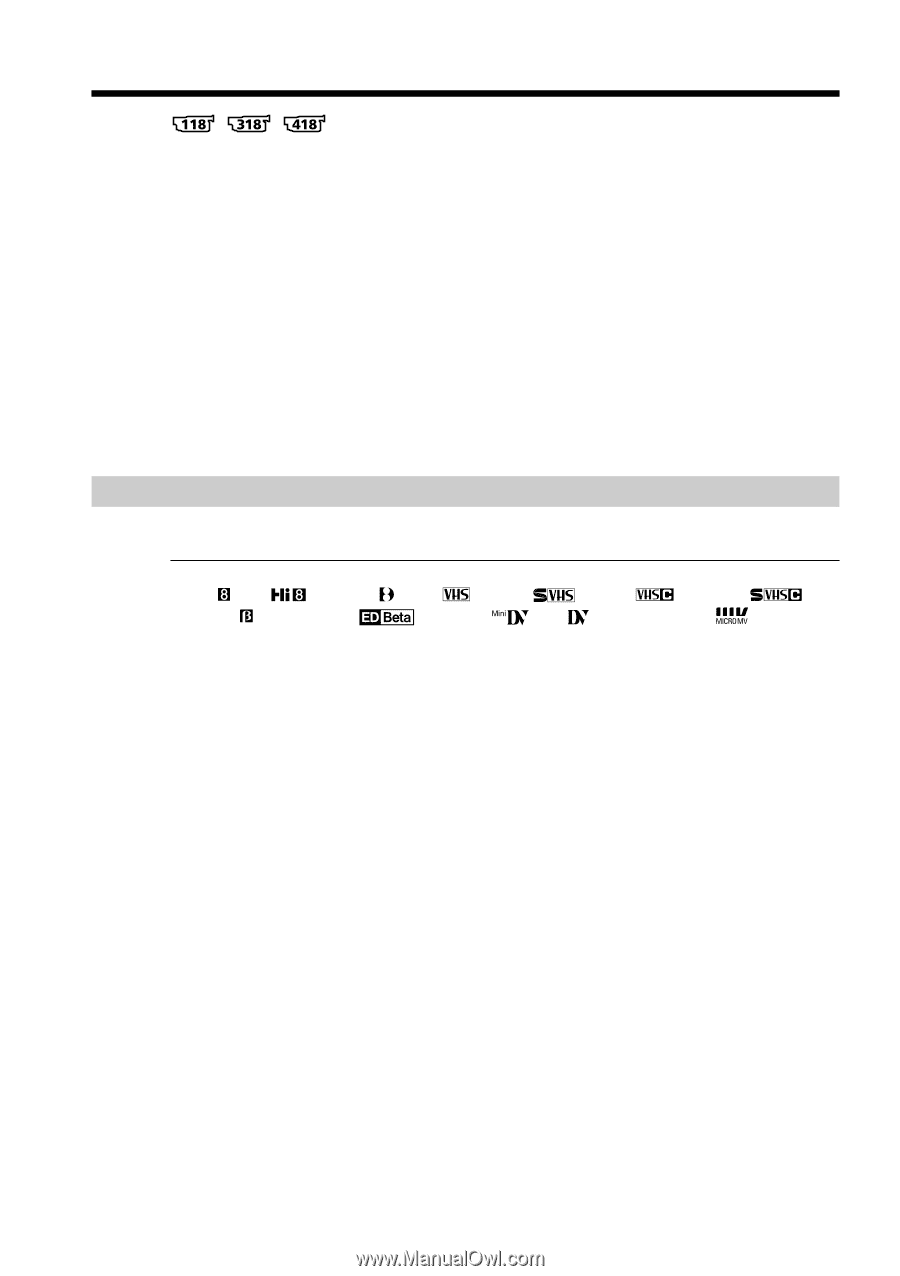
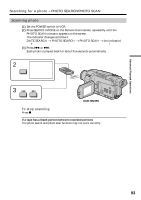
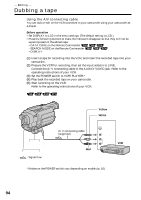
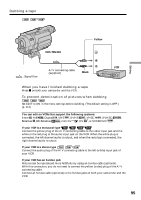
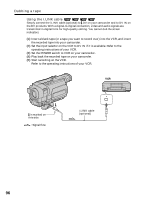
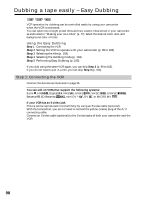
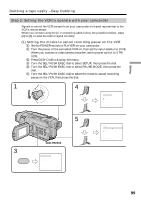
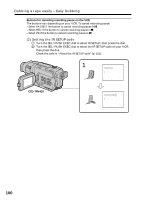
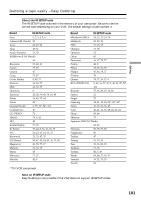
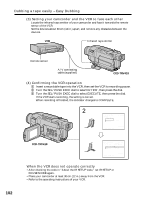
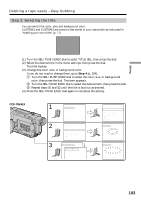
Dubbing a tape easily - Easy Dubbing VCR operation for dubbing can be controlled easily by using your camcorder when the VCR is connected. You can select one of eight preset titles and two custom titles stored in your camcorder as instructed in "Making your own titles" (p. 77). Select the desired color, size, and background color of titles. Using the Easy Dubbing Step 1 Connecting the VCR Step 2 Setting the VCR to operate with your camcorder (p. 99 to 102) Step 3 Selecting the title (p. 103) Step 4 Selecting the dubbing mode (p. 104) Step 5 Performing Easy Dubbing (p. 105) If you dub using the same VCR again, you can skip Step 2 (p. 99 to 102). If you do not need to put in a title, you can skip Step 3 (p. 103). Step 1: Connecting the VCR Connect the devices as illustrated in page 95. You can edit on VCRs that support the following systems: 8 mm , Hi8 , Digital8 , VHS , S-VHS , VHSC , S-VHSC , Betamax , ED Betamax , mini DV , DV , or MICRO MV . If your VCR has an S video jack Picture can be reproduced more faithfully by using an S video cable (optional). With this connection, you do not need to connect the yellow (video) plug of the A/V connecting cable. Connect an S video cable (optional) to the S video jacks of both your camcorder and the VCR. 98
-
 1
1 -
2
-
3
-
4
-
5
-
6
-
7
-
8
-
9
-
10
-
11
-
12
-
13
-
14
-
15
-
16
-
17
-
18
-
19
-
20
-
21
-
22
-
23
-
24
-
25
-
26
-
27
-
28
-
29
-
30
-
31
-
32
-
33
-
34
-
35
-
36
-
37
-
38
-
39
-
40
-
41
-
42
-
43
-
44
-
45
-
46
-
47
-
48
-
49
-
50
-
51
-
52
-
53
-
54
-
55
-
56
-
57
-
58
-
59
-
60
-
61
-
62
-
63
-
64
-
65
-
66
-
67
-
68
-
69
-
70
-
71
-
72
-
73
-
74
-
75
-
76
-
77
-
78
-
79
-
80
-
81
-
82
-
83
-
84
-
85
-
86
-
87
-
88
-
89
-
90
-
91
-
92
-
 93
93 -
 94
94 -
 95
95 -
 96
96 -
 97
97 -
 98
98 -
 99
99 -
 100
100 -
 101
101 -
 102
102 -
 103
103 -
104
-
105
-
106
-
107
-
108
-
109
-
110
-
111
-
112
-
113
-
114
-
115
-
116
-
117
-
118
-
119
-
120
-
121
-
122
-
123
-
124
-
125
-
126
-
127
-
128
-
129
-
130
-
131
-
132
-
133
-
134
-
135
-
136
-
137
-
138
-
139
-
140
-
141
-
142
-
143
-
144
-
145
-
146
-
147
-
148
-
149
-
150
-
151
-
152
-
153
-
154
-
155
-
156
-
157
-
158
-
159
-
160
-
161
-
162
-
163
-
164
-
165
-
166
-
167
-
168
-
169
-
170
-
171
-
172
-
173
-
174
-
175
-
176
-
177
-
178
-
179
-
180
-
181
-
182
-
183
-
184
-
185
-
186
-
187
-
188
-
189
-
190
-
191
-
192
-
193
-
194
-
195
-
196
-
197
-
198
-
199
-
200
-
201
-
202
-
203
-
204
-
205
-
206
-
207
-
208
-
209
-
210
-
211
-
212
-
213
-
214
-
215
-
216
-
217
-
218
-
219
-
220
-
221
-
222
-
223
-
224
-
225
-
226
-
227
-
228
-
229
-
230
-
231
-
232
-
233
-
234
-
235
-
236
-
237
-
238
-
239
-
240
-
241
-
242
-
243
-
244
-
245
-
246
-
247
-
248
-
249
-
250
-
251
-
252
-
253
-
254
-
255
-
256
-
257
-
258
-
259
-
260
-
261
-
262
-
263
-
264
-
265
-
266
-
267
-
268
 |
 |