Sony SRG300SE User Manual (SRG-300SE User's Guide) - Page 21
Initialize Tab, Image stabilizer, Eflip, OK/Cancel, Reboot, Factory default, Backup setting data
 |
View all Sony SRG300SE manuals
Add to My Manuals
Save this manual to your list of manuals |
Page 21 highlights
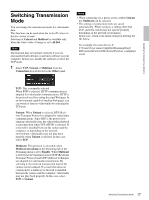
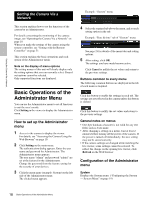
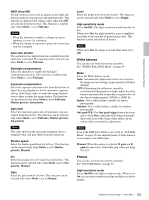
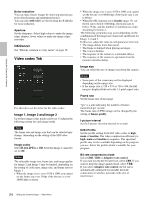
Setting the Camera Via a Network Notes • The frame rate and image size that can be selected for the IP image may differ depending on the video format. • After changing the video format, the PTZF position is returned to the position originally set when starting the camera and the video codec setting is returned to the default setting in accordance with the SDI video format. Image stabilizer Set the image stabilizer function. Select the checkbox to display steadier images when the camera is installed in a place subject to vibration. Notes • When the image stabilizer function is set, the angle of images taken will be smaller than usual. • The image stabilizer may not respond depending on the amount of vibration. • Be sure to set this function during the installation. Eflip Flip an image vertically. This function is set to Off normally. When installing the camera to ceilings, set it to On. Note If you switch On/Off of the Eflip function, all preset settings and pan-tilt limit settings are deleted. The video codec setting is returned to the default setting in accordance with the SDI video format. OK/Cancel See "Buttons common to every menu" on page 18. Initialize Tab Reboot Used when rebooting the system. Click Reboot, and the message "This System will be rebooted. Are you sure?" appears. Click OK to reboot the camera. It takes about two minutes to restart. Factory default Resets the camera to the factory settings. Retain current network settings When this item is checked, only the current network settings will be retained after reset. Click Factory default, and the message "This System will be rebooted. Are you sure?" appears. When you click OK, the network indicator on the camera starts to blink. After adjustments of the default settings have finished, the camera reboots automatically. Do not turn off the camera until the camera reboots. Tip The camera can also be reset to the factory settings by turning on the power of this unit while pressing the reset button on the camera. For details, refer to the supplied Installation Manual. Backup setting data Saves the setting data of the camera in a file. Click Backup setting data, and follow the instructions on the Web browser to specify the folder and save the setting data of the camera. Note The camera setting items that are stored in Preset 1 to 16 (page 62) are not saved. Restore setting Loads the stored setting data of the camera. Click Browse... and select the file in which the setting data is stored. Click OK, and the camera is adjusted according to the loaded data. Notes • With Restore setting, some items in the Network menu (page 28) cannot be restored. • The following items cannot be stored or restored with Backup setting data or Restore setting. - a certificate to be used in the 802.1X function - a certificate to be used in the SSL function - thumbnail - superimpose logo - preset position - camera setting items stored to presets Delete superimpose logo Click Delete to delete the superimposed logo, specified by Position in the Superimpose tab of the Video menu, from the camera. To set whether to show or hide the superimpose logo, you need to configure the setting under the Superimpose tab. 21 Configuring the System - System Menu
-
 1
1 -
2
-
3
-
4
-
5
-
6
-
7
-
8
-
9
-
10
-
11
-
12
-
13
-
14
-
15
-
 16
16 -
 17
17 -
 18
18 -
 19
19 -
 20
20 -
 21
21 -
 22
22 -
 23
23 -
 24
24 -
 25
25 -
 26
26 -
27
-
28
-
29
-
30
-
31
-
32
-
33
-
34
-
35
-
36
-
37
-
38
-
39
-
40
-
41
-
42
-
43
-
44
-
45
-
46
-
47
-
48
-
49
-
50
-
51
-
52
-
53
-
54
-
55
-
56
-
57
-
58
-
59
-
60
-
61
-
62
-
63
-
64
-
65
-
66
-
67
 |
 |
