Sony VGC-RB45G VAIO User Guide (Large File - 12.11 MB) - Page 153
To create a DVD Slide Show, DVD Slide Show
 |
View all Sony VGC-RB45G manuals
Add to My Manuals
Save this manual to your list of manuals |
Page 153 highlights
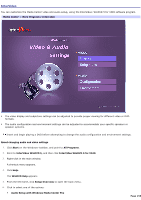
2. Select View DVD, and press OK. The View DVD window appears. 3. Select Create DVD, and press OK. 3. Use the Add More option to place more data on the DVD, combining music, pictures, and video content to the same CD or DVD. A status message at the bottom of the window shows the available recording space on the media. To create a data CD or DVD Additional recording choices are enabled when you select the option to create a data CD or DVD. A data CD or DVD can include pictures, music, recorded TV programs, and video. Follow steps 1 and 2 in the section, Creating a CD or DVD, using a recordable CD or DVD. 1. From the Disc Format window, select Data CD or Data DVD, depending on the type of recordable media being used, and then press OK. 2. Type a title for your CD or DVD2, and then press OK. 3. Select the type of media files you want to record, and press OK. The selected media's window appears, such as My Music or My Pictures, displaying available files. 4. From the media's window, select the desired files3. Use the Add More option to place more data on the CD or DVD, combining music, pictures, and video content to the same CD or DVD. A status message, at the bottom of the window, shows the available recording space on the media. 5. Select Create CD (Create DVD) to begin recording the media files to the CD or DVD4. To create a DVD Slide Show Follow steps 1 and 2 in the section, Creating a CD or DVD, using a recordable DVD. 1. From the Disc Format window, select DVD Slide Show, and then press OK. 2. Type a title for your DVD2, and then press OK. A Select Media window appears. 3. Select Music, and then press OK. The My Music window appears, listing all available music albums. 4. Select an album, and press OK. The Album Details window appears. 5. Select songs to include on the DVD, and press OK. A status message at the bottom of the window shows the amount of available recording space on the DVD. 6. Select Add More, and press OK. The Select Media window returns. 7. Select Pictures, and then press OK. The My Pictures window appears, displaying thumbnail views of all available pictures and folders. 8. Select the picture files to include on the DVD, and press OK. A status message, at the bottom of the window, shows the amount of available recording space on the DVD. Page 153
-
 1
1 -
2
-
3
-
4
-
5
-
6
-
7
-
8
-
9
-
10
-
11
-
12
-
13
-
14
-
15
-
16
-
17
-
18
-
19
-
20
-
21
-
22
-
23
-
24
-
25
-
26
-
27
-
28
-
29
-
30
-
31
-
32
-
33
-
34
-
35
-
36
-
37
-
38
-
39
-
40
-
41
-
42
-
43
-
44
-
45
-
46
-
47
-
48
-
49
-
50
-
51
-
52
-
53
-
54
-
55
-
56
-
57
-
58
-
59
-
60
-
61
-
62
-
63
-
64
-
65
-
66
-
67
-
68
-
69
-
70
-
71
-
72
-
73
-
74
-
75
-
76
-
77
-
78
-
79
-
80
-
81
-
82
-
83
-
84
-
85
-
86
-
87
-
88
-
89
-
90
-
91
-
92
-
93
-
94
-
95
-
96
-
97
-
98
-
99
-
100
-
101
-
102
-
103
-
104
-
105
-
106
-
107
-
108
-
109
-
110
-
111
-
112
-
113
-
114
-
115
-
116
-
117
-
118
-
119
-
120
-
121
-
122
-
123
-
124
-
125
-
126
-
127
-
128
-
129
-
130
-
131
-
132
-
133
-
134
-
135
-
136
-
137
-
138
-
139
-
140
-
141
-
142
-
143
-
144
-
145
-
146
-
147
-
 148
148 -
 149
149 -
 150
150 -
 151
151 -
 152
152 -
 153
153 -
 154
154 -
 155
155 -
 156
156 -
 157
157 -
 158
158 -
159
-
160
-
161
-
162
-
163
-
164
-
165
-
166
-
167
-
168
-
169
-
170
-
171
-
172
-
173
-
174
-
175
-
176
-
177
-
178
-
179
-
180
-
181
-
182
-
183
-
184
-
185
-
186
-
187
-
188
-
189
-
190
-
191
-
192
-
193
-
194
-
195
-
196
-
197
-
198
-
199
-
200
-
201
-
202
-
203
-
204
-
205
-
206
-
207
-
208
-
209
-
210
-
211
-
212
-
213
-
214
-
215
-
216
-
217
-
218
-
219
-
220
-
221
-
222
-
223
-
224
-
225
-
226
-
227
-
228
-
229
-
230
-
231
-
232
-
233
-
234
-
235
-
236
-
237
-
238
-
239
-
240
-
241
-
242
-
243
 |
 |