TRENDnet TPL-410AP User's Guide - Page 38
Using the Powerline Utility, Powerline Utility System Requirements, Software Installation
 |
View all TRENDnet TPL-410AP manuals
Add to My Manuals
Save this manual to your list of manuals |
Page 38 highlights
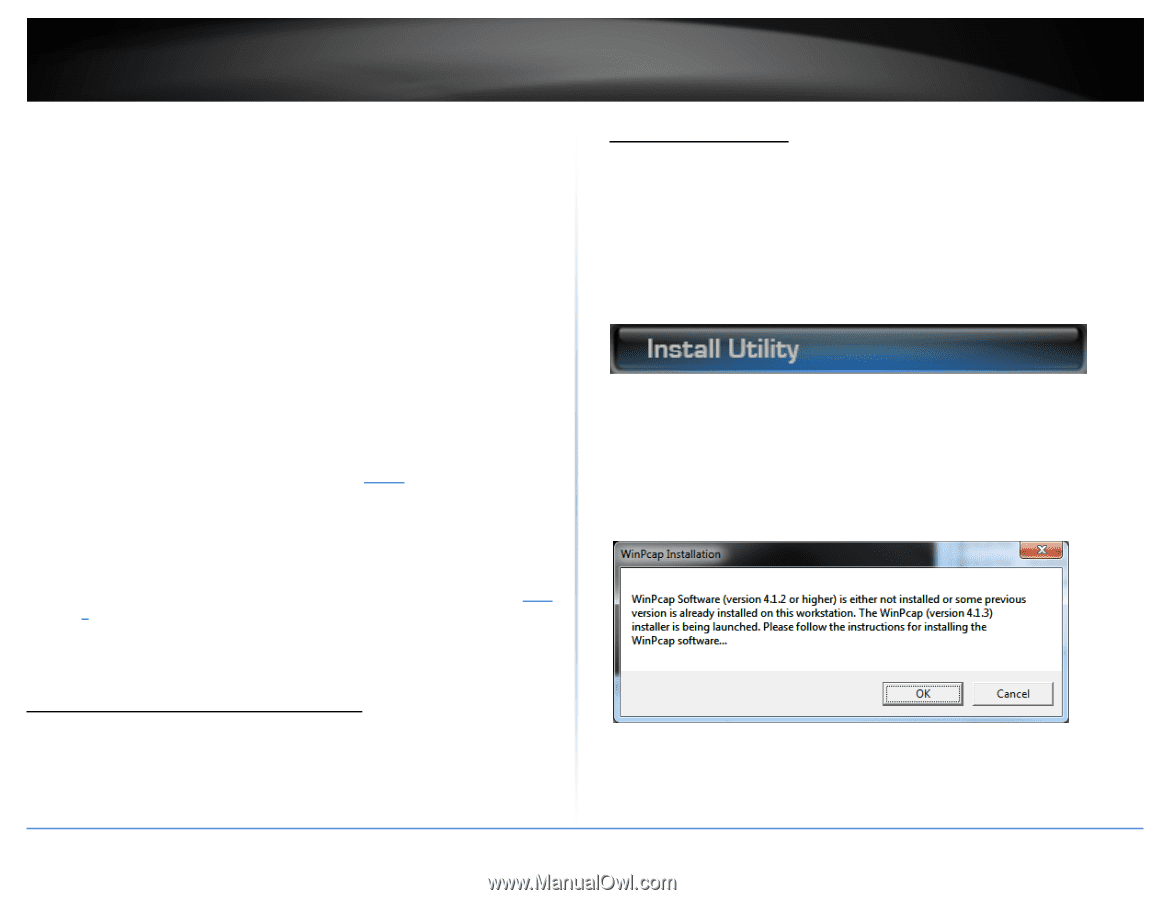
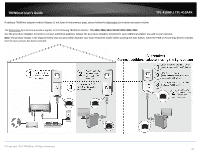
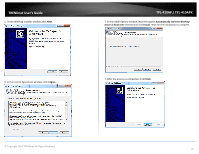
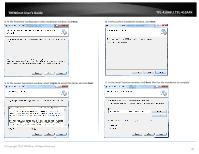
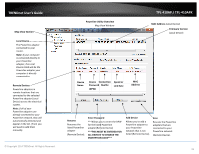
TRENDnet User's Guide Using the Powerline Utility The Powerline Utility allows you to do the following: • Create a customized encryption key for your Powerline network and apply it to multiple Powerline adapters at the same time. • View the Powerline adapters connected to your network (using the MAC address) and the approximate connection quality and speed of each Powerline adapter. • View and upgrade Powerline adapter firmware. Note: Link speed displayed in the utility of your Powerline adapters to another through your electrical system is estimated. Actual link speed may vary. Before installing and using the utility, please ensure the following: • Write down the Device Password (DPW) (16-digit characters A-Z only) and MAC Address (12-digit characters a-f, A-F, 0-9) of each Powerline adapter as this will be required to change the encryption key for multiple Powerline adapters. See "Product Hardware Features" on page 2. • Make sure your computer in which you are installing the utility is connected to your network and your Powerline adapters are also connected to your network. • If you have changed your encryption key using the Sync button and you are creating a customized encryption key, it is required to reset all Powerline devices to factory defaults using the physical Reset button on your Powerline adapter first before using the utility. See "Product Hardware Features" on page 2. • Please ensure that your Powerline adapters are already installed and connected and the Ethernet port on each adapter is connected to a device powered on. Powerline Utility System Requirements • Windows® 8.1 (32/64-bit), 8 (32/64-bit), Windows 7 (32/64-bit), Vista (32/64bit), or XP (32/64-bit) • Microsoft® .NET Framework 2.0 installed (Included with CD installation) Software Installation © Copyright 2014 TRENDnet. All Rights Reserved. TPL-410AP / TPL-410APK Software Installation 1. Insert the included CD-ROM into your computer's CD-ROM drive. 2. At the CD Autorun Prompt window, click Run Autorun.exe . Note: If the Autorun prompt does not appear automatically, open the CD contents and double-click Autorun.exe. 3. At the CD-ROM main menu, click Install Utility. 4. You may receive the following prompt about WinPcap. Click OK to continue the installation. Note: The Powerline Configuration Utility requires the use of the WinPcap application. If you are prompted to install the WinPcap application, continue through the following steps to complete the installation. Otherwise, if you are not prompted to install WinPcap, reboot your computer to complete the installation. 36
-
 1
1 -
2
-
3
-
4
-
5
-
6
-
7
-
8
-
9
-
10
-
11
-
12
-
13
-
14
-
15
-
16
-
17
-
18
-
19
-
20
-
21
-
22
-
23
-
24
-
25
-
26
-
27
-
28
-
29
-
30
-
31
-
32
-
 33
33 -
 34
34 -
 35
35 -
 36
36 -
 37
37 -
 38
38 -
 39
39 -
 40
40 -
 41
41 -
 42
42 -
 43
43 -
44
-
45
-
46
-
47
-
48
-
49
-
50
-
51
-
52
-
53
-
54
-
55
-
56
-
57
-
58
-
59
-
60
-
61
-
62
-
63
-
64
-
65
 |
 |