Toshiba Tecra M2-S410 Instruction Manual - Page 217
Appendix F, Internal Modem Guide, Installing the internal modem
 |
View all Toshiba Tecra M2-S410 manuals
Add to My Manuals
Save this manual to your list of manuals |
Page 217 highlights
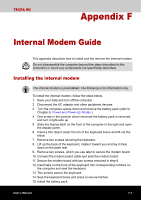
TECRA M2 Appendix F Internal Modem Guide This appendix describes how to install and the remove the internal modem. Do not disassemble the computer beyond the steps described in this instruction or touch any components not specifically described. Installing the internal modem The internal modem is preinstalled. The following is for information only. To install the internal modem, follow the steps below. 1. Save your data and turn off the computer. 2. Disconnect the AC adaptor and other peripheral devices. 3. Turn the computer upside down and remove the battery pack (refer to Chapter 6, Power and Power-Up Modes.) 4. One screw in the position which removed the battery pack is removed, and turn it right-side up. 5. Slide the display latch on the front of the computer to the right and open the display panel. 6. Insert a thin object under the rim of the keyboard brace and lift out the brace. 7. Remove two screws securing the keyboard. 8. Lift up the back of the keyboard, rotate it toward you and lay in face down on the palm rest. 9. Remove two screws, which you use later to secure the modem board. 10. Connect the modem board cable and seat the modem board. 11. Secure the modem board with two screws removed in step 9. 12. Insert tabs on the front of the keyboard into corresponding notches on the computer and seat the keyboard. 13. Two screws secure the keyboard. 14. Seat the keyboard brace and press to secure latches. 15. Install the battery pack. User's Manual F-1
-
 1
1 -
2
-
3
-
4
-
5
-
6
-
7
-
8
-
9
-
10
-
11
-
12
-
13
-
14
-
15
-
16
-
17
-
18
-
19
-
20
-
21
-
22
-
23
-
24
-
25
-
26
-
27
-
28
-
29
-
30
-
31
-
32
-
33
-
34
-
35
-
36
-
37
-
38
-
39
-
40
-
41
-
42
-
43
-
44
-
45
-
46
-
47
-
48
-
49
-
50
-
51
-
52
-
53
-
54
-
55
-
56
-
57
-
58
-
59
-
60
-
61
-
62
-
63
-
64
-
65
-
66
-
67
-
68
-
69
-
70
-
71
-
72
-
73
-
74
-
75
-
76
-
77
-
78
-
79
-
80
-
81
-
82
-
83
-
84
-
85
-
86
-
87
-
88
-
89
-
90
-
91
-
92
-
93
-
94
-
95
-
96
-
97
-
98
-
99
-
100
-
101
-
102
-
103
-
104
-
105
-
106
-
107
-
108
-
109
-
110
-
111
-
112
-
113
-
114
-
115
-
116
-
117
-
118
-
119
-
120
-
121
-
122
-
123
-
124
-
125
-
126
-
127
-
128
-
129
-
130
-
131
-
132
-
133
-
134
-
135
-
136
-
137
-
138
-
139
-
140
-
141
-
142
-
143
-
144
-
145
-
146
-
147
-
148
-
149
-
150
-
151
-
152
-
153
-
154
-
155
-
156
-
157
-
158
-
159
-
160
-
161
-
162
-
163
-
164
-
165
-
166
-
167
-
168
-
169
-
170
-
171
-
172
-
173
-
174
-
175
-
176
-
177
-
178
-
179
-
180
-
181
-
182
-
183
-
184
-
185
-
186
-
187
-
188
-
189
-
190
-
191
-
192
-
193
-
194
-
195
-
196
-
197
-
198
-
199
-
200
-
201
-
202
-
203
-
204
-
205
-
206
-
207
-
208
-
209
-
210
-
211
-
 212
212 -
 213
213 -
 214
214 -
 215
215 -
 216
216 -
 217
217 -
 218
218 -
 219
219 -
 220
220 -
 221
221 -
 222
222 -
223
-
224
-
225
-
226
-
227
-
228
-
229
-
230
-
231
-
232
-
233
-
234
-
235
-
236
-
237
-
238
-
239
-
240
-
241
-
242
-
243
-
244
-
245
-
246
 |
 |
