Troy-Bilt Horse Tiller Technical Manual - Page 11
Service, Inspection
 |
View all Troy-Bilt Horse Tiller manuals
Add to My Manuals
Save this manual to your list of manuals |
Page 11 highlights
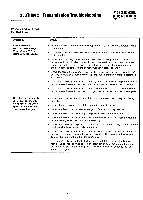
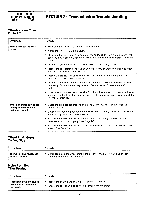
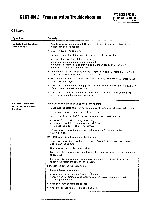
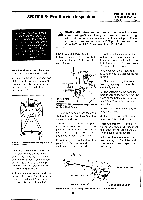
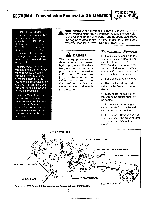
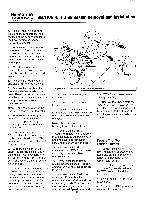
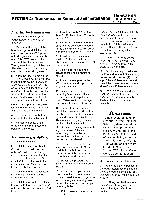
SECTION 3: Pre-Service Inspection PTO HORSE MODEL TECHNICAL MANUAL Page 3-1 4/90 Before you begin your repair or maintenance procedure take a moment to perform a pre-service inspection of the following transmission parts. In doing so, you may discover additional problems that can be corrected while the tiller is in your shop. Wheel Shaft - Inspect the wheel shaft for movement and oil leaks: • Grasp the tiller's handlebars and tilt the tiller forward so its weight is resting entirely on the wheels and move the tiller side-to-side. See Figure 3-1. 0 OD O Figure 3-1: Pre-Disassembly Inspection of the Wheel Shaft. If the tiller moves more than .015" from side-to-side on the wheel shaft, it indicates that the wheel shaft needs either to be shimmed or that one or both of the snap rings has become dislodged from the snap ring groove(s). • If oil is leaking from around one or both of the wheel shaft oil seals, replace the oil seal(s) and determine why the oil seal(s) failed. WARNING: When servicing the machine, prevent unintentional starting of the engine by disconnecting the spark plug wire and keeping the wire away from the spark plug. Place the engine throttle control in the OFF position and shift the Wheels/Tines/PTO Drive Lever into NEUTRAL. PTO Power Unit Drive Shaft Pulley- Check the PTO drive shaft pulley (see Figure 3-2) for end play and oil leaks: 111 Drive Shaft Pulley Figure 3-2: Pre-Disassembly Inspection of the Drive Shaft Pulley. • Using two hands, grasp the drive shaft pulley and pull it in and out to check for end play. There should be .005" to .010" play. If the drive shaft pulley has more play, the bolt that holds the pulley may need to be tightened. This bolt should be tightened to 170 inch/lbs. If tightening does not reduce the play, the PTO power unit drive shaft needs to be shimmed. • Look for oil leaks around the pulley. If you see oil, make sure that it did not come from the neutral plunger on the housing cover; this is an oil relief point. If you suspect an oil leak from around the pulley, inspect the following: a. The bolts holding the front bearing cap may not be sufficiently tightened. b. The washers on the bolts that hold the front bearing cap may be worn or the bolts may not have been coated with non-hardening gasket sealer. c. The front bearing cap gasket may have failed. d. The front drive shaft oil seal may have failed; find out why. Tiller Attachment - Tip the tiller so that you have a full view of the tiller attachment (see Figure 3-3). Then check the following: • Inspect the area around the rear bearing cap for oil leaks. If you see an oil leak, inspect the following: a! HOUSING COVER '1*--REAR BEARING CAP TILLER TINE SHAFT HOUSING COVER GASKET Figure 3-3: Pre-Disassembly Inspection of the Tiller Attachment. If
-
 1
1 -
2
-
3
-
4
-
5
-
 6
6 -
 7
7 -
 8
8 -
 9
9 -
 10
10 -
 11
11 -
 12
12 -
 13
13 -
 14
14 -
 15
15 -
 16
16 -
17
-
18
-
19
-
20
-
21
-
22
-
23
-
24
-
25
-
26
-
27
-
28
-
29
-
30
-
31
-
32
-
33
-
34
-
35
-
36
-
37
-
38
-
39
 |
 |
