Yamaha PSR-3000 Owner's Manual - Page 143
Multi Track Recording, Press the SONG [REC] and SONG
 |
View all Yamaha PSR-3000 manuals
Add to My Manuals
Save this manual to your list of manuals |
Page 143 highlights
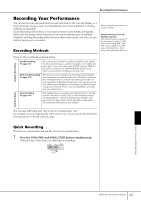
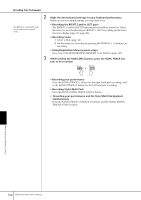
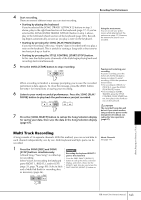
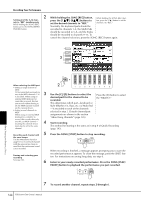
Recording Your Performance 4 Start recording. There are several different ways you can start recording. • Starting by playing the keyboard If you've selected the SONG [TRACK 1]/[TRACK 2] buttons in step 3 above, play in the right-hand section of the keyboard (page 77). If you've selected the SONG [EXTRA TRACKS (STYLES)] button in step 3 above, play in the left-hand (chord) section of the keyboard (page 105). Recording begins automatically as soon as you play a note on the keyboard. • Starting by pressing the SONG [PLAY/PAUSE] button If you start recording in this way, "empty" data is recorded until you play a note on the keyboard. This is useful for starting a Song with a short one-or two-beat pick-up or lead-in. Using the metronome You can record your performance while playing back the metronome (page 33). However, the metronome sound is not recorded. • Starting by pressing the STYLE CONTROL [START/STOP] button. In this case the rhythm parts (channels) of the Style begin playing back and recording starts simultaneously. 5 Press the SONG [STOP] button to stop recording. Pausing and restarting your recording To pause recording, press the SONG [PLAY/PAUSE] button during recording. To restart recording, follow the operations When recording is finished, a message prompting you to save the recorded performance data appears. To close the message, press the [EXIT] button. See step 7 for instructions on saving your recording. shown below. • For recording to [TRACK 1]/ [TRACK 2], press the SONG [PLAY/PAUSE] button. 6 Listen to your newly recorded performance. Press the SONG [PLAY/ PAUSE] button to play back the performance you just recorded. • For recording to [EXTRA TRACKS], press the STYLE CONTROL [SYNC START] button, then play in the chord sec- tion of the keyboard. CAUTION The recorded Song data will be lost if you select another Song or turn the power to the 7 Press the [SONG SELECT] button to call up the Song Selection display instrument off without executing the Save operation for saving your data, then save the data in the Song Selection display (page 67). (page 67). Multi Track Recording A Song consists of 16 separate channels. With this method, you can record data to each channel independently, one by one. Both Keyboard and Style parts can be recorded. 1 Press the SONG [REC] and SONG [STOP] buttons simultaneously. A blank Song ("New Song") is called up for recording. Example Recording the keyboard RIGHT 2 part to the channel 2 Press the PART SELECT [RIGHT 2] Select Voices for recording the keyboard parts (RIGHT 1, RIGHT 2, and/or LEFT) (page 29, page 78, page 80). Select a Style and a Multi Pad Bank for recording also, button to call up the Voice selection display, and select a Voice for the RIGHT 2 part. Also be sure to turn the PART ON/OFF [RIGHT 2] button on. as necessary (page 46). About Channels See page 145. Using, Creating and Editing Songs PSR-3000/1500 Owner's Manual 143
-
 1
1 -
2
-
3
-
4
-
5
-
6
-
7
-
8
-
9
-
10
-
11
-
12
-
13
-
14
-
15
-
16
-
17
-
18
-
19
-
20
-
21
-
22
-
23
-
24
-
25
-
26
-
27
-
28
-
29
-
30
-
31
-
32
-
33
-
34
-
35
-
36
-
37
-
38
-
39
-
40
-
41
-
42
-
43
-
44
-
45
-
46
-
47
-
48
-
49
-
50
-
51
-
52
-
53
-
54
-
55
-
56
-
57
-
58
-
59
-
60
-
61
-
62
-
63
-
64
-
65
-
66
-
67
-
68
-
69
-
70
-
71
-
72
-
73
-
74
-
75
-
76
-
77
-
78
-
79
-
80
-
81
-
82
-
83
-
84
-
85
-
86
-
87
-
88
-
89
-
90
-
91
-
92
-
93
-
94
-
95
-
96
-
97
-
98
-
99
-
100
-
101
-
102
-
103
-
104
-
105
-
106
-
107
-
108
-
109
-
110
-
111
-
112
-
113
-
114
-
115
-
116
-
117
-
118
-
119
-
120
-
121
-
122
-
123
-
124
-
125
-
126
-
127
-
128
-
129
-
130
-
131
-
132
-
133
-
134
-
135
-
136
-
137
-
 138
138 -
 139
139 -
 140
140 -
 141
141 -
 142
142 -
 143
143 -
 144
144 -
 145
145 -
 146
146 -
 147
147 -
 148
148 -
149
-
150
-
151
-
152
-
153
-
154
-
155
-
156
-
157
-
158
-
159
-
160
-
161
-
162
-
163
-
164
-
165
-
166
-
167
-
168
-
169
-
170
-
171
-
172
-
173
-
174
-
175
-
176
-
177
-
178
-
179
-
180
-
181
-
182
-
183
-
184
-
185
-
186
-
187
-
188
-
189
-
190
-
191
-
192
-
193
-
194
-
195
-
196
-
197
-
198
-
199
-
200
-
201
-
202
-
203
-
204
-
205
-
206
-
207
-
208
-
209
-
210
-
211
-
212
-
213
-
214
-
215
-
216
-
217
-
218
-
219
-
220
 |
 |
