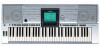
Yamaha PSR-3000 Owner's Manual - Page 43
Playing Backing Parts with the performance assistant Technology - memory card for
 |
View all Yamaha PSR-3000 manuals
Add to My Manuals
Save this manual to your list of manuals |
Page 43 highlights
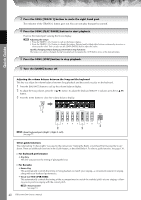
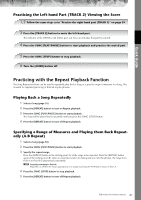
Quick Guide 6 Press the SONG [PLAY/PAUSE] button to play back the recorded performance. 7 Save the recorded performance. 1 Press the [SONG SELECT] button to call up the Song selection display. 2 Press the TAB [√]/[®] buttons to select the appropriate tab (USER, CARD, etc.) to which you want to save the data. Select USER to save the data to internal memory, or select CARD to save the data to a SmartMedia card. 3 Press the [6†] (SAVE) button to call up the file naming display. 4 Enter the file name (page 71). 5 Press the [8π] (OK) button to save the file. To cancel the Save operation, press the [8†] (CANCEL) button. CAUTION The recorded song will be lost if you change to another Song or you turn the power off without executing the Save operation. When the following message appears: "Song" changed. Save?/"Song" speichern?/ "Song" modifié. Sauv.?/"Song" cambiado. ¿Guardar?/Salvare "Song"? The recorded data has not yet been saved. To save the data, press the [G] (YES) button to open the Song selection display and save the data (see above). To cancel the operation, press the [H] (NO) button. Playing Backing Parts with the performance assistant Technology This feature makes it exceptionally easy to play the backing parts along with Song playback. n Before using performance assistant technology To use the performance assistant technology, the Song must contain chord data. If the Song contains this data, the current chord name will be displayed in the Main display during Song playback, letting you easily check whether the Song contains chord data or not. 1 Select a Song (page 35). In these example instructions, use the Songs in the "SampleSongs" folder. PSR-3000/1500 Owner's Manual 43
-
 1
1 -
2
-
3
-
4
-
5
-
6
-
7
-
8
-
9
-
10
-
11
-
12
-
13
-
14
-
15
-
16
-
17
-
18
-
19
-
20
-
21
-
22
-
23
-
24
-
25
-
26
-
27
-
28
-
29
-
30
-
31
-
32
-
33
-
34
-
35
-
36
-
37
-
 38
38 -
 39
39 -
 40
40 -
 41
41 -
 42
42 -
 43
43 -
 44
44 -
 45
45 -
 46
46 -
 47
47 -
 48
48 -
49
-
50
-
51
-
52
-
53
-
54
-
55
-
56
-
57
-
58
-
59
-
60
-
61
-
62
-
63
-
64
-
65
-
66
-
67
-
68
-
69
-
70
-
71
-
72
-
73
-
74
-
75
-
76
-
77
-
78
-
79
-
80
-
81
-
82
-
83
-
84
-
85
-
86
-
87
-
88
-
89
-
90
-
91
-
92
-
93
-
94
-
95
-
96
-
97
-
98
-
99
-
100
-
101
-
102
-
103
-
104
-
105
-
106
-
107
-
108
-
109
-
110
-
111
-
112
-
113
-
114
-
115
-
116
-
117
-
118
-
119
-
120
-
121
-
122
-
123
-
124
-
125
-
126
-
127
-
128
-
129
-
130
-
131
-
132
-
133
-
134
-
135
-
136
-
137
-
138
-
139
-
140
-
141
-
142
-
143
-
144
-
145
-
146
-
147
-
148
-
149
-
150
-
151
-
152
-
153
-
154
-
155
-
156
-
157
-
158
-
159
-
160
-
161
-
162
-
163
-
164
-
165
-
166
-
167
-
168
-
169
-
170
-
171
-
172
-
173
-
174
-
175
-
176
-
177
-
178
-
179
-
180
-
181
-
182
-
183
-
184
-
185
-
186
-
187
-
188
-
189
-
190
-
191
-
192
-
193
-
194
-
195
-
196
-
197
-
198
-
199
-
200
-
201
-
202
-
203
-
204
-
205
-
206
-
207
-
208
-
209
-
210
-
211
-
212
-
213
-
214
-
215
-
216
-
217
-
218
-
219
-
220
 |
 |
