Yamaha PSR-3000 Owner's Manual - Page 70
Renaming Files/Folders, Selecting Custom Icons for Files Shown at the, Left of File Name, Press the [1
 |
View all Yamaha PSR-3000 manuals
Add to My Manuals
Save this manual to your list of manuals |
Page 70 highlights
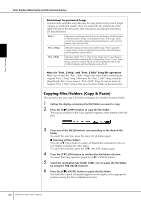
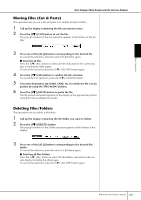
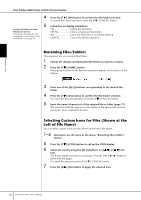
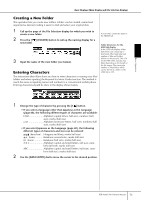
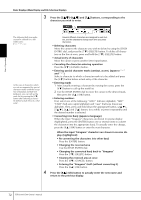
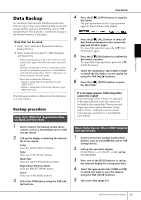
Basic Operation Basic Displays (Main Display and File Selection Display) 4 Press the [7†] (OK) button to confirm the file/folder selection. To cancel the Delete operation, press the [8†] (CANCEL) button. 5 Follow the on-display instructions. Deleting all data in a Smart- YES Delete the file/folder Media card at once Formatting a SmartMedia card completely erases all data on the SmartMedia card (page 66). YES ALL Delete all selected files/folders NO Leave the file/folder as is without deleting CANCEL Cancel the Delete operation Renaming Files/Folders This operation lets you rename files/folders. 1 Call up the display containing the file/folder you want to rename. 2 Press the [1†] (NAME) button. The pop-up window for the Rename operation appears at the bottom of the display. 3 Press one of the [A]-[J] buttons corresponding to the desired file/ folder. 4 Press the [7†] (OK) button to confirm the file/folder selection. To cancel the Rename operation, press the [8†] (CANCEL) button. 5 Input the name (characters) of the selected file or folder (page 71). The renamed folder/file appears on the display at the appropriate position among the files in alphabetical order. Selecting Custom Icons for Files (Shown at the Left of File Name) You can select custom icons for files (shown at the left of file name). 1-4 Operations are the same as the above "Renaming Files/Folders" section. 5 Press the [1†] (ICON) button to call up the ICON display. 6 Select the icon by using the [A]-[J] buttons or [3π†]-[5π†] but- tons. The ICON display includes several pages. Press the TAB [√]/[®] button to select different pages. To cancel the operation, press the [8†] (CANCEL) button. 7 Press the [8π] (OK) button to apply the selected icon. 70 PSR-3000/1500 Owner's Manual
-
 1
1 -
2
-
3
-
4
-
5
-
6
-
7
-
8
-
9
-
10
-
11
-
12
-
13
-
14
-
15
-
16
-
17
-
18
-
19
-
20
-
21
-
22
-
23
-
24
-
25
-
26
-
27
-
28
-
29
-
30
-
31
-
32
-
33
-
34
-
35
-
36
-
37
-
38
-
39
-
40
-
41
-
42
-
43
-
44
-
45
-
46
-
47
-
48
-
49
-
50
-
51
-
52
-
53
-
54
-
55
-
56
-
57
-
58
-
59
-
60
-
61
-
62
-
63
-
64
-
 65
65 -
 66
66 -
 67
67 -
 68
68 -
 69
69 -
 70
70 -
 71
71 -
 72
72 -
 73
73 -
 74
74 -
 75
75 -
76
-
77
-
78
-
79
-
80
-
81
-
82
-
83
-
84
-
85
-
86
-
87
-
88
-
89
-
90
-
91
-
92
-
93
-
94
-
95
-
96
-
97
-
98
-
99
-
100
-
101
-
102
-
103
-
104
-
105
-
106
-
107
-
108
-
109
-
110
-
111
-
112
-
113
-
114
-
115
-
116
-
117
-
118
-
119
-
120
-
121
-
122
-
123
-
124
-
125
-
126
-
127
-
128
-
129
-
130
-
131
-
132
-
133
-
134
-
135
-
136
-
137
-
138
-
139
-
140
-
141
-
142
-
143
-
144
-
145
-
146
-
147
-
148
-
149
-
150
-
151
-
152
-
153
-
154
-
155
-
156
-
157
-
158
-
159
-
160
-
161
-
162
-
163
-
164
-
165
-
166
-
167
-
168
-
169
-
170
-
171
-
172
-
173
-
174
-
175
-
176
-
177
-
178
-
179
-
180
-
181
-
182
-
183
-
184
-
185
-
186
-
187
-
188
-
189
-
190
-
191
-
192
-
193
-
194
-
195
-
196
-
197
-
198
-
199
-
200
-
201
-
202
-
203
-
204
-
205
-
206
-
207
-
208
-
209
-
210
-
211
-
212
-
213
-
214
-
215
-
216
-
217
-
218
-
219
-
220
 |
 |
