Bernina Bernette 56 Instruction Manual
Bernina Bernette 56 Manual
 |
View all Bernina Bernette 56 manuals
Add to My Manuals
Save this manual to your list of manuals |
Bernina Bernette 56 manual content summary:
- Bernina Bernette 56 | Instruction Manual - Page 1
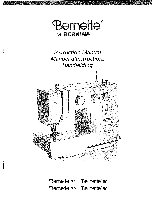
r ·tor BERNINPl Instruction Manual Manuel d'instructions Handleiding 'Barnette® 75 'Barnette® 60 'Bernette® 10 'Bernette® so - Bernina Bernette 56 | Instruction Manual - Page 2
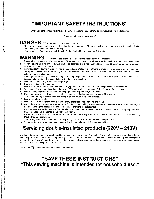
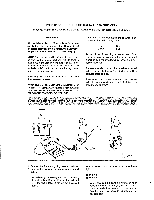
the needle, changing the needl\3, threading the bobbin, or changing the presser foot. 15. Always unplug the sewing machine from the electrical outlet when removing covers, lubricating, or when making any other user service adjustments mentioned in this instruction manual. 16. Appliance (220V - 240V - Bernina Bernette 56 | Instruction Manual - Page 3
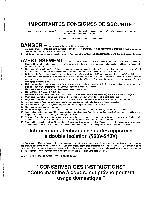
instructions avant d'utiliser Ia machine:• DANG ER - Pour reduire le risque de decharge electrique: 1. Ne jamais laisser Ia machine si elle a ete plongee dans du liquids. Retourner Ia machine a coudre aupres du revendeur autorise ou du service technique le plus proche afin qu'il puisse !'examiner, - Bernina Bernette 56 | Instruction Manual - Page 4
niet goed werkt, indien iemand de machine heeft Iaten vallen of als de machine in aanraking is gekomen met water. Breng ·de machine in dit geval voor controle of elektrische of mechanische reparatie naar de dichtstbijzijnde dealer of service-centrum. 4. Zorg altijd dat de ventilatiegaten vrij - Bernina Bernette 56 | Instruction Manual - Page 5
USERS IN THE UK, EIRE, MALTA AND CYPRUS ONLV. If your sewing machine is fitted with a 3 pin non-rewireable BS plug then please read the following. IMPORTANT If the available socket outlet is not suitable for the plug supplied with this equipment, it should be cut off and an appropriate three pin - Bernina Bernette 56 | Instruction Manual - Page 6
and 75 only 26 Reverse Sewing Lever 27 Drop Feed Lever 27 THREADING THE MACHINE 28 Winding the Bobbin 28 Lower Threading 29 Upper (Needle) Threading 30 Using the Needle Threader (75 only 32 Quick Thread-setting System FAST START BOBBIN (75 only 34 Drawing Up Lower Thread (50, 60 and 70 only - Bernina Bernette 56 | Instruction Manual - Page 7
largeur de point (modeles 60, 70 et 75 uniquement 26 Levier de couture en marche arriere 27 Levier des griffes d'entralnement 27 ENFILAGE DE LA MACHINE 28 Remplissage de Ia canette 28 Mise en place du til inferieur 29 Mise en place du til superieur (fil de l'aiguille) ........ 31 Utilisation - Bernina Bernette 56 | Instruction Manual - Page 8
7 Voetpedaal 7 De naald erin doen 8 De naald controleren 8 De persvoet vervangen 9 Omschakelen naar vrije armmachine 10 De machine stabiliseren 10 BEDIENINGSTOETSEN Patroonkeuzeknop 11 AAl\lBEVOLEN STEEKLENGTEN EN -BREEDTEN ... 20 Steeklengteknop 24 Elastische steek 25 Steekbreedteknop - Bernina Bernette 56 | Instruction Manual - Page 9
• • • PRINCIPAl PARTS • (j) Bobbin winding assembly • • Winds the thread onto the bobbin to be used for the lower thread. • ®Spool pin • • Holds the spool of thread. • ® Bobbin winding tension disc and thread guide @ Thread take-up lever ® Thread cutter ® Needle threader (75 only) IJ) - Bernina Bernette 56 | Instruction Manual - Page 10
garen. @ Disque de tension pour le remplissage de Ia canette et guide- . fil @ Levier de remontee du fil @ Coupe-fils @ Enfileur pour lever ou abaisser l'aiguille. • @ lnterrupteur principal/ de Ia lampe Met Ia machine sous ou hers tension et eteint ou allume Ia lampe de couture. @) Logement - Bernina Bernette 56 | Instruction Manual - Page 11
® X52800-050 ® 130920-051 .. ACCESSORIES 75/70 CD Buttonhole foot (1 pc.) ® Zipper foot (1 pc.) @ Button sewing foot (1 pc.) @ Needle pack (regular single needle HA x 130) (3 pes.) @ Twin needle (1 pc.) · ® Bobbins (3 pes.) (f) Screwdriver (1 pc.) ® Extra spool pin (1 pc.) ® Seam ripper - Bernina Bernette 56 | Instruction Manual - Page 12
® Bobbins (3 pes.) (j) Screwdriver (1 pc.) ® Extra spool pin (1 pc.) ® Seam ripper @ General purpose foot Parts code for zigzag presser foot: 138135-051Foot controller: X57319-051 (110/120V areas) XA1668-121 (220/240V areas) ]02185-051 (U.K.) ]02187-051 (Australia, New Zealanp) The above accessories - Bernina Bernette 56 | Instruction Manual - Page 13
/240V areas) )02185-051 (U.K.) !02187-051 (Australia, New Zealand) The above accessories are stored in the accessory bag inside the ex- tension table. These accessories have been designed to help complete @ X52800-050 (f) X54243-001 @138135-052 • most sewing tasks. 50 so - Bernina Bernette 56 | Instruction Manual - Page 14
controller plug, located between the foot controller • and the power supply plug on the cord, into the jack on the ma• chine . •• 2. Insert the power supply plug into an electrical outlet •• CAUTION: • 1. When changing the light bulb or when the sewing machine is not •• in use, the power supply plug - Bernina Bernette 56 | Instruction Manual - Page 15
NOTE (For U.S.A. and Canada only): This foot controller can be used with the machines . (j) Foot controller: Model N 50, •• 60, 70 ••• and •• 75 sewing lnterrupteur principal et de Ia lampe Get interrupteur permet d'allumer et d'8teindre Ia machine ainsi que Ia lampe de couture. (Voir - Bernina Bernette 56 | Instruction Manual - Page 16
Raise the needle bar to its highest position. 3. lower the presser foot 4. If a needle is already installed, remove it by loosening .the CD Coin Checking the Needle 8 • 1. The sewing needle must always be straight and sharp for smooth sewing. 0 ':-": ",-. .:'' , 1 2. To ou usee. 8 - Bernina Bernette 56 | Instruction Manual - Page 17
foot according to your sew- • ing needs. •• SNAP-ON TYPE • Turn power switch to "0" . • 1. Raise the needle to its highest position by turning the balance wheel •• toward you .{counterclockwise) and raise the presser foot lever. • 2. Release the foot uw machine, zijn zorg dat de pin in de persvoet - Bernina Bernette 56 | Instruction Manual - Page 18
0 Uft the bottom of the extension table up toward you. 8 Pull the extension table out to remove it - Bernina Bernette 56 | Instruction Manual - Page 19
VARIOUS CONTROLS Pattern Selection Dial To select a stitch, simply turn the pattern selection dial in either direction. Stitch widths and lengths are shown on the following pages. CD Pattern selection dial NOTE: Continuing to turn the pattern selection dial counterclockwise selects each pattern - Bernina Bernette 56 | Instruction Manual - Page 20
12 - Bernina Bernette 56 | Instruction Manual - Page 21
70 - Bernina Bernette 56 | Instruction Manual - Page 22
I 1 j " ' 14 - Bernina Bernette 56 | Instruction Manual - Page 23
--'~'l 50 I Q SMOCKING STITCH 5 49 (13/64) - Bernina Bernette 56 | Instruction Manual - Page 24
16 - Bernina Bernette 56 | Instruction Manual - Page 25
70 - Bernina Bernette 56 | Instruction Manual - Page 26
ov I i I .L 18 - Bernina Bernette 56 | Instruction Manual - Page 27
50 - Bernina Bernette 56 | Instruction Manual - Page 28
20 - Bernina Bernette 56 | Instruction Manual - Page 29
70 - Bernina Bernette 56 | Instruction Manual - Page 30
i ' 22 - Bernina Bernette 56 | Instruction Manual - Page 31
50 - Bernina Bernette 56 | Instruction Manual - Page 32
and decorative stitches. The • position needed for making the Satin 'Stitch varies according to the ~~~ • material and thread being used. To determine the exact dial position, • you should first test the stitc.h and length settings on a scrap of fabric to • observe the feeding of the materia - Bernina Bernette 56 | Instruction Manual - Page 33
to a stretch stitch. (See fig. A.) Adjusting the stretch stitching The sewing machine is adjusted during its production so that the stretch stitching can be sewn at the standard position "B". If different types of fabric or thread are used or the pattern does not have the correct shape, turn the - Bernina Bernette 56 | Instruction Manual - Page 34
• Stitch Width Dial (60, 70 and 75 only) ••• Depending on the stitch selected, you may need to adjust the stitch • width. • The numbers marked on the dial represent the stitch width . • THE HIGHER THE NUMBER, THE WIDER THE STITCH . •• Q) Stitch width dial •• NOTE: • When you choose the Straight - Bernina Bernette 56 | Instruction Manual - Page 35
foot con- • troller. To sew forward, release the reverse sewing lever. Reverse sew• ing is used for locking and reinforcing seams. (See fig. A B ••• Drop Feed lever Use ou • renforcer une couture. (Voir fig. A.) Om de machine achteruit te Iaten naaien, houdt u de achteruitnaaiknop zo ver mogelijk - Bernina Bernette 56 | Instruction Manual - Page 36
Winding the Bobbin 1. Place the spool of thread on the spool pin and pass the thread around the bobbin winding tension disc. G) Bobbin winding tension disc ® Bobbi~ winding 2. Pass the end of the .thread through the hole in the bobbin from the inside. 3. While turning the bobbin clockwise, slide - Bernina Bernette 56 | Instruction Manual - Page 37
foot !ever. 2. Open the shuttle cover behind the extension table on the front of the machine and remove the bobbin case by pulling its latch toward you and pulling it out from the shuttle race (fig. A) . 3. Unwind about 10 em (4'') of thread from a full bobbin and insert the bobbin into the bobbin - Bernina Bernette 56 | Instruction Manual - Page 38
switch to "0". 1. Raise the presser foot lever and turn the balance wheel toward you (counterclockwise) to raise the .thread take-up lever to its highest position. 2. Pull up the spool pin and place a spool of thread on it. 3. Pass the thread through both thread guides: the rear one first, then - Bernina Bernette 56 | Instruction Manual - Page 39
nu door beide draadgeleiders: eerst door de achterste, dan door de voorste. (Zie fig. A.) Q) Klospen ® Draadgeleider (achter) ® Draadgeleider (voor) @ Draadgever ® Guide-fils (arriE':lre) ® Guide-fils (avant) @ Levier re!eveur de fil 4. Tirer te fil vers le bas et le faire passer par le disque de - Bernina Bernette 56 | Instruction Manual - Page 40
the back of the sewing machine. • Only use the needle threader with needle sizes #70 to #1 00. !n addition, refer to the CHART OF SEWING FABRICS, NEEDLES AND THREAD COMBINATIONS to check that the appropriate thread and needle are being used. When using transparent nylon thread, use needles of sizes - Bernina Bernette 56 | Instruction Manual - Page 41
s'assurer que !e crochet l'attrape. - Bernina Bernette 56 | Instruction Manual - Page 42
as usual, then pull it • between the toes of the presser foot and straight toward the back of ~" •• the machine. • 5. Start sewing as usual. Ot is not necessary to draw up the bobbin • thread.) SYSTEME RAPIDE •• (modele 75 uniquement) a ••• Ce nouveau systeme permet de commencer coudre - Bernina Bernette 56 | Instruction Manual - Page 43
come • up from the bobbin in a large loop . • 4. Pull out about 15 em (6~') of both threads and place them toward • the back of the machine straight behind the presser foot. The upper •• thread should pass between the toes of the presser foot. • - Bernina Bernette 56 | Instruction Manual - Page 44
the top righthand side of the machine. Place the second spool of thread on this pin as shown in fig. A. CD Extra spool pin Twin~Needle Threading Each needle should be threaded separately. 1. Threading the Right Needle Follow the same instructions for single-needle threading. See page 30 for more - Bernina Bernette 56 | Instruction Manual - Page 45
stitches. lt may need to be adjusted when you change fabric or thread type. NOTE: It is recommended that a test sample be made on a fabric scrap before sewing on your project. The.basic thread tension setting is "5". Possible Problems and How To Correct Them A Upper tension is too tight. locks - Bernina Bernette 56 | Instruction Manual - Page 46
Tension des fils La tension des fils va affecter directement Ia qualit6 des points et il • Draadspanning De draadspanning bei"nvloedt de kwaliteit van uw steken. Bij gebruik van se peut qu'elle doive etre r6g!6e lors du changeh'lent de tissu ou de • de verschillende stoffen of garens, meet - Bernina Bernette 56 | Instruction Manual - Page 47
CHART OF SEWING FABRICS, NEEDLES AND THREAD COMBINATIONS KNITS Single knit, Double knit, jersey, Tricot NOTE: 1. Select the correct needle and "thread size from the above chart. 2. Use the same size thread for the upper (spool) and lower {bobbin) threads. #90/14 Cotton-Wrapped Polyester - Bernina Bernette 56 | Instruction Manual - Page 48
OVERZICHT VAN COMBINATIES VAN MATERIALEN, NAALDEN EN GARENS Gebreid materiaal Enkel, dubbel,jersey, tricot #90/14 OPJVIERKING: I. Kies de juiste naald en garen volgens de bovenstaande tabel. 2. Voor de onderdraad moet altijd hetzelfde garen worden gebruikt als voor de bovendraad (klos en spoel). - Bernina Bernette 56 | Instruction Manual - Page 49
place both the upper and lower threads behind the presser foot. 4. Place the fabric under the presser foot with the needle 1 em (3/8") from the edge of the fabric. 5. Lower the presser foot. 75170/60 Point droit a placer droite. Backtacking Reverse sti'tching is used to Jock or reinforce the - Bernina Bernette 56 | Instruction Manual - Page 50
(fig. A) • 1. Stop the machine at the point where you wish to change directions • with the needle still in the fabric. 2. Raise the presser foot and turn the fabric to line up its new direcH tion using the needle as a turning point. 3. lower the presser foot and start sewing in the new - Bernina Bernette 56 | Instruction Manual - Page 51
presser foot toward the back of the machine . •• - Bernina Bernette 56 | Instruction Manual - Page 52
, select the stitch length and the stitch width . It is recommended to sew using the Straight Stitch at the beginning and end of the Zigzag Stitch. • Lorsque Ia longueur du point zigzag est dSfinie dans Ia plage "c::J", Ia machine effectue un point de bourdon (point zigzag tres s~rre) qui a peut - Bernina Bernette 56 | Instruction Manual - Page 53
the bottom of a pair of pants, so that the stitch does tlot show. Use the Blindhem Stitch when sewing on non-stretch fabrics, and the Stretch Blindhem for stretch fabrics . 1. Both the upper (spool) and lower {bobbin) threads should be the satne color as the fabric. 2. Fold back the fabric to the - Bernina Bernette 56 | Instruction Manual - Page 54
used to sew a picot {lace-like) edge on lightweight fabric . 1. Set the pattern selection dial to the She!! hem Stitch. 2. This stitch requires a tighter thread tension than no_rma!. 3. Place the fabric under the presser foot - • biche de sorte que Ia machine puisse coudre des points droits • sur - Bernina Bernette 56 | Instruction Manual - Page 55
the elastic both in the front and behind the presser foot as shown in fig. B. Joining Fabric The 3-Step Zigzag Stitch can be used to join two pieces of fabric together and is very effective when sewing knitted fabrics. If nylon thread is used, the stitch will not be visible . 1. Place the edges of - Bernina Bernette 56 | Instruction Manual - Page 56
Set the pattern selection dial to the Universal Stitch. • • • • • This machine automatically produces a Scallop Stitch which may be used as decorative edging . 1. Set the pattern selection dial to the Scallop Stitch. •• 2. SeW the Scallop Stitch along the edge of the material. 3. lf desired - Bernina Bernette 56 | Instruction Manual - Page 57
These stitches are used to join two pieces of fabric while leaving a space between Double Overlock. 3.. Stitch along the edge, pulling both threads rlight!y when beginning to sew. • Use thicker than normal threads for sewing. 4. After sewing, remove the basting and the paper. Finish by - Bernina Bernette 56 | Instruction Manual - Page 58
one • B step. The Stretch Overlock (Right) is useful when sewing stretch mate- • rials . •• 1. Set the pattern selection dial to the Stretch Overlock (Left), Stretch • Overlock {Right) or Comb Stitch. • 2. Position the fabric under the presser foot so that the seamline is •• approximately 3 mm - Bernina Bernette 56 | Instruction Manual - Page 59
This stitch can be used to sew heavyweight stretch fabrics wherever a Zigzag Stitch would be used. The Triple Zigzag can also be used as a decorative topstitch . Set the pattern selection dial to the Triple Zigzag . Utiliser ce point pour coudre des tissus erastiques epais ra oU un • point - Bernina Bernette 56 | Instruction Manual - Page 60
8. Stop the machine when the buttonhole is sewn. CD Align the marks on the foot with those on the fabric. ® Starting mark on the fabric ® Marks on the foot @ Button plate Making a Buttonhole, on Stretch Fabrics (fig. E) When sewing buttonholes on stretch fabric, place a gimp thread under •• the - Bernina Bernette 56 | Instruction Manual - Page 61
coudre tout en tenant Jegerement le fil superieur. 7. La couture de Ia boutonniere se faitparordre, de 1 8.4, comme le montre Ia fig. D. 8. Arreter Ia machine lorsque toutes !es barres d'arret sont cousues. - Bernina Bernette 56 | Instruction Manual - Page 62
garment. • 2. When sewing buttonholes on thin fabrics, Making a Buttonhole •• 1. Using tailor's chalk, mark the foot so that the center of the front bar tack mark is directly under the center of the presser foot Ia couture automatique de· boutonnieres Ia machine donne des resultats tres fiables. Pour - Bernina Bernette 56 | Instruction Manual - Page 63
tack) _, Step 2 (Left side) [ Step 3 (Back bar tack) Step 4 (Right side) 1. Set the pattern selection dial to "1 ". 2. lower the presser foot and sew 5 to 6 stitches. 3. Stop the machine when the needle is at the left side of the stitches, then raise the needle from the material. 1. Turn the - Bernina Bernette 56 | Instruction Manual - Page 64
the Buttonhole 1. To secure the stitching, turn the material90° counterclockwise and sew straight stitches to the end of the front bar tack of the buttonhole . 2. Remove the material from the machine. It is recommended that pins be placed across both bar tacks of the buttonhole as protection against - Bernina Bernette 56 | Instruction Manual - Page 65
the fol!owing adjustments can be made. • 1. Set the stiich length dial to "c:J" and sew the left side of the but- • tonhole on a scrap of fabric while observing how the •• If the right side is too coarse, use the enclosed screwdriver to turn the • screw in the - direction. • If the right side - Bernina Bernette 56 | Instruction Manual - Page 66
Equilibrage des boutonnieres Afstelling voor knoopsgaten Sl les points de chaque.c6t8 de Ia boutonniere sont dissemblab!es, • lndien de steken aan de beide zijden van bet knoopsgat ongelijk zijn, kunt u proc8der aux r6g!ages suivants: : de instellingen als volgt veranderen: 1. Mettre le - Bernina Bernette 56 | Instruction Manual - Page 67
between the foot and the fabric and make sure that • the needle enters the holes without hitting the button. If it hits, see •• step 1. • 5. At a slow speed, sew approximately 10 stitches. •• 6. Remove the material from the machine. Cut the upper and lower • threads and tie the two threads at the - Bernina Bernette 56 | Instruction Manual - Page 68
. Si e!!e heurte le bouton, veuillez vous reporter au point 1: a 5. Coudre environ 1o pOints faible vitesse. 6. Retirer le tlssu de Ia machine, Couper les fils inf8rieur et supe~ rieur puis !es nouer sur l'envers du tissu, 0 0 2, Monteer de knoopaanzetvoet. 3, Zetde transporteurs omlaag - Bernina Bernette 56 | Instruction Manual - Page 69
foot, • move the zipper foot to the other side of the zipper, and continue • sewing using the other side notch . •• 0) Zipper foot • ® Right pin for sewing the left side of the zipper • ® left pin upper thread (to about "2"} so that the •• lower thread lies on the underside of the material. • 3. Sew - Bernina Bernette 56 | Instruction Manual - Page 70
, en kan op eenvoudige wijze links of rechts van de naald worden gezet. Voor het naaien rechts van de ritssluiling, monteert u het asje aan de pin links van de ritsvoet. Naait u de Jinkerkant van de 1its, dan wordt het asje van de ritsvoet aan de rechterpin gezet (zie fig. A). 1. Stel de - Bernina Bernette 56 | Instruction Manual - Page 71
foot together with • a fabric underlay for reinforcement •• 4. Remove the presser foot and presser foot holder, then lower the • presser foot Iifter. •• 5. Begin sewing pied~de~ • biche. •• 4. Retirer le pied-de-biche et son support puis abaisser le releveur • de pied-de-bfche. a • 5. Commencer - Bernina Bernette 56 | Instruction Manual - Page 72
as a decoration on a garment or project. •• 1. Baste the cu·t design to the fabric in the desired location. • 2. Carefully sew around the edge of the cutout design using a Zigzag •• Stitch with a fine stitch length. • 3. Cut away the surplus fab_ric oUtside of the stitching. •• 4. Remove the basting - Bernina Bernette 56 | Instruction Manual - Page 73
presser bar with the presser foot holder assembly removed . 6. Pull the lower thread up through the work at and supporting the outside of the hoop with your small fingers . NOTE: After sewing without Apres Ia couture sans entrainement, pn3parer Ia machine pour Ia • couture suivante en rabaissant - Bernina Bernette 56 | Instruction Manual - Page 74
Monogrammmg 1. Sew moving the hoop slowly along the lettering at a constant speed . 2. Secure with a few straight stitches at the end of the last letter. Embroidering 1. Stitch the - Bernina Bernette 56 | Instruction Manual - Page 75
from the outlet. 2. Loosen the face plate screw as shown in fig. A. 3. Remove the face plate from the machine as illustrated in fig. B. 4. Replace the sewing light bulb. {See fig. C.} • NOTE: Use only same type of bulb rated 15W. 5. Reattach the face plate and fasten the screw as shown in fig - Bernina Bernette 56 | Instruction Manual - Page 76
without thread installed for a short time . 5. Be sure to wipe any excess oil off the machine. NOTE: The machine should be oiled once a week if it is'used more than one hour a day. lf the machine is used more often, oil every day. Sewing machine oil is available from your local sewing machine dealer - Bernina Bernette 56 | Instruction Manual - Page 77
cover on the front of the free arm. 8 c 3. Take out the bobbin case by opening its latch and pulling it out from the shuttle race. 4. accumulated lint and thread from the retaining ring, hook, driver and race body with a brush . 2. A cloth dampened with machine oil should be used to wipe lint - Bernina Bernette 56 | Instruction Manual - Page 78
this instruction manual that details the operation you are performing to make sure you are correctly using the machine. If the problem continues, the following checklist may help you to improve the operation. If you sti!! have difficulties, contact your nearest service center. Upper threading is - Bernina Bernette 56 | Instruction Manual - Page 79
combination of needle size/ thread size/fabric is incorrect. Foot controller is not used correctly. Page 8 No Thread is tangled. Page 30 No Page 39 No Fabric is pulled excessively. Let the feed dogs move the fabric. Do not pu II the fabric. No Page 7 No The bobbin winding shaft is slid - Bernina Bernette 56 | Instruction Manual - Page 80
dans le present manuel pour s'assurer de Ia bonne utilisation de Ia machine. Si le probl8me persiste, Ia liste de verification suivante peut vous aider 8. y rem8dier. a Si vous ne parvenez toujours pas resoudre le probleme, veuillez contacter le centre technique le plus proche. Le fil superieur n' - Bernina Bernette 56 | Instruction Manual - Page 81
de Ia prise. Page 24 Page8 Page 69 Page 6 La combinaison aiguille/fil/tissu est incorrecte. Une aiguille inf8rieure est utilis8e. La machine manque d'huile. ~interrupteur principal est ete.int. Page 39 Une aiguille inf8rieure est utilises. Page 8 La combinaison aiguille/fil/tissu est - Bernina Bernette 56 | Instruction Manual - Page 82
u met behulp van de volgende controlelijst de fout wellicht verhelpen. Mocht u het probleem niet kunnen oplossen, neem dan contact op met uw service-centrum. I I I I ) 1 l Bovendraad is niet g0ed inge- . regen. Pagina 31 Nee Onderdraad zit in .. de knoop. Pagina 29 Nee Naald is fout geplaatst - Bernina Bernette 56 | Instruction Manual - Page 83
Steeklengteknop is ingesteld op niet doorvoeren. Pagina 24 Foute combinatie naaldlgaren/stof gebruikt. Naald is niet goed geplaatst Pagina 8 Slechte naald gebruikt. Er zit stof aan de onderkant van de naaldplaat. Pagina 69 Onvoldoende smering. Stroomkabel/ stekker niet aangesloten. Pagina 6 , - Bernina Bernette 56 | Instruction Manual - Page 84
•• Keep the carton and packing material's for future use. It may become •• necessary to reship the sewing machine. Improper packing or improper • packing material could result in damage during shipping. Instructions • for repacking the machine are illustrated. IMPORTANT This packing materia! is - Bernina Bernette 56 | Instruction Manual - Page 85
B Balancing the Machine 10 Blindhem Stitching 45 0 p Patchworking 49 Pattern Lengths 12-15 Bobbin o Pattern Selection Dial 11 ! Threading 29, 34 Pattern Widths 12-15 Winding 28 o Performance Checklist 70-71 Bridging Stitch 12 Buttonhole Sewing 52, 54 Presser Foot Replacement - Bernina Bernette 56 | Instruction Manual - Page 86
de modele 11 ratssage 68 Griffes d'entra1nement • • 8 ens d e cou1ure 42 . • Stabilisation de Ia machine 10 Levter 27 • Syste' me d'enf'1lage rapr'de 34· Nettoyage 69 • Guide de depannage 72-73 : T I •• Tableau de combinaisons tissu/aiguille/fil 39 11nn1se1arr1u1aplt
-
 1
1 -
 2
2 -
 3
3 -
 4
4 -
 5
5 -
 6
6 -
 7
7 -
8
-
9
-
10
-
11
-
12
-
13
-
14
-
15
-
16
-
17
-
18
-
19
-
20
-
21
-
22
-
23
-
24
-
25
-
26
-
27
-
28
-
29
-
30
-
31
-
32
-
33
-
34
-
35
-
36
-
37
-
38
-
39
-
40
-
41
-
42
-
43
-
44
-
45
-
46
-
47
-
48
-
49
-
50
-
51
-
52
-
53
-
54
-
55
-
56
-
57
-
58
-
59
-
60
-
61
-
62
-
63
-
64
-
65
-
66
-
67
-
68
-
69
-
70
-
71
-
72
-
73
-
74
-
75
-
76
-
77
-
78
-
79
-
80
-
81
-
82
-
83
-
84
-
85
-
86
 |
 |
r
·tor
BERNINPl
Instruction
Manual
Manuel
d'instructions
Handleiding
'Barnette®
75
'Barnette®
60
'Bernette®
10
'Bernette®
so