Bernina Bernette 56 Instruction Manual - Page 58
Overhandse steken
 |
View all Bernina Bernette 56 manuals
Add to My Manuals
Save this manual to your list of manuals |
Page 58 highlights
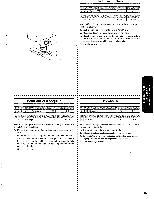
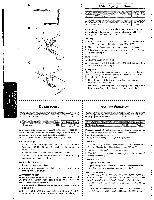
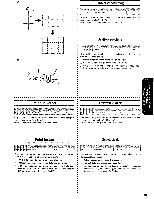
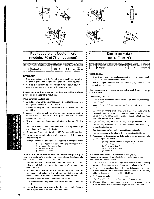
• A These stitches are used to join together seams and finish them in one • B step. The Stretch Overlock (Right) is useful when sewing stretch mate- • rials . •• 1. Set the pattern selection dial to the Stretch Overlock (Left), Stretch • Overlock {Right) or Comb Stitch. • 2. Position the fabric under the presser foot so that the seamline is •• approximately 3 mm (1/811) to the left of the presser foot center. This • stitch works best with a seam allowance of approximately 6 mm • (1/4") as this allows the right side of the stitch to overlock the cut • edge of the fabric as shown in fig. A. •• 3. If the seam allowance is wider than the stitch pattern, trim away • any excess fabric after stitching. • A finished Stretch Overlock (Right) is shown in fig. B. Points sur le bord Overhandse steken a a Ces points servent assembler des coutures et les terminer en Met deze steek kunt u in Mn handeling naden naaien en afwerken. De stretch une seule operation. Le point overlock stretch (8. droite) est id8al overlock (rechts) is geschikt voor bet naaien van elastische stoffen. pour coudre des tissus Blastiques. 1. Stel de patroonkeuzeknop in op de stretch overlock (links\ de stretch 1. Mettre le s81edeur de modele sur le point overlock stretch'(8. gauM overlock (rechts) of de kamsteeL che}, te point overlock stretch (8. droite) ou le point peigne. 2. Leg de stof onder de persvoet zodat de naad ongeveer 3 mm. links van 2. Placer le tissu sous le piedMde-biche de sorte que Ia couture se a a trouve environ 3 mm gauche du centre du pied-de-biche. Ce bet midden van de persvoet komt. De steek komt bet beste tot zijn recht met een zoom van ongeveer ~ mm., zodat de rechter (zigzag) kant van point donne d'excellents r8sultats avec une marge de couture de de steek over de buitenrand van de stof valt. (Zie fig. A.) 6 mm, ce qui permet au c6t8 droit (cOte zigzag) du point de pi- 3. Als het steekpatroon niet over de rand valt, dan moet bet teveel aan stof quer le bord coupe du tissu com me le montre Ia fig. A. eerst worden afgeknipt. a 3. Si I'Scart est superieur Ia tail!e du point, couper l'excedent de tissu apres avoir pique. La fig. B montre un point overlock stretch (8. droite) termine. In fig. B ziet u bet eindresultaat van he~ gebruik van de stretch overlock (rechts) . ~0
-
 1
1 -
2
-
3
-
4
-
5
-
6
-
7
-
8
-
9
-
10
-
11
-
12
-
13
-
14
-
15
-
16
-
17
-
18
-
19
-
20
-
21
-
22
-
23
-
24
-
25
-
26
-
27
-
28
-
29
-
30
-
31
-
32
-
33
-
34
-
35
-
36
-
37
-
38
-
39
-
40
-
41
-
42
-
43
-
44
-
45
-
46
-
47
-
48
-
49
-
50
-
51
-
52
-
 53
53 -
 54
54 -
 55
55 -
 56
56 -
 57
57 -
 58
58 -
 59
59 -
 60
60 -
 61
61 -
 62
62 -
 63
63 -
64
-
65
-
66
-
67
-
68
-
69
-
70
-
71
-
72
-
73
-
74
-
75
-
76
-
77
-
78
-
79
-
80
-
81
-
82
-
83
-
84
-
85
-
86
 |
 |
