Brother International HL-2170W Network Users Manual - English - Page 104
Specifying a different URL, Other sources of information, Continue Anyway, Have Disk, Insert Disk - print test page
 |
UPC - 012502619468
View all Brother International HL-2170W manuals
Add to My Manuals
Save this manual to your list of manuals |
Page 104 highlights
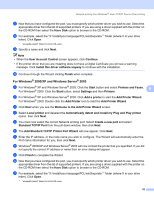
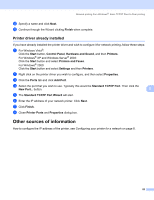
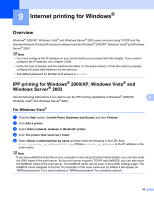
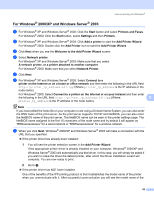
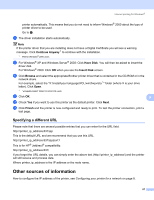
Internet printing for Windows® printer automatically. This means that you do not need to inform Windows® 2000 about the type of printer driver to be used. Go to h. h The driver installation starts automatically. Note If the printer driver that you are installing does not have a Digital Certificate you will see a warning message. Click Continue Anyway 1 to continue with the installation. 1 Yes for Windows® 2000 users i For Windows® XP and Windows Server® 2003: Click Have Disk. You will then be asked to insert the driver disk. For Windows® 2000: Click OK when you see the Insert Disk screen. j Click Browse and select the appropriate Brother printer driver that is contained in the CD-ROM or in the network share. For example, select the "X:\\install\your language\PCL\win2kxpvista 1" folder (where X is your drive letter). Click Open. 1 "winxpx64vista64" folder for 64-bit OS users k Click OK. 9 l Check Yes if you want to use this printer as the default printer. Click Next. m Click Finish and the printer is now configured and ready to print. To test the printer connection, print a test page. Specifying a different URL 9 Please note that there are several possible entries that you can enter for the URL field. http://printer_ip_address:631/ipp This is the default URL and we recommend that you use this URL. http://printer_ip_address:631/ipp/port1 This is for HP® Jetdirect® compatibility. http://printer_ip_address:631/ If you forget the URL details, you can simply enter the above text (http://printer_ip_address/) and the printer will still receive and process data. Where printer_ip_address is the IP address or the node name. Other sources of information 9 How to configure the IP address of the printer, see Configuring your printer for a network on page 8. 97
-
 1
1 -
2
-
3
-
4
-
5
-
6
-
7
-
8
-
9
-
10
-
11
-
12
-
13
-
14
-
15
-
16
-
17
-
18
-
19
-
20
-
21
-
22
-
23
-
24
-
25
-
26
-
27
-
28
-
29
-
30
-
31
-
32
-
33
-
34
-
35
-
36
-
37
-
38
-
39
-
40
-
41
-
42
-
43
-
44
-
45
-
46
-
47
-
48
-
49
-
50
-
51
-
52
-
53
-
54
-
55
-
56
-
57
-
58
-
59
-
60
-
61
-
62
-
63
-
64
-
65
-
66
-
67
-
68
-
69
-
70
-
71
-
72
-
73
-
74
-
75
-
76
-
77
-
78
-
79
-
80
-
81
-
82
-
83
-
84
-
85
-
86
-
87
-
88
-
89
-
90
-
91
-
92
-
93
-
94
-
95
-
96
-
97
-
98
-
 99
99 -
 100
100 -
 101
101 -
 102
102 -
 103
103 -
 104
104 -
 105
105 -
 106
106 -
 107
107 -
 108
108 -
 109
109 -
110
-
111
-
112
-
113
-
114
-
115
-
116
-
117
-
118
-
119
-
120
-
121
-
122
-
123
-
124
-
125
-
126
-
127
-
128
-
129
-
130
-
131
-
132
-
133
-
134
-
135
-
136
-
137
 |
 |