Brother International Innov-ís 1200 Users Manual - English - Page 100
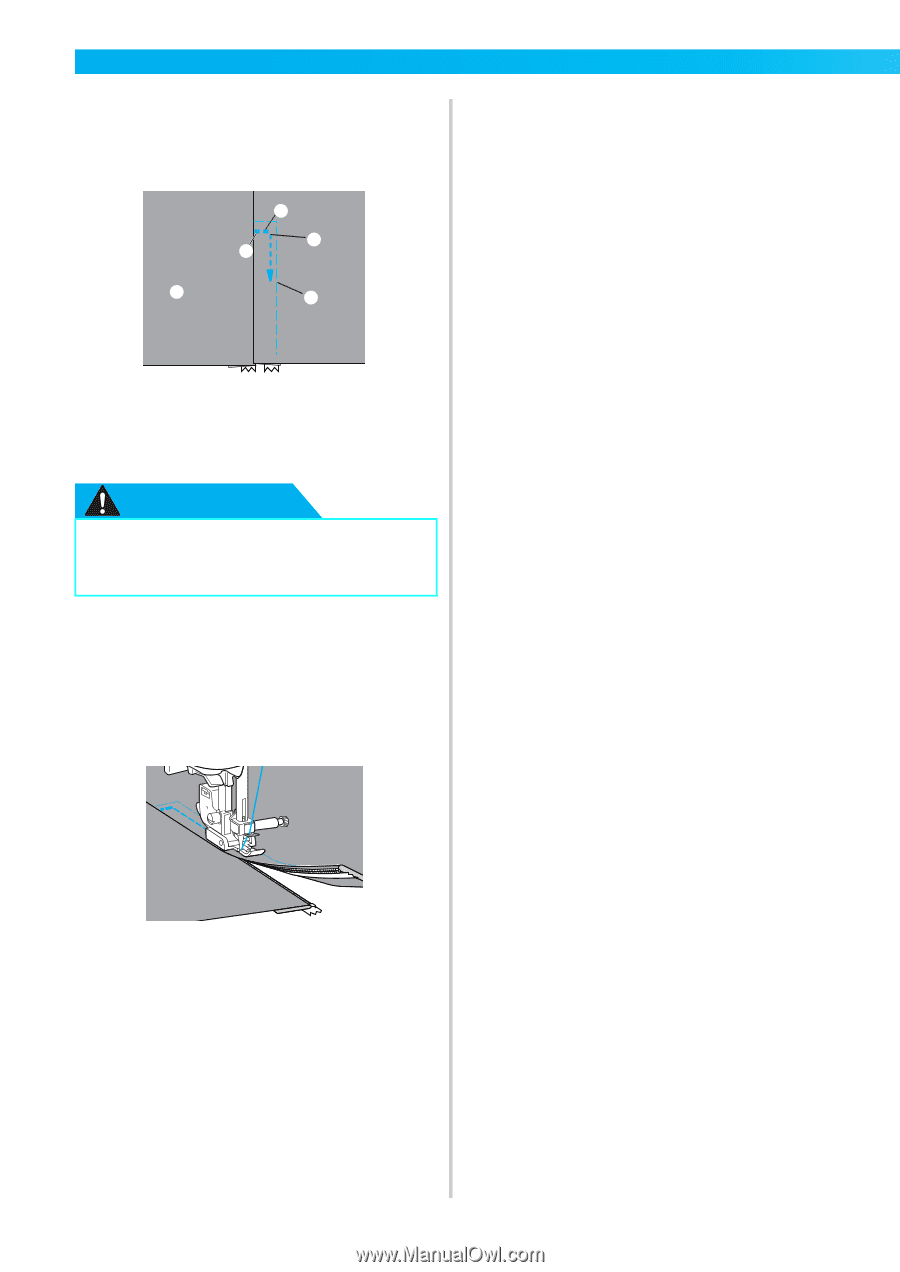
When sewing, be sure that the needle, does not touch the zipper, otherwise the, needle may bend or
 |
View all Brother International Innov-ís 1200 manuals
Add to My Manuals
Save this manual to your list of manuals |
Page 100 highlights
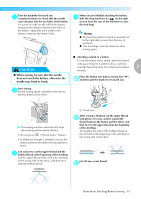
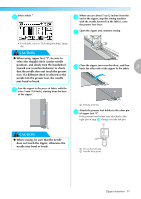
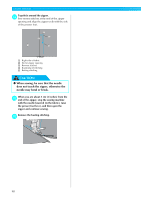
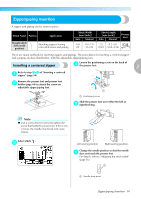
UTILITY STITCHES Topstitch around the zipper. n Sew reverse stitches at the end of the zipper opening and align the zipper teeth with the side of the presser foot. 3 4 2 1 5 a Right side of fabric b End of zipper opening c Reverse stitches d Beginning of stitching e Basting stitching CAUTION ● When sewing, be sure that the needle does not touch the zipper, otherwise the needle may bend or break. When you are about 5 cm (2 inches) from the o end of the zipper, stop the sewing machine with the needle lowered (in the fabric), raise the presser foot lever, and then open the zipper and continue sewing. Remove the basting stitching. p 98
-
 1
1 -
2
-
3
-
4
-
5
-
6
-
7
-
8
-
9
-
10
-
11
-
12
-
13
-
14
-
15
-
16
-
17
-
18
-
19
-
20
-
21
-
22
-
23
-
24
-
25
-
26
-
27
-
28
-
29
-
30
-
31
-
32
-
33
-
34
-
35
-
36
-
37
-
38
-
39
-
40
-
41
-
42
-
43
-
44
-
45
-
46
-
47
-
48
-
49
-
50
-
51
-
52
-
53
-
54
-
55
-
56
-
57
-
58
-
59
-
60
-
61
-
62
-
63
-
64
-
65
-
66
-
67
-
68
-
69
-
70
-
71
-
72
-
73
-
74
-
75
-
76
-
77
-
78
-
79
-
80
-
81
-
82
-
83
-
84
-
85
-
86
-
87
-
88
-
89
-
90
-
91
-
92
-
93
-
94
-
 95
95 -
 96
96 -
 97
97 -
 98
98 -
 99
99 -
 100
100 -
 101
101 -
 102
102 -
 103
103 -
 104
104 -
 105
105 -
106
-
107
-
108
-
109
-
110
-
111
-
112
-
113
-
114
-
115
-
116
-
117
-
118
-
119
-
120
-
121
-
122
-
123
-
124
-
125
-
126
-
127
-
128
-
129
-
130
-
131
-
132
-
133
-
134
-
135
-
136
-
137
-
138
-
139
-
140
-
141
-
142
-
143
-
144
-
145
-
146
-
147
-
148
-
149
-
150
-
151
-
152
-
153
-
154
-
155
-
156
-
157
-
158
-
159
-
160
-
161
-
162
-
163
-
164
-
165
-
166
-
167
-
168
-
169
-
170
-
171
-
172
-
173
-
174
-
175
-
176
-
177
-
178
-
179
-
180
-
181
-
182
-
183
-
184
-
185
-
186
-
187
-
188
-
189
-
190
-
191
-
192
-
193
-
194
-
195
-
196
-
197
-
198
 |
 |
98
UTILITY STITCHES
— — — — — — — — — — — — — — — — — — — — — — — — — — — — — — — — — — — — — — — — — — —
n
Topstitch around the zipper.
Sew reverse stitches at the end of the zipper
opening and align the zipper teeth with the side
of the presser foot.
a
Right side of fabric
b
End of zipper opening
c
Reverse stitches
d
Beginning of stitching
e
Basting stitching
CAUTION
o
When you are about 5 cm (2 inches) from the
end of the zipper, stop the sewing machine
with the needle lowered (in the fabric), raise
the presser foot lever, and then open the
zipper and continue sewing.
p
Remove the basting stitching.
●
When sewing, be sure that the needle
does not touch the zipper, otherwise the
needle may bend or break.
1
2
3
4
5