Brother International Innov-ís 1200 Users Manual - English - Page 102
Inserting a piping
 |
View all Brother International Innov-ís 1200 manuals
Add to My Manuals
Save this manual to your list of manuals |
Page 102 highlights
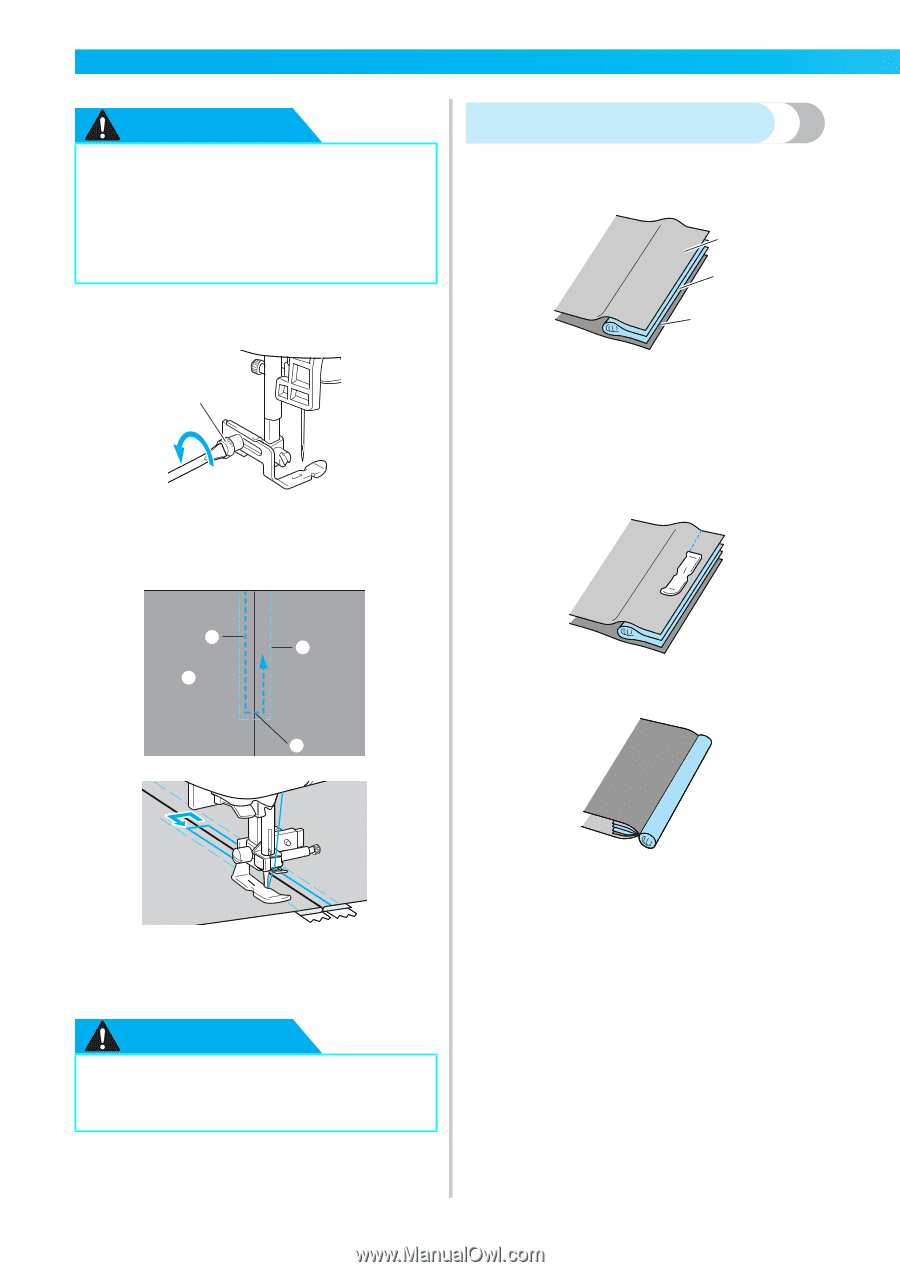
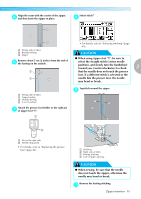
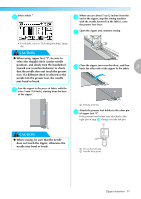
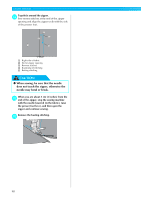
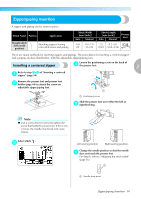
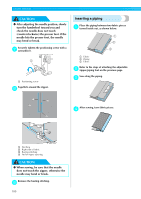
UTILITY STITCHES CAUTION ● After adjusting the needle position, slowly turn the handwheel toward you and check the needle does not touch (counterclockwise) the presser foot. If the needle hits the presser foot, the needle may bend or break. Securely tighten the positioning screw with a g screwdriver. 1 a Positioning screw Topstitch around the zipper. h Inserting a piping Place the piping between two fabric pieces a turned inside out, as shown below. 1 2 3 a Fabric b Piping c Fabric Refer to the steps of attaching the adjustable b zipper/piping foot on the previous page. Sew along the piping. c 1 3 2 4 After sewing, turn fabric pieces. d a Stitching b Right side of fabric c Basting stitching d End of zipper opening CAUTION ● When sewing, be sure that the needle does not touch the zipper, otherwise the needle may bend or break. Remove the basting stitching. i 100
-
 1
1 -
2
-
3
-
4
-
5
-
6
-
7
-
8
-
9
-
10
-
11
-
12
-
13
-
14
-
15
-
16
-
17
-
18
-
19
-
20
-
21
-
22
-
23
-
24
-
25
-
26
-
27
-
28
-
29
-
30
-
31
-
32
-
33
-
34
-
35
-
36
-
37
-
38
-
39
-
40
-
41
-
42
-
43
-
44
-
45
-
46
-
47
-
48
-
49
-
50
-
51
-
52
-
53
-
54
-
55
-
56
-
57
-
58
-
59
-
60
-
61
-
62
-
63
-
64
-
65
-
66
-
67
-
68
-
69
-
70
-
71
-
72
-
73
-
74
-
75
-
76
-
77
-
78
-
79
-
80
-
81
-
82
-
83
-
84
-
85
-
86
-
87
-
88
-
89
-
90
-
91
-
92
-
93
-
94
-
95
-
96
-
 97
97 -
 98
98 -
 99
99 -
 100
100 -
 101
101 -
 102
102 -
 103
103 -
 104
104 -
 105
105 -
 106
106 -
 107
107 -
108
-
109
-
110
-
111
-
112
-
113
-
114
-
115
-
116
-
117
-
118
-
119
-
120
-
121
-
122
-
123
-
124
-
125
-
126
-
127
-
128
-
129
-
130
-
131
-
132
-
133
-
134
-
135
-
136
-
137
-
138
-
139
-
140
-
141
-
142
-
143
-
144
-
145
-
146
-
147
-
148
-
149
-
150
-
151
-
152
-
153
-
154
-
155
-
156
-
157
-
158
-
159
-
160
-
161
-
162
-
163
-
164
-
165
-
166
-
167
-
168
-
169
-
170
-
171
-
172
-
173
-
174
-
175
-
176
-
177
-
178
-
179
-
180
-
181
-
182
-
183
-
184
-
185
-
186
-
187
-
188
-
189
-
190
-
191
-
192
-
193
-
194
-
195
-
196
-
197
-
198
 |
 |