Brother International Innov-ís 1200 Users Manual - English - Page 67
Hands-free raising and, lowering of the presser foot
 |
View all Brother International Innov-ís 1200 manuals
Add to My Manuals
Save this manual to your list of manuals |
Page 67 highlights
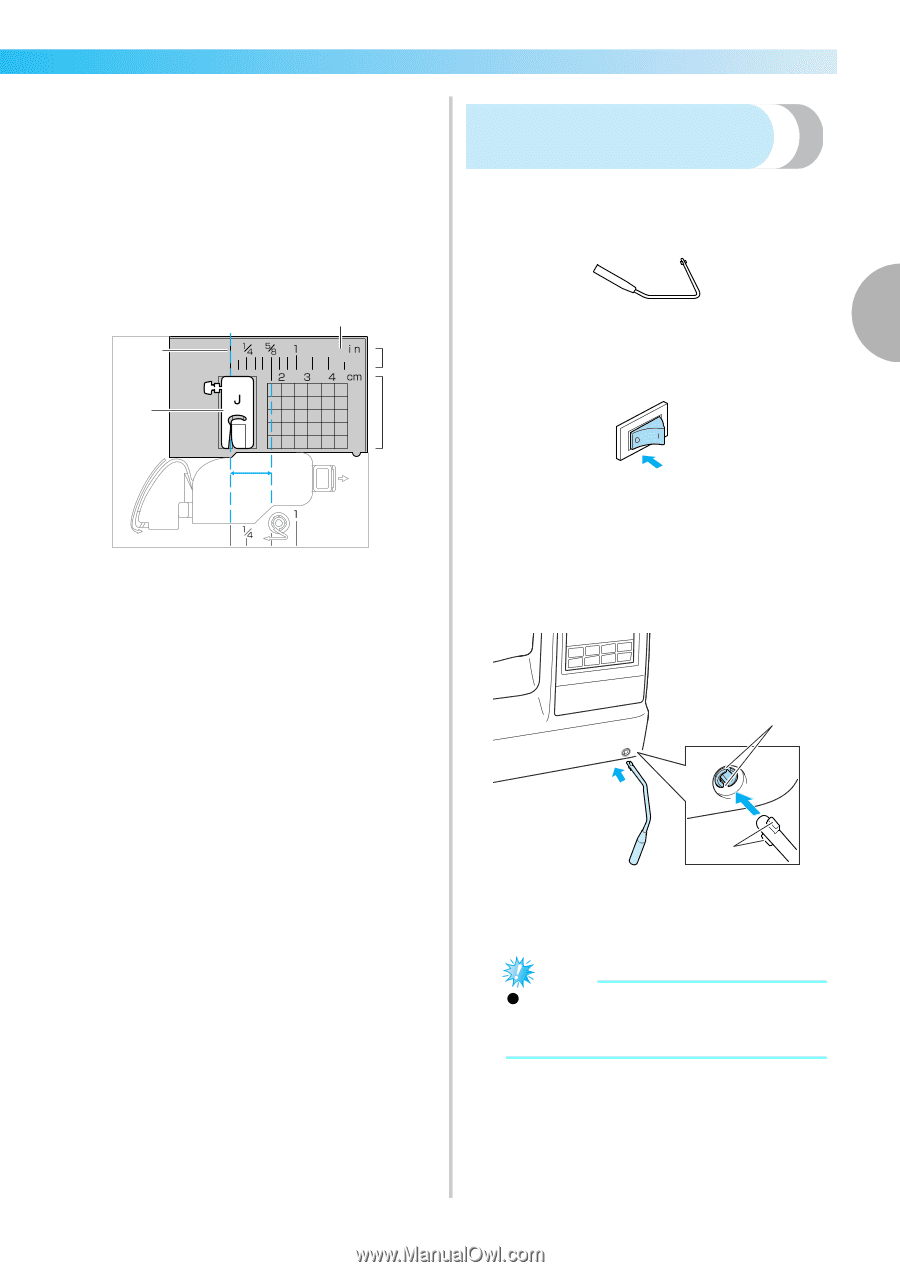
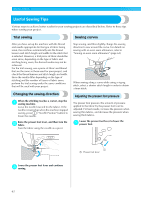
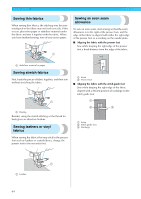
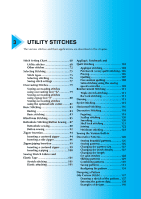
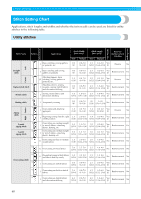
■ Aligning the fabric with a needle plate marking The markings on the needle plate show the distance from the needle position of a seam sewn with the straight stitch (left needle position). Sew while keeping the edge of the fabric aligned with a marking in the needle plate. The distance between the markings in the upper scale is 1/8 inch (3 mm) and the distance between the markings in the grid is 5 mm (3/16 inch). Hands-free raising and lowering of the presser foot Using the knee lifter, you can raise and lower the presser foot with your knee, leaving both hands free to handle the fabric. 5 ■ Installing the knee lifter 2 1 4 Turn off the sewing machine. a 2 3 6 a Seam b Presser foot c Centimeters d Inches e Needle plate f 1.6 cm (5/8 inch) Insert the knee lifter into the mounting slot on b the front of the sewing machine in the lower- right corner. Align the tabs on the knee lifter with the notches in the mounting slot, and then insert the knee lifter as far as possible. 2 1 a Tabs b Notches Note z If the knee lifter is not fully inserted into the mounting slot, it may fall out while the sewing machine is operating. Useful Sewing Tips 65
-
 1
1 -
2
-
3
-
4
-
5
-
6
-
7
-
8
-
9
-
10
-
11
-
12
-
13
-
14
-
15
-
16
-
17
-
18
-
19
-
20
-
21
-
22
-
23
-
24
-
25
-
26
-
27
-
28
-
29
-
30
-
31
-
32
-
33
-
34
-
35
-
36
-
37
-
38
-
39
-
40
-
41
-
42
-
43
-
44
-
45
-
46
-
47
-
48
-
49
-
50
-
51
-
52
-
53
-
54
-
55
-
56
-
57
-
58
-
59
-
60
-
61
-
 62
62 -
 63
63 -
 64
64 -
 65
65 -
 66
66 -
 67
67 -
 68
68 -
 69
69 -
 70
70 -
 71
71 -
 72
72 -
73
-
74
-
75
-
76
-
77
-
78
-
79
-
80
-
81
-
82
-
83
-
84
-
85
-
86
-
87
-
88
-
89
-
90
-
91
-
92
-
93
-
94
-
95
-
96
-
97
-
98
-
99
-
100
-
101
-
102
-
103
-
104
-
105
-
106
-
107
-
108
-
109
-
110
-
111
-
112
-
113
-
114
-
115
-
116
-
117
-
118
-
119
-
120
-
121
-
122
-
123
-
124
-
125
-
126
-
127
-
128
-
129
-
130
-
131
-
132
-
133
-
134
-
135
-
136
-
137
-
138
-
139
-
140
-
141
-
142
-
143
-
144
-
145
-
146
-
147
-
148
-
149
-
150
-
151
-
152
-
153
-
154
-
155
-
156
-
157
-
158
-
159
-
160
-
161
-
162
-
163
-
164
-
165
-
166
-
167
-
168
-
169
-
170
-
171
-
172
-
173
-
174
-
175
-
176
-
177
-
178
-
179
-
180
-
181
-
182
-
183
-
184
-
185
-
186
-
187
-
188
-
189
-
190
-
191
-
192
-
193
-
194
-
195
-
196
-
197
-
198
 |
 |