Brother International HL 5370DW Users Manual - English - Page 63
High Quality Image Printing, Reduce Paper Curl - toner light
 |
UPC - 012502622482
View all Brother International HL 5370DW manuals
Add to My Manuals
Save this manual to your list of manuals |
Page 63 highlights
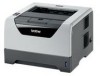
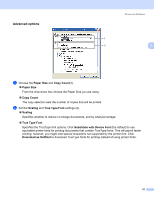
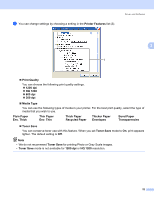
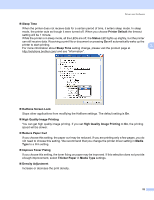
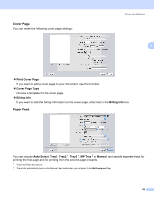
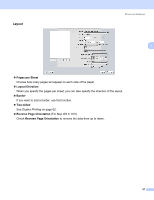
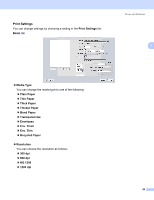
Driver and Software „ Sleep Time When the printer does not receive data for a certain period of time, it enters sleep mode. In sleep mode, the printer acts as though it were turned off. When you choose Printer Default the timeout setting will be 1 minute. While the printer is in sleep mode, all the LEDs are off, the Status LED lights up slightly, but the printer can still receive data. Receiving a print file or document or pressing Go will automatically wake up the printer to start printing. 3 For more information about Sleep Time setting change, please visit the product page at http://solutions.brother.com/ and see "Information". „ Halftone Screen Lock Stops other applications from modifying the Halftone settings. The default setting is On. „ High Quality Image Printing You can get high quality image printing. If you set High Quality Image Printing to On, the printing speed will be slower. „ Reduce Paper Curl If you choose this setting, the paper curl may be reduced. If you are printing only a few pages, you do not need to choose this setting. We recommend that you change the printer driver setting in Media Type to a thin setting. „ Improve Toner Fixing If you choose this setting, the toner fixing on paper may be improved. If this selection does not provide enough improvement, select Thicker Paper in Media Type settings. „ Density Adjustment Increase or decrease the print density. 53
-
 1
1 -
2
-
3
-
4
-
5
-
6
-
7
-
8
-
9
-
10
-
11
-
12
-
13
-
14
-
15
-
16
-
17
-
18
-
19
-
20
-
21
-
22
-
23
-
24
-
25
-
26
-
27
-
28
-
29
-
30
-
31
-
32
-
33
-
34
-
35
-
36
-
37
-
38
-
39
-
40
-
41
-
42
-
43
-
44
-
45
-
46
-
47
-
48
-
49
-
50
-
51
-
52
-
53
-
54
-
55
-
56
-
57
-
 58
58 -
 59
59 -
 60
60 -
 61
61 -
 62
62 -
 63
63 -
 64
64 -
 65
65 -
 66
66 -
 67
67 -
 68
68 -
69
-
70
-
71
-
72
-
73
-
74
-
75
-
76
-
77
-
78
-
79
-
80
-
81
-
82
-
83
-
84
-
85
-
86
-
87
-
88
-
89
-
90
-
91
-
92
-
93
-
94
-
95
-
96
-
97
-
98
-
99
-
100
-
101
-
102
-
103
-
104
-
105
-
106
-
107
-
108
-
109
-
110
-
111
-
112
-
113
-
114
-
115
-
116
-
117
-
118
-
119
-
120
-
121
-
122
-
123
-
124
-
125
-
126
-
127
-
128
-
129
-
130
-
131
-
132
-
133
-
134
-
135
-
136
-
137
-
138
-
139
-
140
-
141
-
142
-
143
-
144
-
145
-
146
-
147
-
148
-
149
-
150
-
151
-
152
-
153
-
154
-
155
-
156
-
157
-
158
-
159
-
160
-
161
-
162
-
163
-
164
-
165
-
166
-
167
-
168
-
169
-
170
-
171
-
172
 |
 |