Canon PIXMA MP600 Quick Start Guide - Page 41
Printing Scanned Photographs, Other Useful Functions, Select and print, Easy-Scroll Wheel, Color
 |
View all Canon PIXMA MP600 manuals
Add to My Manuals
Save this manual to your list of manuals |
Page 41 highlights
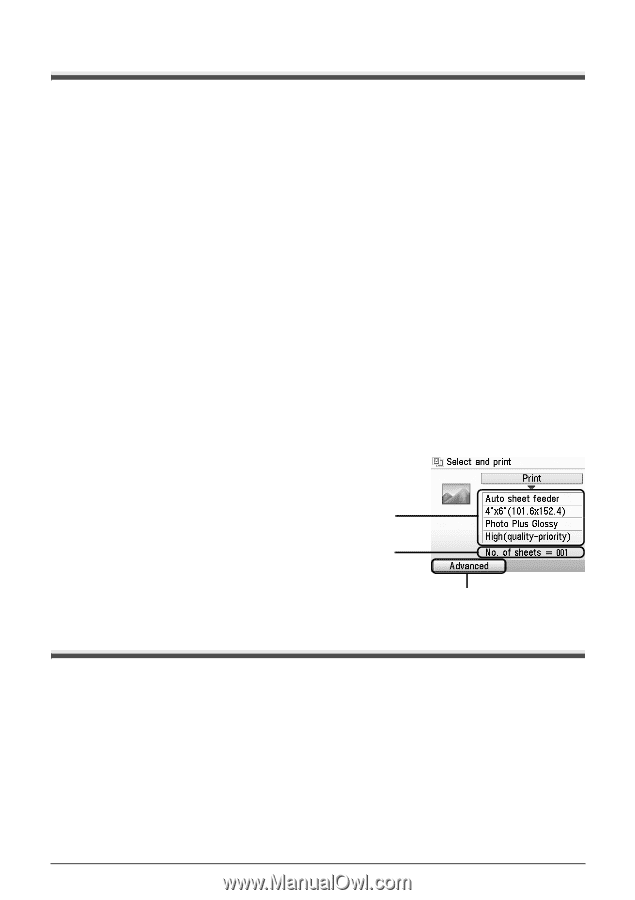
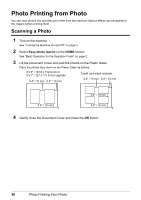
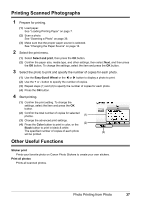
Printing Scanned Photographs 1 Prepare for printing. (1) Load paper. See "Loading Printing Paper" on page 7. (2) Scan a photo. See "Scanning a Photo" on page 36. (3) Make sure that the proper paper source is selected. See "Changing the Paper Source" on page 14. 2 Select the print menu. (1) Select Select and print, then press the OK button. (2) Confirm the paper size, media type, and other settings, then select Next, and then press the OK button. To change the settings, select the item and press the OK button. 3 Select the photo to print and specify the number of copies for each photo. (1) Use the Easy-Scroll Wheel or the [ or ] button to display a photo to print. (2) Use the + or - button to specify the number of copies. (3) Repeat steps (1) and (2) to specify the number of copies for each photo. (4) Press the OK button. 4 Start printing. (1) Confirm the print setting. To change the settings, select the item and press the OK button. (2) Confirm the total number of copies for selected photos. (1) (3) Change the advanced print settings. (4) Press the Color button to print in color, or the (2) Black button to print in black & white. The specified number of copies of each photo (3) will be printed. Other Useful Functions Sticker print Prints your favorite photo on Canon Photo Stickers to create your own stickers. Print all photos Prints all scanned photos. Photo Printing from Photo 37
-
 1
1 -
2
-
3
-
4
-
5
-
6
-
7
-
8
-
9
-
10
-
11
-
12
-
13
-
14
-
15
-
16
-
17
-
18
-
19
-
20
-
21
-
22
-
23
-
24
-
25
-
26
-
27
-
28
-
29
-
30
-
31
-
32
-
33
-
34
-
35
-
 36
36 -
 37
37 -
 38
38 -
 39
39 -
 40
40 -
 41
41 -
 42
42 -
 43
43 -
 44
44 -
 45
45 -
 46
46 -
47
-
48
-
49
-
50
-
51
-
52
-
53
-
54
-
55
-
56
-
57
-
58
-
59
-
60
-
61
-
62
-
63
-
64
-
65
-
66
-
67
-
68
-
69
-
70
-
71
-
72
-
73
-
74
-
75
-
76
-
77
-
78
-
79
-
80
-
81
-
82
-
83
-
84
-
85
-
86
-
87
-
88
-
89
-
90
-
91
-
92
-
93
-
94
-
95
-
96
-
97
-
98
-
99
-
100
-
101
-
102
-
103
-
104
-
105
-
106
-
107
-
108
-
109
-
110
-
111
-
112
 |
 |