Canon PIXMA MP600 Quick Start Guide - Page 77
Print Results Not Satisfactory, Cannot Print to End of Job, Part of the Is Not Printed - user manual
 |
View all Canon PIXMA MP600 manuals
Add to My Manuals
Save this manual to your list of manuals |
Page 77 highlights
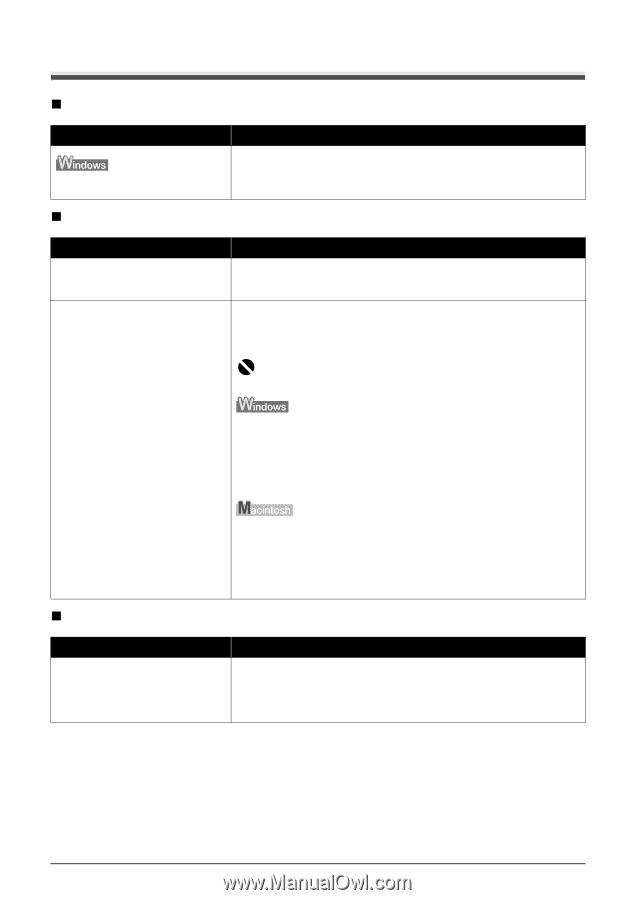
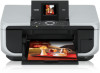
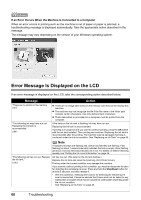
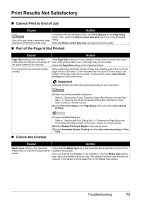
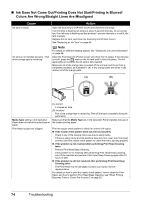
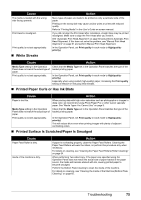
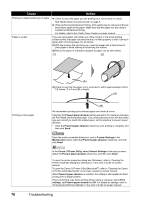
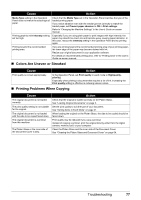
Print Results Not Satisfactory „ Cannot Print to End of Job Cause Action Size of the print data is extremely large (Windows XP/Windows 2000 only). In Windows XP and Windows 2000, click Print Options on the Page Setup sheet. Then, select the Reduce spool data size check box in the displayed dialog. Selecting Reduce spool data size may reduce the print quality. „ Part of the Page Is Not Printed Cause Action Page Size setting in the Operation If the Page Size setting set in the Operation Panel does not match the actual Panel does not match the actual size of size of the printing paper, part of the page may not be printed. the paper loaded in the machine. Check the Page Size setting on the Operation Panel. You are performing automatic duplex printing. When performing automatic duplex printing, the printable area at the top of the page will be 0.08 inches / 2 mm narrower than the usual. For this reason, the bottom of the page may not be printed. To prevent this, select Use reduced printing from the printer driver. Important Reduced printing may affect the layout depending on your document. (1)Open the printer properties dialog box. Refer to "Opening the Printer Properties Dialog Box Directly from the Start Menu" in "Opening the Printer Properties Dialog Box (Windows)" of the User's Guide on-screen manual. (2)Click Print Area Setup in the Page Setup sheet and select Use reduced printing. „ Colors Are Unclear (1)Open the Print dialog box. Refer to "Opening the Print Dialog Box" in "Opening the Page Setup and Print Dialog Box (Macintosh)" of the User's Guide on-screen manual. (2)Select Duplex Printing & Margin in the pop-up menu. (3)Select Automatic Duplex Printing and click Use reduced printing in Print Area. Cause Action Media Type setting in the Operation Panel does not match the actual type of paper. Check that the Media Type set in the Operation Panel matches the type of the loaded printing paper. If you are printing a photograph or an illustration, incorrect Media Type setting may reduce the quality of printout color. The quality of printout color may also be reduced in borderless printing depending on the Media Type setting. Troubleshooting 73
-
 1
1 -
2
-
3
-
4
-
5
-
6
-
7
-
8
-
9
-
10
-
11
-
12
-
13
-
14
-
15
-
16
-
17
-
18
-
19
-
20
-
21
-
22
-
23
-
24
-
25
-
26
-
27
-
28
-
29
-
30
-
31
-
32
-
33
-
34
-
35
-
36
-
37
-
38
-
39
-
40
-
41
-
42
-
43
-
44
-
45
-
46
-
47
-
48
-
49
-
50
-
51
-
52
-
53
-
54
-
55
-
56
-
57
-
58
-
59
-
60
-
61
-
62
-
63
-
64
-
65
-
66
-
67
-
68
-
69
-
70
-
71
-
 72
72 -
 73
73 -
 74
74 -
 75
75 -
 76
76 -
 77
77 -
 78
78 -
 79
79 -
 80
80 -
 81
81 -
 82
82 -
83
-
84
-
85
-
86
-
87
-
88
-
89
-
90
-
91
-
92
-
93
-
94
-
95
-
96
-
97
-
98
-
99
-
100
-
101
-
102
-
103
-
104
-
105
-
106
-
107
-
108
-
109
-
110
-
111
-
112
 |
 |