Canon VIXIA HF G10 VIXIA HF G10 Instruction Manual - Page 22
Preparing the Camcorder - lens
 |
View all Canon VIXIA HF G10 manuals
Add to My Manuals
Save this manual to your list of manuals |
Page 22 highlights
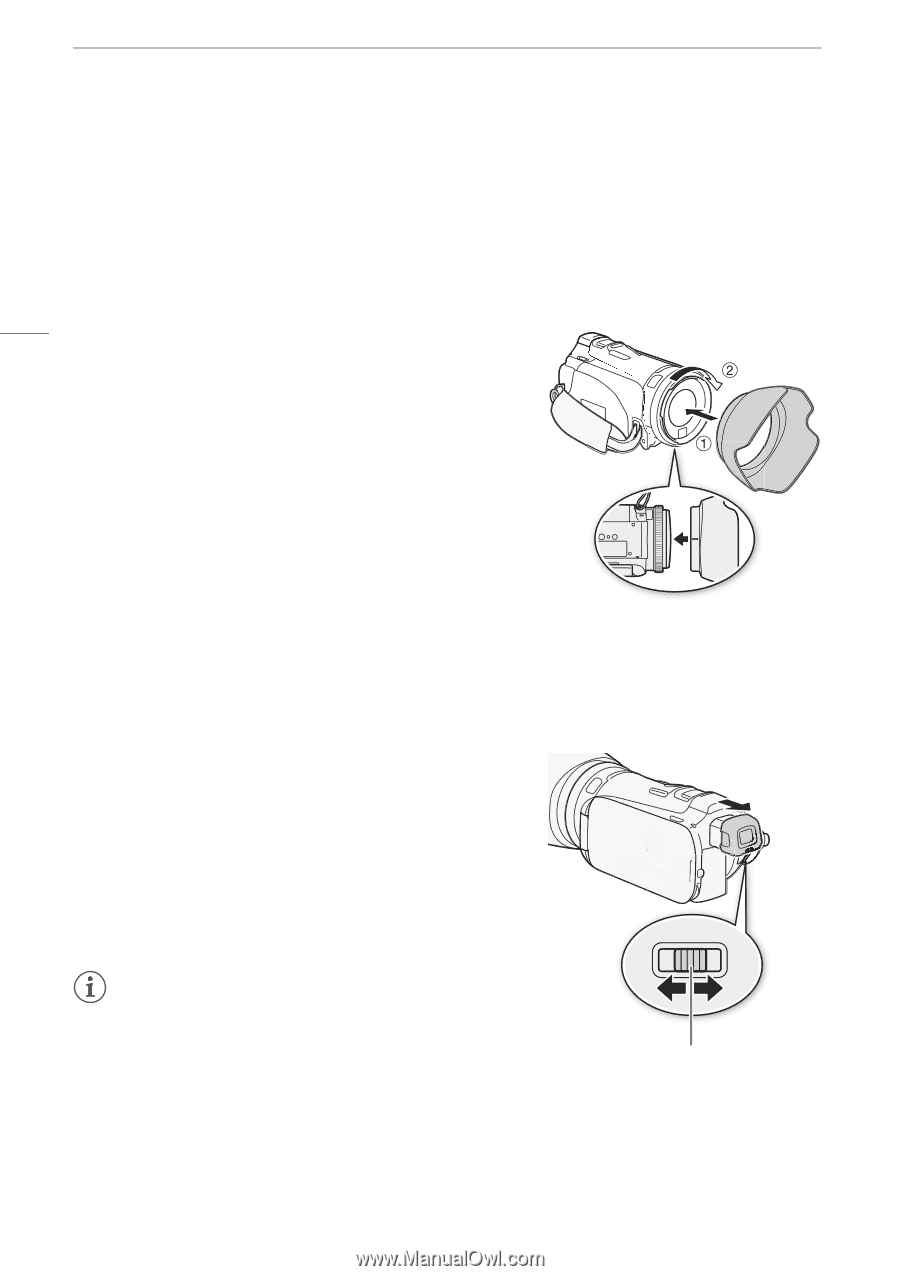
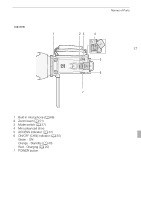
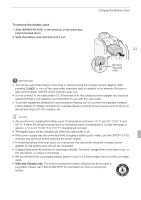
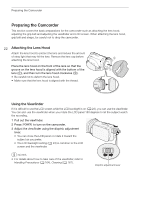
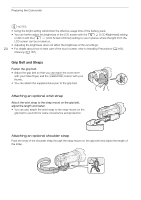
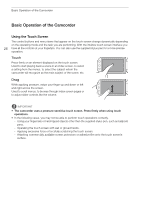
Preparing the Camcorder Preparing the Camcorder This section covers the basic preparations for the camcorder such as attaching the lens hood, adjusting the grip belt and adjusting the viewfinder and LCD screen. When attaching the lens hood, grip belt and straps, be careful not to drop the camcorder. 22 Attaching the Lens Hood Attach the lens hood to protect the lens and reduce the amount of stray light that may hit the lens. Remove the lens cap before attaching the lens hood. Place the lens hood on the front of the lens so that the groove on the lens hood is aligned with the bottom of the lens (ቢ), and then turn the lens hood clockwise (ባ). • Be careful not to deform the lens hood. • Make sure that the lens hood is aligned with the thread. Using the Viewfinder If it is difficult to use the LCD screen while the LCD backlight is on (0 23), you can use the viewfinder. You can also use the viewfinder when you rotate the LCD panel 180 degrees to let the subject watch the recording. 1 Pull out the viewfinder. 2 Press x to turn on the camcorder. 3 Adjust the viewfinder using the dioptric adjustment lever. • You can close the LCD panel or rotate it toward the subject as you prefer. • The LCD backlight setting (0 23) is common to the LCD screen and the viewfinder. NOTES • For details about how to take care of the viewfinder, refer to Handling Precautions (0 164), Cleaning (0 167). Dioptric adjustment lever
-
 1
1 -
2
-
3
-
4
-
5
-
6
-
7
-
8
-
9
-
10
-
11
-
12
-
13
-
14
-
15
-
16
-
 17
17 -
 18
18 -
 19
19 -
 20
20 -
 21
21 -
 22
22 -
 23
23 -
 24
24 -
 25
25 -
 26
26 -
 27
27 -
28
-
29
-
30
-
31
-
32
-
33
-
34
-
35
-
36
-
37
-
38
-
39
-
40
-
41
-
42
-
43
-
44
-
45
-
46
-
47
-
48
-
49
-
50
-
51
-
52
-
53
-
54
-
55
-
56
-
57
-
58
-
59
-
60
-
61
-
62
-
63
-
64
-
65
-
66
-
67
-
68
-
69
-
70
-
71
-
72
-
73
-
74
-
75
-
76
-
77
-
78
-
79
-
80
-
81
-
82
-
83
-
84
-
85
-
86
-
87
-
88
-
89
-
90
-
91
-
92
-
93
-
94
-
95
-
96
-
97
-
98
-
99
-
100
-
101
-
102
-
103
-
104
-
105
-
106
-
107
-
108
-
109
-
110
-
111
-
112
-
113
-
114
-
115
-
116
-
117
-
118
-
119
-
120
-
121
-
122
-
123
-
124
-
125
-
126
-
127
-
128
-
129
-
130
-
131
-
132
-
133
-
134
-
135
-
136
-
137
-
138
-
139
-
140
-
141
-
142
-
143
-
144
-
145
-
146
-
147
-
148
-
149
-
150
-
151
-
152
-
153
-
154
-
155
-
156
-
157
-
158
-
159
-
160
-
161
-
162
-
163
-
164
-
165
-
166
-
167
-
168
-
169
-
170
-
171
-
172
-
173
-
174
-
175
-
176
-
177
-
178
-
179
-
180
-
181
-
182
-
183
-
184
 |
 |