Canon VIXIA HF G10 VIXIA HF G10 Instruction Manual - Page 74
Using Commercially Available Microphones - hdmi output
 |
View all Canon VIXIA HF G10 manuals
Add to My Manuals
Save this manual to your list of manuals |
Page 74 highlights
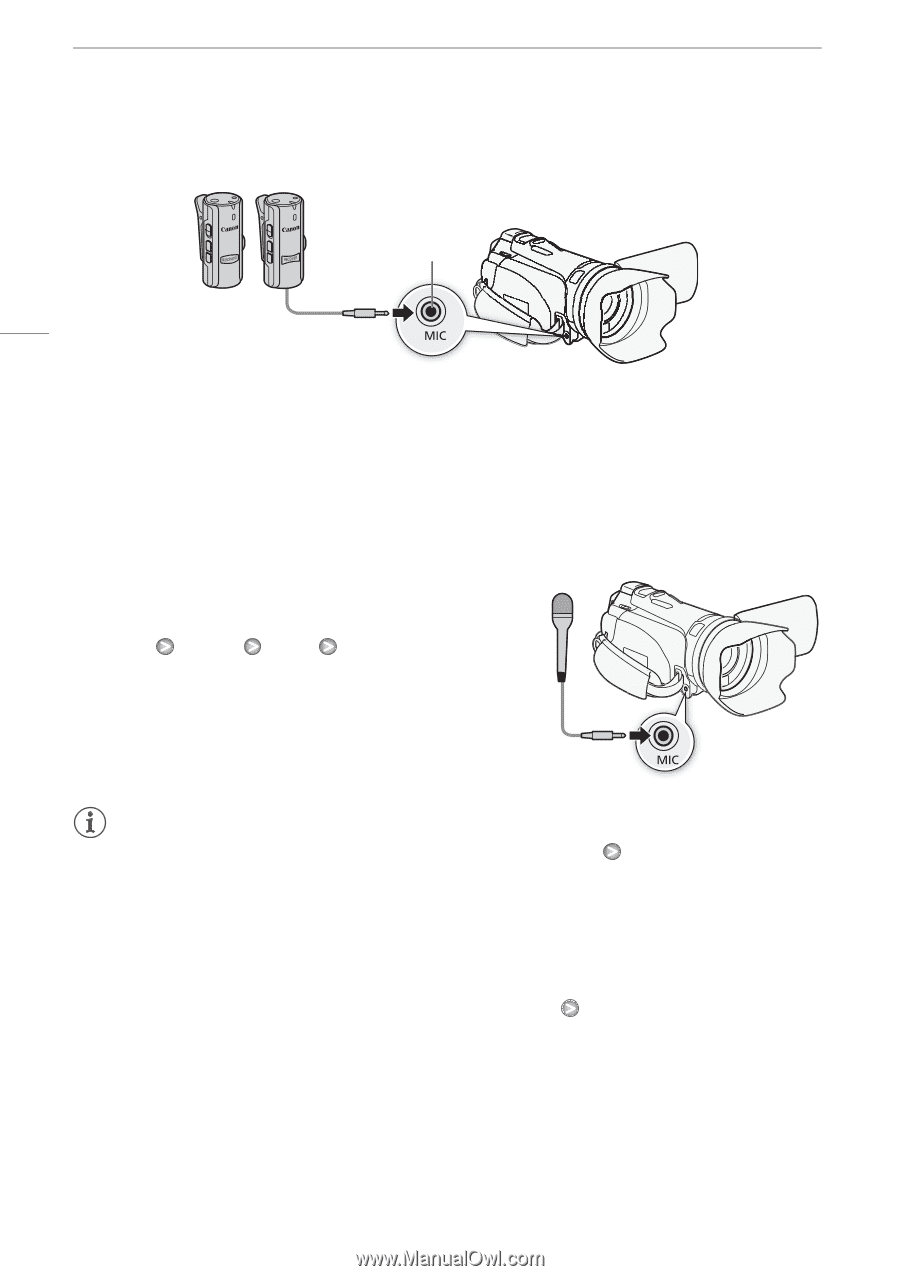
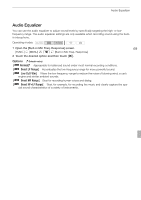
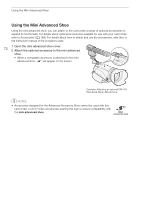
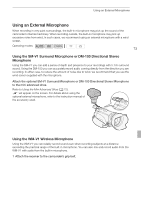
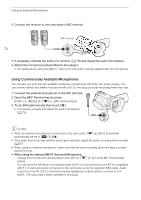
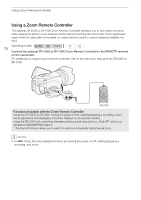
Using an External Microphone 2 Connect the receiver to the camcorder's MIC terminal. MIC terminal 74 3 If necessary, activate the audio mix function (0 70) and adjust the audio mix balance. 4 Attach the microphone (transmitter) to the subject. • For details about using the WM-V1, refer to the instruction manual supplied with the microphone. Using Commercially Available Microphones You can also use commercially available condenser microphones with their own power supply. You can connect almost any stereo microphone with a ∅ 3.5 mm plug but audio recording levels may vary. 1 Connect the external microphone to the MIC terminal. 2 Open the [MIC Terminal Input] screen. [FUNC.] [MENU] 7 [MIC Terminal Input] 3 Touch [Microphone] and then touch [a]. • If necessary, activate and adjust the audio mix balance (0 70). NOTES • When an external microphone is connected to the camcorder, 7 [Wind Screen] will automatically be set to [B Off Z]. • If the audio level is too high and the sound gets distorted, adjust the audio recording level manually (0 67). • When using an external microphone, make sure that the jacket covering above the plug is smaller than ∅ 9.5 mm. • When using the optional SM-V1 Surround Microphone: - Change the microphone's directionality mode with the 7 setting. [Surround Mic Directionality] - You can enjoy the full effect of recordings made with 5.1ch surround sound on HDTVs compatible with 5.1ch surround sound connected to the camcorder using the supplied HDMI cable. Audio output from the AV OUT/X terminal (including headphone output) will be converted to 2ch stereo. The camcorder's built-in speaker is monaural.
-
 1
1 -
2
-
3
-
4
-
5
-
6
-
7
-
8
-
9
-
10
-
11
-
12
-
13
-
14
-
15
-
16
-
17
-
18
-
19
-
20
-
21
-
22
-
23
-
24
-
25
-
26
-
27
-
28
-
29
-
30
-
31
-
32
-
33
-
34
-
35
-
36
-
37
-
38
-
39
-
40
-
41
-
42
-
43
-
44
-
45
-
46
-
47
-
48
-
49
-
50
-
51
-
52
-
53
-
54
-
55
-
56
-
57
-
58
-
59
-
60
-
61
-
62
-
63
-
64
-
65
-
66
-
67
-
68
-
 69
69 -
 70
70 -
 71
71 -
 72
72 -
 73
73 -
 74
74 -
 75
75 -
 76
76 -
 77
77 -
 78
78 -
 79
79 -
80
-
81
-
82
-
83
-
84
-
85
-
86
-
87
-
88
-
89
-
90
-
91
-
92
-
93
-
94
-
95
-
96
-
97
-
98
-
99
-
100
-
101
-
102
-
103
-
104
-
105
-
106
-
107
-
108
-
109
-
110
-
111
-
112
-
113
-
114
-
115
-
116
-
117
-
118
-
119
-
120
-
121
-
122
-
123
-
124
-
125
-
126
-
127
-
128
-
129
-
130
-
131
-
132
-
133
-
134
-
135
-
136
-
137
-
138
-
139
-
140
-
141
-
142
-
143
-
144
-
145
-
146
-
147
-
148
-
149
-
150
-
151
-
152
-
153
-
154
-
155
-
156
-
157
-
158
-
159
-
160
-
161
-
162
-
163
-
164
-
165
-
166
-
167
-
168
-
169
-
170
-
171
-
172
-
173
-
174
-
175
-
176
-
177
-
178
-
179
-
180
-
181
-
182
-
183
-
184
 |
 |