Canon imageCLASS 2300 Reference Guide for imageCLASS 2300
Canon imageCLASS 2300 Manual
 |
View all Canon imageCLASS 2300 manuals
Add to My Manuals
Save this manual to your list of manuals |
Canon imageCLASS 2300 manual content summary:
- Canon imageCLASS 2300 | Reference Guide for imageCLASS 2300 - Page 1
- Canon imageCLASS 2300 | Reference Guide for imageCLASS 2300 - Page 2
0 Ot¯ imageCLASS 2300 Reference Guide - Canon imageCLASS 2300 | Reference Guide for imageCLASS 2300 - Page 3
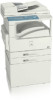
manuals included on the CD-ROM accompanying CD-ROM. Installing and Setting Up the Machine Network and Printer Settings Basic Operations Set-Up Sheet for the Machine Set-Up Sheet for Networking and Printing Basic Guide Machine Settings Troubleshooting Copying Instructions Reference Guide (This - Canon imageCLASS 2300 | Reference Guide for imageCLASS 2300 - Page 4
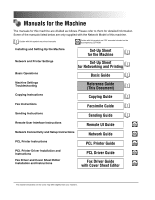
Job Status Chapter 5 System Manager Settings Chapter 6 Routine Maintenance Chapter 7 Troubleshooting Chapter 8 Appendix Includes the report samples, specifications, and index. Considerable effort has been made to ensure that this manual is free of inaccuracies and omissions. However, as we are - Canon imageCLASS 2300 | Reference Guide for imageCLASS 2300 - Page 5
Used in This Manual x Legal Notices xii Laser Safety xii CDRH Regulations xiii International Energy Star Program xiv Trademarks xiv Copyright xiv Disclaimers xiv Legal Limitations on the Usage of Your Product and the Use of Images . . . . . xv Important Safety Instructions xvi Installation - Canon imageCLASS 2300 | Reference Guide for imageCLASS 2300 - Page 6
Main Power and Energy Saver Key 1-15 How to Turn ON the Main Power 1-15 Adjusting the Brightness of the LCD Display 1-17 Energy Saver Mode 1-18 System Settings 1-19 Chapter 2 Basic Operations Overview of the imageCLASS 2300 2-2 Convenient Functions 2-2 Easy Operations 2-4 Reducing Running - Canon imageCLASS 2300 | Reference Guide for imageCLASS 2300 - Page 7
Stamp Cartridge 6-18 Routine Cleaning 6-20 Platen Glass and Cover 6-20 Feeder Cleaning 6-21 Roller Cleaning 6-25 Consumables 6-28 Chapter 7 Troubleshooting Clearing Paper Jams 7-2 Display Indicating the Locations of Paper Jams 7-2 Left Cover and the Fixing Unit 7-4 Upper Left Side Cover and - Canon imageCLASS 2300 | Reference Guide for imageCLASS 2300 - Page 8
Feeder 7-17 List of Error Messages 7-21 Self-Diagnostic Display 7-21 Service Call Message 7-27 If You Cannot Solve the Problem 7-28 Chapter 8 Appendix Report Samples 8-2 User's Data List 8-2 One-Touch Speed Dialing List 1 8-3 Coded Speed Dialing List 1 8-3 One-Touch Speed Dialing List 2 - Canon imageCLASS 2300 | Reference Guide for imageCLASS 2300 - Page 9
it in a safe place for future reference. How to Use This Manual Symbols Used in This Manual The following symbols are used in this manual to explain procedures, restrictions, handling precautions, and instructions that should be observed for safety. WARNING CAUTION IMPORTANT NOTE . Indicates - Canon imageCLASS 2300 | Reference Guide for imageCLASS 2300 - Page 10
Function Keys: + (Key Function) Example: F3 Press [F3] (DENSITY) F4 Press [F4] (L) ix - Canon imageCLASS 2300 | Reference Guide for imageCLASS 2300 - Page 11
kinds of prints may sometimes have to wait their turn before they can be output. To avoid confusion when reading this manual, the terms "scanning", "printing", and "copying" used throughout this manual are defined as set out below. There are some cases in which the scanning of an original when making - Canon imageCLASS 2300 | Reference Guide for imageCLASS 2300 - Page 12
Copying Scanning of an original, printing through finishing. xi - Canon imageCLASS 2300 | Reference Guide for imageCLASS 2300 - Page 13
Chapter 1 Subchapter J as a Class 1 laser product under the U.S. Department of Health and Human Services (DHHS) Radiation Performance Standard according to the Radiation Control for Health and Safety Act of 1968. housings or external covers, except as directed by the equipment's Reference Guide. xii - Canon imageCLASS 2300 | Reference Guide for imageCLASS 2300 - Page 14
in the United States. CANON INC. 3-30-2 SHIMOMARUKO, OHTA-KU, TOKYO, JAPAN CANON U.S.A., INC. ONE CANON PLAZA, LAKE SUCCESS, N.Y. 11042, U.S.A. CANON CANADA INC. 3128 ORLANDO or performance of procedures other than those specified in this manual may result in hazardous radiation exposure. xiii - Canon imageCLASS 2300 | Reference Guide for imageCLASS 2300 - Page 15
Energy Star Program As an ENERGY STAR® Partner, Canon USA, Inc. has determined that this copier model meets displays, printers, facsimiles, and copiers. The standards and logos are uniform among participating nations. Trademarks Canon, the Canon logo, and imageCLASS are trademarks of Canon Inc. - Canon imageCLASS 2300 | Reference Guide for imageCLASS 2300 - Page 16
list of these documents is set forth below. This list is intended to be a guide only. If you are uncertain about the legality of using your product to scan, (canceled or uncanceled) Identifying Badges or Insignias Selective Service or Draft Papers Checks or Drafts Issued by Governmental Agencies - Canon imageCLASS 2300 | Reference Guide for imageCLASS 2300 - Page 17
instructions. Also, since it may result in unexpected accidents or injuries, do not perform any operation unless otherwise specified in the manual. and disconnect the power cord from the power outlet. Then, contact your service representative. - Necklaces and other metal objects - Cups, vases, fl - Canon imageCLASS 2300 | Reference Guide for imageCLASS 2300 - Page 18
Do not install the machine in the following locations: - A damp or dusty location - A location near water faucets or water - A location exposed to direct sunlight - A location subject to high temperatures - A location near open flames Power Supply WARNING Do not damage or modify the power cord. Also, - Canon imageCLASS 2300 | Reference Guide for imageCLASS 2300 - Page 19
or spilled inside the machine, immediately turn OFF the main power switch, and disconnect the power cord from the power outlet. Then, contact your service representative. CAUTION Do not place heavy objects on the machine, as they may tip over or fall resulting in personal injury. Close the feeder - Canon imageCLASS 2300 | Reference Guide for imageCLASS 2300 - Page 20
, the laser beam cannot escape from the machine during any phase of user operation. Read the following remarks and instructions for safety. Never open covers other than those instructed in this manual. Do not remove the caution label attached to the cover of the laser scanner unit. If the laser beam - Canon imageCLASS 2300 | Reference Guide for imageCLASS 2300 - Page 21
CAUTION The fixing unit and its surroundings inside the machine may become hot during use. When removing jammed paper or when inspecting the inside of the machine, do not touch the fixing unit and its surroundings, as doing so may result in burns or electrical shock. When removing jammed paper or - Canon imageCLASS 2300 | Reference Guide for imageCLASS 2300 - Page 22
Other Warnings WARNING For cardiac pacemaker users: This product generates a low level magnetic field. If you use a cardiac pacemaker and feel abnormalities, please move away from the product and consult your doctor. xxi - Canon imageCLASS 2300 | Reference Guide for imageCLASS 2300 - Page 23
xxii - Canon imageCLASS 2300 | Reference Guide for imageCLASS 2300 - Page 24
Before You Start Using This Machine 1 CHAPTER This chapter describes what you should know before using this machine, such as main features, parts and their functions, how to turn ON the main power, and so on. Installation, Location, and Handling 1-2 Installation Precautions 1-2 Handling - Canon imageCLASS 2300 | Reference Guide for imageCLASS 2300 - Page 25
Before You Start Using This Machine Installation, Location, and Handling 1 This section describes precautions for installation location and handling. We recommend that you read this section prior to use. Installation Precautions Avoid Installing the Machine in the Following Locations I Avoid - Canon imageCLASS 2300 | Reference Guide for imageCLASS 2300 - Page 26
Before You Start Using This Machine I Avoid poorly ventilated locations. This machine generates a slight amount of ozone during normal use. Although sensitivity to ozone may vary, this amount is not harmful. Ozone may be more noticeable during extended use or long production runs, especially in - Canon imageCLASS 2300 | Reference Guide for imageCLASS 2300 - Page 27
Before You Start Using This Machine 1 I Avoid exposing the machine to rapid changes in temperature. If the room in which the machine is installed is cold but rapidly heated, water droplets (condensation) may form inside the machine. This may result in a noticeable degradation in the quality of the - Canon imageCLASS 2300 | Reference Guide for imageCLASS 2300 - Page 28
Before You Start Using This Machine Select a Safe Power Supply I Insert the power plug into a 120 V AC outlet. I Make sure that the power supply for the machine is safe, and has a steady voltage. 1 I Do not connect the power cords of other electrical equipment into the same outlet to which the - Canon imageCLASS 2300 | Reference Guide for imageCLASS 2300 - Page 29
Before You Start Using This Machine 39 3/4" (1010 mm) Provide Adequate Installation Space I Provide enough space on each side of the machine for unrestricted operation. 1 4" or more (100 mm) 4" or more (100 mm) 33 1/2" (852 mm) NOTE Be sure to provide enough space also at the top of the machine - Canon imageCLASS 2300 | Reference Guide for imageCLASS 2300 - Page 30
Moving the Machine I Be sure to unplug the power cord and disconnect all the other connection cables before moving the machine. Failure to do so may damage the power cord and may result in a fire or electric shock. I When carrying the machine, be sure to hold the parts indicated below. 1 Failure - Canon imageCLASS 2300 | Reference Guide for imageCLASS 2300 - Page 31
the machine. Do not carry out any inspections not described in this manual. I Be careful not to drop any foreign objects, such as paper power switch OFF, disconnect the power cord from the outlet, and contact your service representative. Using the machine in this state may cause a fire or electrical - Canon imageCLASS 2300 | Reference Guide for imageCLASS 2300 - Page 32
I This machine generates a slight amount of ozone during normal use. Although sensitivity to ozone may vary, this amount is not harmful. Ozone may be more noticeable during extended use or long production runs, especially in poorly ventilated rooms. It is recommended that the room be appropriately - Canon imageCLASS 2300 | Reference Guide for imageCLASS 2300 - Page 33
Parts and Their Functions 1 This section provides you with the names and functions of all the parts on the outside and inside of the main unit, and the control panel. External View Before You Start Using This Machine Front View a Control Panel Includes the keys, LCD display, and indicators - Canon imageCLASS 2300 | Reference Guide for imageCLASS 2300 - Page 34
Before You Start Using This Machine i Printer Ports Connect the printer cable (USB or parallel) to the matching port. Available in the Network Model only. j Main Power Switch Internal View 1 1 2 0 9 8 7 6 5 a Underside of the Feeder This holds - Canon imageCLASS 2300 | Reference Guide for imageCLASS 2300 - Page 35
Displays selections, text, numbers, and names when registering information. c COPY, FAX, PRINT keys Press to switch the machine to the Copy, Fax or Printer functions. The PRINT key only functions in the Network Model. d Monitor key Press to check the transaction or copying status. e Reset key Press - Canon imageCLASS 2300 | Reference Guide for imageCLASS 2300 - Page 36
blinks red when an error occurs. If the alarm lamp blinks, solve the problem by following the instructions on the LCD display. If the alarm lamp maintains a steady red light, contact your service representative. Press to use registered special copying features. The default settings are as follows - Canon imageCLASS 2300 | Reference Guide for imageCLASS 2300 - Page 37
One-Touch Speed Dialing Panels Opened 1 2 34 56 7 Delayed Advanced Memory Transmission Communication Transfer Reception Delete 1 Memory Reference Report TTI Selector Space Stack Bypass Settings Stamp Pin Code + Clear OK Before You Start Using This Machine G F EDC B a Delayed - Canon imageCLASS 2300 | Reference Guide for imageCLASS 2300 - Page 38
Before You Start Using This Machine Main Power and Energy Saver Key The machine is provided with a main power switch and an Energy Saver key to 1 enter the Energy Saver mode. How to Turn ON the Main Power This section explains about how to turn ON the main power. 1 Make sure that the power - Canon imageCLASS 2300 | Reference Guide for imageCLASS 2300 - Page 39
Paper Selection Copy Exposure: 5 Copy Quantity: 1 You can change the standard copy settings. (See Chapter 4, "Customizing Settings," in the Copying Guide.) You can select which function to display on the Basic Features screen, according to the Additional Function settings. (See "Initial Function at - Canon imageCLASS 2300 | Reference Guide for imageCLASS 2300 - Page 40
message appears: ID ❑ Enter the Department ID and password © press [ID]. 1 The Basic Features screen appears. NOTE For instructions on how to enter the Department ID and password, see "Entering the Department ID and Password," on p. 2-11. For details about the - Canon imageCLASS 2300 | Reference Guide for imageCLASS 2300 - Page 41
Before You Start Using This Machine Energy Saver Mode If the machine remains idle for a specified length of time, or [Energy Saver] is pressed, the machine enters the Energy Saver mode. Press [Energy Saver] to cancel the Energy Saver mode and resume normal 1 machine operations. Energy Saver - Canon imageCLASS 2300 | Reference Guide for imageCLASS 2300 - Page 42
function. To set up the machine, refer to the following instructions: I Setting Up and Connecting to the Network See the Network Guide. I Installing the Printer Driver See the PCL Driver Guide. I Installing the Fax Driver See the Fax Driver Guide with Cover Sheet Editor. I Date and Time Settings See - Canon imageCLASS 2300 | Reference Guide for imageCLASS 2300 - Page 43
1 1-20 System Settings Before You Start Using This Machine - Canon imageCLASS 2300 | Reference Guide for imageCLASS 2300 - Page 44
Basic Operations This chapter describes the main features and basic operations. 2 CHAPTER Overview of the imageCLASS 2300 2-2 Convenient Functions 2-2 Easy Operations 2-4 Reducing Running Costs 2-6 Entering Characters 2-8 Alphanumeric and Special Characters 2-8 Entering the Department ID and - Canon imageCLASS 2300 | Reference Guide for imageCLASS 2300 - Page 45
," on p. 2-20. The I-Fax function is only available in the Network Model of this machine. For details on I-Fax, see Chapter 1, "Overview," in the Sending Guide. 2-2 Overview of the imageCLASS 2300 - Canon imageCLASS 2300 | Reference Guide for imageCLASS 2300 - Page 46
NOTE For details on the mode select keys, see "Parts and Their Functions," on p. 1-10. The printer function is only available in the Network Model of this machine. I Sending a Document by E-Mail By on I-Fax, see Chapter 1, "Overview," in the Sending Guide. Overview of the imageCLASS 2300 2-3 - Canon imageCLASS 2300 | Reference Guide for imageCLASS 2300 - Page 47
Branch Office B (101) 2 Basic Operations Branch Office C (102) NOTE For details on the access code, see Chapter 2, "Speed Dialing," in the Facsimile Guide. Easy Operations I Using the Directory By using the directory, you can find the destination easily from among many telephone numbers and e-mail - Canon imageCLASS 2300 | Reference Guide for imageCLASS 2300 - Page 48
pressing one key. Reduce Enlarge 1 2 Two Page Separation Frame Erase 3 4 NOTE For details on setting the shortcut keys, see Chapter 4, "Customizing Settings," in the Copying Guide. Overview of the imageCLASS 2300 2-5 - Canon imageCLASS 2300 | Reference Guide for imageCLASS 2300 - Page 49
I Checking the Status of a Job Using a Single Key You can view the status of the current job being processed and the jobs to be processed by pressing [Monitor] on the control panel. COPY FAX PRINT Monitor COPY STATUS 0144 13:30 2 x 15 PRINTING 0145 13:30 4 x 15 STNDBY 2 0146 14:31 3 x - Canon imageCLASS 2300 | Reference Guide for imageCLASS 2300 - Page 50
Basic Operations I Scheduling the Energy Saver Mode You can specify the time the machine enters the Energy Saver mode automatically for each day of the week. mtwt f s s 31 1 2 3 4 5 6 7 8 9 10 11 12 13 14 15 16 17 18 19 20 21 22 23 24 25 26 27 28 29 30 1 2 3 4 2 NOTE For details on the daily timer, - Canon imageCLASS 2300 | Reference Guide for imageCLASS 2300 - Page 51
Entering Characters Basic Operations If a message is displayed, enter characters as follows. To enter characters, use the function keys and numeric keys on the control panel, 2 and the fourth one-touch speed dialing panel ( , , L, M, Space, Delete, and Clear keys). NOTE This - Canon imageCLASS 2300 | Reference Guide for imageCLASS 2300 - Page 52
Basic Operations Each key contains the upper and lower case letters for its group of letters. (for example: ABCabc). Key Characters @. 1 @ ABC 2 ABCabc DEF 3 DEFdef 2 GHI 4 GHIghi JKL 5 JKLjkl MNO 6 MNOmno PRS 7 PQRSpqrs TUV 8 TUVtuv WXY 9 WXYZwxyz SYMBOLS l To - Canon imageCLASS 2300 | Reference Guide for imageCLASS 2300 - Page 53
NOTE To enter a space, press [Space]. To move a cursor, press [ ] or [ ]. To enter the same character continuously, press [ ] to move the cursor to the right. If you entered an incorrect character, delete it using , , and [Delete], and enter the correct character. To delete all the entered - Canon imageCLASS 2300 | Reference Guide for imageCLASS 2300 - Page 54
Basic Operations Entering the Department ID and Password If Department ID Management has been set, the Department ID and password must be entered before using this machine. 2 1 Use the numeric keys to enter values for the Department ID and password. F3 ❑ Press F3 (DEPT. ID) © enter the - Canon imageCLASS 2300 | Reference Guide for imageCLASS 2300 - Page 55
NOTE If the Department ID or Password that you entered is wrong, the beep sounds. Repeat the procedure from step 1. ID 3 When your operations are complete, press [ID] on the control panel. The display for entering the Department ID and password appears. 2 Basic Operations NOTE To perform - Canon imageCLASS 2300 | Reference Guide for imageCLASS 2300 - Page 56
paper sizes when using the stack bypass, see "Standard Paper for the Stack Bypass," on p. 3-16. NOTE For high quality printouts, use paper recommended by Canon. Making Prints Using the Stack Bypass 2-13 - Canon imageCLASS 2300 | Reference Guide for imageCLASS 2300 - Page 57
," on p. 4-2.) If there is a reserved job, you can reserve a change of paper for the stack bypass. (See Chapter 1, "Introduction to Copying," in the Copying Guide.) If there is no reserved job, remove the paper already loaded on the stack bypass and continue the procedure from step 2. NOTE If the - Canon imageCLASS 2300 | Reference Guide for imageCLASS 2300 - Page 58
of paper with the slide guides. Insert the paper into the machine until it stops. Basic Operations The Paper Select display for the stack bypass appears. NOTE If there are instructions on the paper package about which side of the paper to load, follow those instructions. If problems, such as poor - Canon imageCLASS 2300 | Reference Guide for imageCLASS 2300 - Page 59
Basic Operations G To load envelopes into the stack bypass: ❑ Take five envelopes, loosen them as shown, and stack them together. Repeat this step five times for each set of five envelopes. 2 ❑ Place the envelopes on a clean, level surface, and press all the way around the envelopes by hand, in the - Canon imageCLASS 2300 | Reference Guide for imageCLASS 2300 - Page 60
IMPORTANT Do not print on the underside of the envelopes (the side with the flap). If the envelopes become filled with air, flatten them by hand before loading them into the stack bypass. Flap 2 Take particular care to spread the envelopes out in the direction they will be fed. ❑ Load the envelopes, as - Canon imageCLASS 2300 | Reference Guide for imageCLASS 2300 - Page 61
F3 F4 OK 2 F3 F4 OK G If you want to use envelopes: ❑ Press [F3] (M) or [F4] (L) to highlight © press [OK]. The display for specifying envelope type appears. ❑ Press [F3] (M) or [F4] (L) to highlight , , or © press [OK]. Basic Operations IMPORTANT Set - Canon imageCLASS 2300 | Reference Guide for imageCLASS 2300 - Page 62
5 Place your originals, and set the copy mode. Start 6 Press [Start]. 2 Copying starts. NOTE If you are printing on heavyweight paper or envelopes using the stack bypass, and find that the paper or envelopes are not being fed smoothly or evenly through the stack bypass, curl the forward edge in - Canon imageCLASS 2300 | Reference Guide for imageCLASS 2300 - Page 63
Multifunctional Operations The imageCLASS 2300 is equipped with the following functions: Copy, Fax, and Print. You can operate these functions together. The following table presents the 2 details of multifunctional operations. Basic Operations Previous Job Copy Print Next Job Scanning Data - Canon imageCLASS 2300 | Reference Guide for imageCLASS 2300 - Page 64
) - - - Memory TX - - - Memory RX - - - Printing of - Auto RX Documents Print Receiving Data Printing - - : Unavailable due to duplicate operations : Available NOTE The printer function is only available in the Network Model of this machine. Multifunctional Operations 2-21 - Canon imageCLASS 2300 | Reference Guide for imageCLASS 2300 - Page 65
Paper Type Paper types which can be used with this machine are shown in the following table. Basic Operations 2 Paper Type Paper Drawer Location Stack Bypass Plain *1 Heavy *2 Recycled *1 Transparency - Labels *3 - Envelope - *1 16 to 24 lb bond (60 to 90 g/m2) *2 24 to 32 lb bond ( - Canon imageCLASS 2300 | Reference Guide for imageCLASS 2300 - Page 66
: Available - : Unavailable IMPORTANT It is recommended not to use the back side of preprinted paper. It may cause a paper jam. NOTE For instructions on how to load paper, see the following pages: - Paper drawer: "Loading Paper," on p. 6-2. - Stack bypass: "Making Prints Using the Stack Bypass," - Canon imageCLASS 2300 | Reference Guide for imageCLASS 2300 - Page 67
2 2-24 Paper Type Basic Operations - Canon imageCLASS 2300 | Reference Guide for imageCLASS 2300 - Page 68
Selecting and Storing Settings 3 CHAPTER This chapter describes the initial settings and procedures necessary to change them. Additional Functions Settings Table 3-2 Specifying Common Settings 3-8 Initial Function at Power ON 3-8 Default Display after Auto Clear 3-9 Volume and Tone Control - Canon imageCLASS 2300 | Reference Guide for imageCLASS 2300 - Page 69
Additional Functions Settings Table The following settings can be selected or stored from the Additional Functions menu. NOTE Some functions are not available in the Network Model of this machine. 3 I COMMON SETTINGS Selecting and Storing Settings Item Available Settings 01 DEFAULT SETTINGS - Canon imageCLASS 2300 | Reference Guide for imageCLASS 2300 - Page 70
KEY SET SHORTCUT KEY 1, 2, 3, 4 08 SHARPNESS 1 to 9; 5* 09 PRESCAN ON*, OFF An asterisk (*) indicates the default setting. *1 See the Copying Guide Applicable Page *1 *1 *1 *1 3 *1 *1 *1 *1 *1 I FAX SETTINGS Item 01 USER SETTINGS Available Settings TEL LINE SETTINGS UNIT NAME SENDER NAME: 01 - Canon imageCLASS 2300 | Reference Guide for imageCLASS 2300 - Page 71
TX ROTATION: ON*, OFF *2 PIN CODE: OFF*, ON *2 04 RX SETTINGS ECM RX: ON*, OFF *2 RX PAGE FOOTER: OFF*, ON *2 2 on 1: OFF*, ON *2 05 PRINTER SETTINGS # OF RX COPIES: 01 to 99 COPIES; 01* *2 SELECT DRAWER: DRAWER SW A - D *2 (ON*, OFF) RX REDUCTION: ON*, OFF *2 TONER SUPPLY LOW: RX - Canon imageCLASS 2300 | Reference Guide for imageCLASS 2300 - Page 72
, ERROR MAIL, ADDRESS FORMAT, PRINT MAIL HEADER E-MAIL ADD SETTING: 01 - 05 (SMTP *3 SETTINGS, POP3 SETTINGS) An asterisk (*) indicates the default setting. *2 See the Facsimile Guide *3 See the Network Guide and the Sending Guide. Additional Functions Settings Table 3-5 - Canon imageCLASS 2300 | Reference Guide for imageCLASS 2300 - Page 73
PASSWORD, UPLOAD DIRECTORY, OPTIONAL SETTING) 03 GROUP DIAL 01 - 63: DESTINATION TEL/ID, NAME, *2 OPTIONAL SETTING *2 See the Facsimile Guide *4 See the Sending Guide I TIMER SETTINGS Item Available Settings 01 DATE/TIME SETTING Default setting 02 AUTO CLEAR ON (1 to 9 min. in one minute - Canon imageCLASS 2300 | Reference Guide for imageCLASS 2300 - Page 74
DNS DYNAMIC SET, HOST NAME, DOMAIN NAME, VIEW IP 3 ADDRESS An asterisk (*) indicates the default setting. *3 See the Network Guide and the Sending Guide. I ADJUST/CLEAN Item 01 ROLLER CLEANING Available Settings START CLEANING, PRNT CLEANING PAPR An asterisk (*) indicates the default setting - Canon imageCLASS 2300 | Reference Guide for imageCLASS 2300 - Page 75
. NOTE The Common Settings menu is made up of several items. Use F3 (M) or F4 (L) 3 to scroll through the items you want to set. The printer function is only available in the Network Model of this machine. Initial Function at Power ON You can specify which screen is displayed when you - Canon imageCLASS 2300 | Reference Guide for imageCLASS 2300 - Page 76
Selecting and Storing Settings F3 3 Press [F3] (M) or [F4] (L) to highlight © press [OK]. OK The DEFAULT SETTINGS menu appears. F3 4 Press [F3] (M) or [F4] (L) to select or © 3 F4 press [OK]. OK To set the machine to the Fax function when the - Canon imageCLASS 2300 | Reference Guide for imageCLASS 2300 - Page 77
Additional Functions F3 F4 1 Press [Additional Functions] © press [F3] (M) or [F4] (L) to highlight © press [OK]. The COMMON SETTINGS menu appears. OK 3 F3 2 Press [F3] (M) or [F4] (L) to highlight © press [OK]. OK Each time you press F3 (M) - Canon imageCLASS 2300 | Reference Guide for imageCLASS 2300 - Page 78
Selecting and Storing Settings Reset 4 Press [Reset] to return to the Basic Features screen. Volume and Tone Control This mode enables you to select whether to sound audible tones and set their volume. The following tones sound at the following times: Keypad Volume: When pressing keys on the - Canon imageCLASS 2300 | Reference Guide for imageCLASS 2300 - Page 79
F3 3 Press [F3] (M) or [F4] (L) to highlight , F4 , , , , or © press [OK]. Selecting and Storing Settings 3 F3 4 Press [F3] (M) or [F4] (L) to highlight , - Canon imageCLASS 2300 | Reference Guide for imageCLASS 2300 - Page 80
Selecting and Storing Settings NOTE To set the volume for another tone, repeat steps 3 to 5. Reset 6 Press [Reset] to return to the Basic Features screen. Power Consumption in the Energy Saver Mode This mode enables you to select the power consumption when the machine is in the Energy Saver - Canon imageCLASS 2300 | Reference Guide for imageCLASS 2300 - Page 81
you to set the paper drawers used for Automatic Paper Selection and Automatic Drawer Switching. This setting can be made independently for the Copy and Printer functions. This mode is useful when different paper drawers are used for different purposes. NOTE Paper drawers set to '02 ON' are used for - Canon imageCLASS 2300 | Reference Guide for imageCLASS 2300 - Page 82
Selecting and Storing Settings F3 2 Press [F3] (M) or [F4] (L) to highlight © press [OK]. OK Each time you press F3 (M) or F4 (L), the next or previous menu option becomes highlighted. The DRAWER ELIGIBLTY menu appears. 3 F3 3 Press [F3] (M) or [F4] (L) to - Canon imageCLASS 2300 | Reference Guide for imageCLASS 2300 - Page 83
G To make the stack bypass or paper drawer ineligible for APS/ADS: ❑ Select . Repeat the procedure from step 3 to continue APS/ADS settings. NOTE If you select for the stack bypass, press F3 (M) or F4 (L) to select the paper size to be used on the stack bypass © press (OK). 3 - Canon imageCLASS 2300 | Reference Guide for imageCLASS 2300 - Page 84
F3 2 Press [F3] (M) or [F4] (L) to highlight © press [OK]. OK Each time you press F3 (M) or F4 (L), the next or previous menu option becomes highlighted. Selecting and Storing Settings The USE STACK BYPASS menu appears. 3 F3 3 Press [F3] (M) or [F4] (L) to - Canon imageCLASS 2300 | Reference Guide for imageCLASS 2300 - Page 85
Identifying the Type of Paper in a Paper Drawer This mode enables you to specify the paper type you load in a paper drawer. NOTE The default setting is '01 PLAIN PAPER'. 1 Additional Functions Press [Additional Functions] © press [F3] (M) or [F4] (L) to 3 F3 highlight © - Canon imageCLASS 2300 | Reference Guide for imageCLASS 2300 - Page 86
Selecting and Storing Settings Reset 4 Press [Reset] to return to the Basic Features screen. Rotate Printing This mode enables you to set the machine to automatically rotate the image when the direction of the original does not match that of the selected paper. NOTE The default setting is '02 - Canon imageCLASS 2300 | Reference Guide for imageCLASS 2300 - Page 87
G If you want to print without rotation: ❑ Select . G If you want to print the original rotated 90˚: ❑ Select . The COMMON SETTINGS menu returns. Reset 4 Press [Reset] to return to the Basic Features Screen. 3 Changing the Language Shown on the LCD Display This mode enables you to - Canon imageCLASS 2300 | Reference Guide for imageCLASS 2300 - Page 88
F3 3 Press [F3] (M) or [F4] (L) to select the desired language © F4 press [OK]. OK The COMMON SETTINGS menu returns. Reset 4 Press [Reset] to return to the Basic Features screen. 3 Selecting and Storing Settings Specifying Common Settings 3-21 - Canon imageCLASS 2300 | Reference Guide for imageCLASS 2300 - Page 89
Timer Settings This mode enables you to set the current date and time, and specify the time for the machine to enter the Energy Saver mode. NOTE The Timer Settings menu is made up of several items. Use F3 (M) or F4 (L) to 3 scroll through the items you want to set. Current Date and Time You - Canon imageCLASS 2300 | Reference Guide for imageCLASS 2300 - Page 90
Selecting and Storing Settings F3 3 Press [F3] (M) or [F4] (L) to highlight © press [OK]. OK The display for entering the date and time appears. F2 4 Press [F2] ( ) or [F3] ( ) to select the month, day, year, and 3 F3 time © enter the current date and time using - Canon imageCLASS 2300 | Reference Guide for imageCLASS 2300 - Page 91
Auto Clear Time If the machine is not used (no keys are pressed) for a certain period of time, the display returns to the Basic Features screen (Auto Clear function). This period of time is called Auto Clear Time. Auto Clear Time can be set from 1 to 9 minutes in one minute increments, and can also - Canon imageCLASS 2300 | Reference Guide for imageCLASS 2300 - Page 92
setting is '01 ON' and '15MIN'. To reactivate the machine from the Energy Saver mode, press (Energy Saver). To enter the Energy Saver mode manually, press (Energy Saver) for more than 2 seconds. You can select the power consumption in the Energy Saver mode between two levels using the Additional - Canon imageCLASS 2300 | Reference Guide for imageCLASS 2300 - Page 93
- The toner cartridge is empty - There is image data stored in memory in the Fax mode The machine will recover from the Energy Saver mode when: - You press (Energy Saver) - You place a document in the feeder - The time preset for printing reports occurs - A fax is received - The time preset for the - Canon imageCLASS 2300 | Reference Guide for imageCLASS 2300 - Page 94
G If you want to use Energy Saver: ❑ Select and proceed to step 4. G If you do not want to use Energy Saver: ❑ Select and proceed to step 5. F2 4 Press [F2] (-) or [F3] (+) to select the desired time period © F3 press [OK]. OK The Time Until Unit Quiets Down settings are from - Canon imageCLASS 2300 | Reference Guide for imageCLASS 2300 - Page 95
F3 2 Press [F3] (M) or [F4] (L) to highlight F4 © press [OK]. OK Each time you press F3 (M) or F4 (L), the next or previous menu option becomes highlighted. 3 Selecting and Storing Settings The DAILY TIMER SET menu appears. F3 3 Press [F3] (M) or [F4] (L) to select - Canon imageCLASS 2300 | Reference Guide for imageCLASS 2300 - Page 96
Selecting and Storing Settings NOTE If you make a mistake when entering the time, enter the four-digit number again. If you do not want to specify the time, press C (Clear). OK 5 Press [OK]. The time is set, and the TIMER SETTINGS or DAILY TIMER SET menu returns. Reset 6 Press [Reset] to - Canon imageCLASS 2300 | Reference Guide for imageCLASS 2300 - Page 97
F3 3 Press [F3] (M) or [F4] (L) to select desired date format © F4 press [OK]. OK Examples of the date format: YYYY MM/DD © 2003 02/03 MM/DD/YYYY © 02/03/2003 DD/MM YYYY © 03/02 2003 3 The COMMON SETTINGS menu appears. Reset 4 Press [Reset] to return to the Basic Features screen. - Canon imageCLASS 2300 | Reference Guide for imageCLASS 2300 - Page 98
Selecting and Storing Settings Printing Reports and Lists This mode enables you to print the contents of the fax settings and the network settings. These reports are useful when you want to check the current settings. User's Data List This mode enables you to print the user's data list. 3 - Canon imageCLASS 2300 | Reference Guide for imageCLASS 2300 - Page 99
Speed Dialing Lists This mode enables you to print the following fax dialing lists: One-Touch Speed Dialing List 1 Coded Speed Dialing List 1 One-Touch Speed Dialing List 2 Coded Speed Dialing List 2 Group Dialing List Access Code List 3 This section explains how to print the One-touch - Canon imageCLASS 2300 | Reference Guide for imageCLASS 2300 - Page 100
Selecting and Storing Settings F3 3 Press [F3] (M) or [F4] (L) to highlight © F4 press [OK]. OK The 1-TOUCH LIST 1 menu appears. F3 4 Press [F3] (M) or [F4] (L) to highlight or © press [OK]. OK G If you want to list the destinations in - Canon imageCLASS 2300 | Reference Guide for imageCLASS 2300 - Page 101
Department ID Management List Additional Functions F3 F4 1 Press [Additional Functions] © press [F3] (M) or [F4] (L) to highlight © press [OK]. The PRINT LISTS menu appears. OK 3 F3 2 Press [F3] (M) or [F4] (L) to highlight © F4 press [OK]. OK Each - Canon imageCLASS 2300 | Reference Guide for imageCLASS 2300 - Page 102
F3 2 Press [F3] (M) or [F4] (L) to highlight F4 © press [OK]. OK Each time you press F3 (M) or F4 (L), the next or previous menu option becomes highlighted. The report printing is canceled, and the Basic Features screen returns. 3 NOTE If there are multiple jobs, press F2 - Canon imageCLASS 2300 | Reference Guide for imageCLASS 2300 - Page 103
Selecting and Storing Settings 3 3-36 Printing Reports and Lists - Canon imageCLASS 2300 | Reference Guide for imageCLASS 2300 - Page 104
Checking Job Status This chapter explains how to confirm the status of print jobs. 4 CHAPTER Checking the Job Status 4-2 4-1 - Canon imageCLASS 2300 | Reference Guide for imageCLASS 2300 - Page 105
Job Status F2 F3 Stop NOTE To check the status of the print jobs sent from a computer, see Chapter 3, "Summary of the Printer Menus," in the PCL Printer Guide (Network Model only). If you press [Monitor] when copy jobs are displayed, the display changes to the fax job status; when fax jobs - Canon imageCLASS 2300 | Reference Guide for imageCLASS 2300 - Page 106
System Manager Settings 5 CHAPTER This chapter describes settings that can be made by the person in charge of the machine's operation, such as the System Manager. System Administrator Information 5-2 System Administrator ID 5-2 System Password 5-4 E-Mail Address 5-5 Department ID Management - Canon imageCLASS 2300 | Reference Guide for imageCLASS 2300 - Page 107
Manager. Once the System Administrator ID and Password are set, restrictions can be placed on storing or changing the System Settings. NOTE For instructions on how to enter characters, see "Entering Characters," on p. 2-8. The maximum number of digits you can store for the System Administrator ID - Canon imageCLASS 2300 | Reference Guide for imageCLASS 2300 - Page 108
System Manager Settings F3 3 Press [F3] (M) or [F4] (L) to highlight F4 © press [OK]. OK The SYS. ADMIN. INFO menu appears. F3 4 Press [F3] (M) or [F4] (L) to highlight © F4 press [OK]. OK 5 The display for entering the System Administrator ID - Canon imageCLASS 2300 | Reference Guide for imageCLASS 2300 - Page 109
System Password You can set the System Password. Additional Functions F3 F4 OK 1 Press [Additional Functions] © press [F3] (M) or [F4] (L) to highlight © press [OK]. If a System Administrator ID and password are set, enter them after selecting © press [OK]. - Canon imageCLASS 2300 | Reference Guide for imageCLASS 2300 - Page 110
@. ABC DEF 123 GHI JKL MNO 456 PRS TUV WXY 789 OPER 0 SYMBOLS OK 4 Enter a System Password using the numeric keys © press [OK]. The System Password is set, and the SYS. ADMIN. INFO menu returns. NOTE You cannot store a System Password with only zeros as the number, such as - Canon imageCLASS 2300 | Reference Guide for imageCLASS 2300 - Page 111
F3 2 Press [F3] (M) or [F4] (L) to highlight F4 © press [OK]. OK Each time you press F3 (M) or F4 (L), the next or previous menu option becomes highlighted. The SYS. ADMIN. INFO menu appears. F3 3 Press [F3] (M) or [F4] (L) to highlight F4 © - Canon imageCLASS 2300 | Reference Guide for imageCLASS 2300 - Page 112
System Manager Settings Department ID Management By storing a Department ID and password for each department, you can set the machine so that its functions can be used only after the correct password has been entered. This is called Department ID Management. Department IDs and passwords for up to - Canon imageCLASS 2300 | Reference Guide for imageCLASS 2300 - Page 113
If a System Administrator ID and password are set, enter them after selecting © press [OK]. The SYSTEM SETTINGS menu appears. F3 3 Press [F3] (M) or [F4] (L) to highlight © press [OK]. OK 5 The DEPT. ID MANAGEMNT menu appears. System Manager - Canon imageCLASS 2300 | Reference Guide for imageCLASS 2300 - Page 114
sent under the name registered in '01'. For details on the sender name, see Chapter 1, "Before You Use the Fax Functions," in the Facsimile Guide. Additional Functions F3 F4 OK 1 Press [Additional Functions] © press [F3] (M) or [F4] (L) to highlight © press [OK]. If a System - Canon imageCLASS 2300 | Reference Guide for imageCLASS 2300 - Page 115
F3 2 Press [F3] (M) or [F4] (L) to highlight © press [OK]. OK Each time you press F3 (M) or F4 (L), the next or previous menu option becomes highlighted. System Manager Settings The DEPT. ID MANAGEMNT menu appears. F3 3 Press [F3] (M) or [F4] (L) to highlight - Canon imageCLASS 2300 | Reference Guide for imageCLASS 2300 - Page 116
System Manager Settings @. ABC DEF 123 GHI JKL MNO 456 PRS TUV WXY 789 OPER 0 SYMBOLS OK 6 Enter the Department ID using the numeric keys © press [OK]. The Department ID is stored, and the ENTER DEPT. ID menu appears. NOTE You can delete the last digit you entered by pressing F4 ( - Canon imageCLASS 2300 | Reference Guide for imageCLASS 2300 - Page 117
F3 9 Press [F3] (M) or [F4] (L) to highlight © F4 press [OK]. OK The display for entering the Copy Limits appears. @. ABC DEF 123 GHI JKL MNO 456 PRS TUV WXY 789 OPER 0 SYMBOLS 10 Enter the total number of pages that can be printed by the registered department - Canon imageCLASS 2300 | Reference Guide for imageCLASS 2300 - Page 118
5 F4 © press [OK]. OK NOTE For details on the sender name, see Chapter 1, "Before You Use the Fax Functions," in the Facsimile Guide. F3 14 Press [F3] (M) or [F4] (L) to select the name of the sender © F4 press [OK]. OK The DEPT. ID ENTRY menu returns. Reset 15 - Canon imageCLASS 2300 | Reference Guide for imageCLASS 2300 - Page 119
Checking and Printing Counter Information You can check the amount of paper used by each department after setting the Department ID Management to '02 ON'. Additional Functions F3 F4 OK 1 Press [Additional Functions] © press [F3] (M) or [F4] (L) to highlight © press [OK]. If a - Canon imageCLASS 2300 | Reference Guide for imageCLASS 2300 - Page 120
F3 4 Press [F3] (M) or [F4] (L) to highlight © press [OK]. OK The COUNT MANAGEMENT menu appears. F3 5 Press [F3] (M) or [F4] (L) to highlight © press [OK]. OK 5 The COUNT INFORMATION menu appears. F3 6 Press [F3] (M) or [F4] (L) to - Canon imageCLASS 2300 | Reference Guide for imageCLASS 2300 - Page 121
F2 7 Press [F2] (M) or [F3] (L) to confirm the count information © F3 press [BACK]. BACK The count information is shown, from left to right: The Department ID, the counted pages, and the maximum page number. If the maximum page number is displayed as , the maximum limit has not been specified. - Canon imageCLASS 2300 | Reference Guide for imageCLASS 2300 - Page 122
Restrictions Using Department ID Management When the Department ID Management is set to '02 ON', you can select whether to activate the restriction on printing and fax transmission quantity. NOTE The default setting is '01 OFF'. Additional Functions F3 F4 1 Press [Additional Functions] © press [F3 - Canon imageCLASS 2300 | Reference Guide for imageCLASS 2300 - Page 123
F3 4 Press [F3] (M) or [F4] (L) to highlight © F4 press [OK]. OK The RESTRICTIONS menu appears. F3 5 Press [F3] (M) or [F4] (L) to highlight or © press [OK]. OK 5 F3 6 Press [F3] (M) or [F4] (L) to highlight or - Canon imageCLASS 2300 | Reference Guide for imageCLASS 2300 - Page 124
Accepting Print Jobs with an Unknown ID This mode enables you to specify whether to print documents from computers that do not correspond with a stored Department ID. NOTE The default setting is '01 ON'. Additional Functions F3 F4 1 Press [Additional Functions] © press [F3] (M) or [F4] (L) to - Canon imageCLASS 2300 | Reference Guide for imageCLASS 2300 - Page 125
F3 4 Press [F3] (M) or [F4] (L) to highlight F4 © press [OK]. OK The PRINT WITH NO ID menu appears. F3 5 Press [F3] (M) or [F4] (L) highlight or © F4 press [OK]. OK 5 If you want to allow printing jobs without Department ID, select . If you do - Canon imageCLASS 2300 | Reference Guide for imageCLASS 2300 - Page 126
Routine Maintenance 6 CHAPTER This chapter describes how to load paper, replace the toner cartridge and drum units, and perform routine cleaning. Paper Drawers 6-2 Loading Paper 6-2 Adjusting a Paper Drawer to Hold a Different Paper Size 6-6 Replacing the Toner Cartridge 6-11 Replacing the - Canon imageCLASS 2300 | Reference Guide for imageCLASS 2300 - Page 127
, the remaining prints are automatically made after you load the correct paper. To cancel printing, press (Stop). (See Chapter 1, "Introduction to Copying," in the Copying Guide.) 6-2 Paper Drawers - Canon imageCLASS 2300 | Reference Guide for imageCLASS 2300 - Page 128
- Paper on which color images have been copied (do not copy on the reverse side either) - Paper which has been printed on using a thermal transfer printer (do not copy on the reverse side either) - Back side of printed paper NOTE For high-quality print output, use paper recommended by - Canon imageCLASS 2300 | Reference Guide for imageCLASS 2300 - Page 129
3 Push down the metal plate until it locks in place. 4 Load the paper into the paper drawer. Even out the edges of the paper stack. Load the paper stack against the right wall of the paper drawer. When loading paper in the paper drawer for the first time, set the size plate to 6 match the paper - Canon imageCLASS 2300 | Reference Guide for imageCLASS 2300 - Page 130
held under the guiding tabs. NOTE Each paper drawer holds about 250 sheets of paper (20 lb bond (80 g/m2)). If there are instructions on the paper load, follow those instructions. When the paper is loaded into the paper drawer, the side facing down is the one printed on. If problems, such as poor - Canon imageCLASS 2300 | Reference Guide for imageCLASS 2300 - Page 131
paper drawer, follow the procedure described below to adjust the paper drawer guides. NOTE The following paper sizes can be loaded into the paper drawers: 11" 17" , LGL , LTR , LTR , and STMT . Please consult your service representative about the settings for U1, U2, and U3 paper. 1 Pull out - Canon imageCLASS 2300 | Reference Guide for imageCLASS 2300 - Page 132
it again aligning it with the mark for the desired paper size. NOTE Attach the end guide while pressing down the point indicated with "A". If you are setting for 11" x 17" paper, attach the end guide to the 11" x 17" indicator on the right rear side of the paper drawer. 6 4 Lift the - Canon imageCLASS 2300 | Reference Guide for imageCLASS 2300 - Page 133
5 Lower the lock lever to the left to lock the side guide. IMPORTANT Be sure to set the lock lever correctly. If the lock lever is set to the wrong position, paper jams or dirty prints may - Canon imageCLASS 2300 | Reference Guide for imageCLASS 2300 - Page 134
7 Attach the appropriate paper size label onto the paper size plate. Remove the protecting plastic sheet and attach the label for the paper size you are loading. LTR 8 Change the paper size plate, so that it matches the new paper size being loaded. 6 9 Gently push the paper drawer back into the - Canon imageCLASS 2300 | Reference Guide for imageCLASS 2300 - Page 135
Routine Maintenance CAUTION When returning the paper drawer to its closed position, be careful not to get your fingers caught, as this may result in personal injury. 6 6-10 Paper Drawers - Canon imageCLASS 2300 | Reference Guide for imageCLASS 2300 - Page 136
Replacing the Toner Cartridge When the machine runs out of toner, the alarm lamp blinks and the message appears on the display. When this happens, remove the toner cartridge from the machine and slowly shake it sideways to redistribute toner. Reinstall the toner cartridge in the - Canon imageCLASS 2300 | Reference Guide for imageCLASS 2300 - Page 137
Routine Maintenance 1 Open the stack bypass. 2 Pull out the left cover of the stack bypass. 6 CAUTION Grasp the handle and pull out the left cover horizontally to the left. (Be careful not to pull it upward as it may easily come off.) 6-12 Replacing the Toner Cartridge - Canon imageCLASS 2300 | Reference Guide for imageCLASS 2300 - Page 138
Routine Maintenance 3 While gripping the handles (marked with blue) of the toner cartridge, pull it out horizontally. 4 Cut the protective bag of the new toner cartridge with scissors, and remove it from the bag. 6 IMPORTANT Use only the toner cartridge recommended for use with this machine. When - Canon imageCLASS 2300 | Reference Guide for imageCLASS 2300 - Page 139
Do not discard the protective bag for the toner cartridge. You will need it later to store the cartridge temporarily when the machine needs servicing. 5 Hold the new toner cartridge with both hands and gently shake it sideways a several times, and then back and forth b several times, to distribute - Canon imageCLASS 2300 | Reference Guide for imageCLASS 2300 - Page 140
7 Remove the tape that holds the orange protective cover, and pull the two release tabs on the cover to detach it from the toner cartridge. Tabs Protective cover CAUTION When removing the protective cover, be careful not to touch the toothed wheels on the covered side of the toner cartridge, as - Canon imageCLASS 2300 | Reference Guide for imageCLASS 2300 - Page 141
-green drum inside the toner cartridge. Drum 8 While holding the toner cartridge with both hands, align both sides of the cartridge with the guiding grooves on the 6 machine and insert the cartridge horizontally as far as it will go. 1 Routine Maintenance IMPORTANT Be careful not to touch - Canon imageCLASS 2300 | Reference Guide for imageCLASS 2300 - Page 142
Routine Maintenance 9 Close the left cover of the stack bypass. CAUTION When closing the left cover, be careful not to get your fingers caught, as this may result in personal injury. Close the left cover until it latches. If the cover is not fully closed, the printout might come out lighter. 6 10 - Canon imageCLASS 2300 | Reference Guide for imageCLASS 2300 - Page 143
Routine Maintenance Replacing the Stamp Cartridge You can print a stamp on the documents that you sent via the feeder. If the stamp becomes faint or no stamp is printed, replace the stamp cartridge with a new one. 1 Open the feeder cover, then open the inner cover by holding the green handle toward - Canon imageCLASS 2300 | Reference Guide for imageCLASS 2300 - Page 144
Routine Maintenance 3 Using the tweezers, insert a new stamp cartridge into the feeder until a "click" is heard. IMPORTANT Set the stamp cartridge so that the two projections on the cartridge are aligned with the hollows on the feeder. Be careful that the stamping surface of the stamp cartridge - Canon imageCLASS 2300 | Reference Guide for imageCLASS 2300 - Page 145
Routine Cleaning If the original is not copied clearly, clean the following parts of the machine. For high quality output, we recommend cleaning these parts once a month. Platen Glass Underside of the Feeder Feeder Scanning Area Roller WARNING When cleaning the machine, first turn OFF the main - Canon imageCLASS 2300 | Reference Guide for imageCLASS 2300 - Page 146
1 Clean the platen glass and the platen glass cover with a cloth dampened with water, and wipe them with a soft and dry cloth. Routine Maintenance Feeder Cleaning When scanning the original using the feeder, some streaked lines which do not exist on the original may appear on the output. 6 If - Canon imageCLASS 2300 | Reference Guide for imageCLASS 2300 - Page 147
1 Open the feeder cover. Collate Display Contrast Special Features COPY FAX 2 Clean the rollers (total of two places), separator, and transparent plastic plate inside the feeder cover, with a cloth slightly dampened with water. 6 Rollers Routine Maintenance Transparent Plastic Plate - Canon imageCLASS 2300 | Reference Guide for imageCLASS 2300 - Page 148
Routine Maintenance 3 Close the feeder cover. CAUTION When closing the feeder cover, be careful not to get your fingers caught, as this may result in personal injury. 4 Open the feeder. 6 Routine Cleaning 6-23 - Canon imageCLASS 2300 | Reference Guide for imageCLASS 2300 - Page 149
5 Clean the feeder scanning area (platen glass) and the document feeding roller, with a cloth dampened with water. Document Feeding Roller Scanning Area CAUTION Do not dampen the cloth too much, as this may damage the original or break the machine. 6 6 Close the feeder. Routine Maintenance - Canon imageCLASS 2300 | Reference Guide for imageCLASS 2300 - Page 150
Roller Cleaning If a black streak appears on the output, the fixing roller in the main unit may be dirty. In such a case, clean the roller. Also, it is necessary to clean the roller every time you replace the toner cartridge. First, print the cleaning paper using the machine, then perform the roller - Canon imageCLASS 2300 | Reference Guide for imageCLASS 2300 - Page 151
F3 4 Press [F3] (M) or [F4] (L) to highlight © press [OK]. OK The cleaning paper is printed. 5 Open the stack bypass. 6 6 Load the cleaning paper with the side on which the letter "V" is printed facing up. Routine Maintenance 6-26 Routine Cleaning - Canon imageCLASS 2300 | Reference Guide for imageCLASS 2300 - Page 152
F3 7 Repeat steps 1 to 3 © press [F3] (M) or [F4] (L) to highlight F4 © press [OK]. OK The machine starts cleaning the roller. NOTE If a cleaning paper jam occurs, the alarm indicator blinks red. Press remove the jammed cleaning paper. Discard the cleaning paper after use. - Canon imageCLASS 2300 | Reference Guide for imageCLASS 2300 - Page 153
Routine Maintenance Consumables The following consumables and accessories are available from Canon. For details, contact your service representative. We recommend that you order paper stock and toner from your service representative before you run out of them. I Paper Stock In addition to plain - Canon imageCLASS 2300 | Reference Guide for imageCLASS 2300 - Page 154
, and Toner specifically for use in this machine. As such, for superior print quality, we recommend that you use Canon-GENUINE brand parts, supplies, and Toner in this machine. Ask your authorized Canon dealer or service provider for Canon-GENUINE brand parts, supplies, and Toner. Consumables 6-29 - Canon imageCLASS 2300 | Reference Guide for imageCLASS 2300 - Page 155
Routine Maintenance I Stamp Cartridge This ink cartridge is used to stamp originals when they are sent by fax. 6 6-30 Consumables - Canon imageCLASS 2300 | Reference Guide for imageCLASS 2300 - Page 156
Troubleshooting 7 CHAPTER This chapter describes what to do in response to a paper jam in the main unit or an Left Side Cover 7-12 Stack Bypass 7-16 Feeder 7-17 List of Error Messages 7-21 Self-Diagnostic Display 7-21 Service Call Message 7-27 If You Cannot Solve the Problem 7-28 7-1 - Canon imageCLASS 2300 | Reference Guide for imageCLASS 2300 - Page 157
paper following the procedures below. If multiple error numbers are displayed, remove the paper following the procedures for each error number. Troubleshooting 7 IMPORTANT When the message is displayed, a paper jam occurs in the feeder. Remove the jammed paper from the feeder - Canon imageCLASS 2300 | Reference Guide for imageCLASS 2300 - Page 158
electrical shock. 1 Check the error number and see the appropriate pages for instructions on how to find and remove jammed paper. If jammed paper tears while Jam and the Paper Number Describing How to Remove the Jammed Paper Troubleshooting [2] [1] 7 [4] [3] Location of the Paper Jam [1]: Left - Canon imageCLASS 2300 | Reference Guide for imageCLASS 2300 - Page 159
Left Cover and the Fixing Unit If a paper jam occurs in the left cover and the fixing unit, the following display appears. Follow the procedure described below to remove the jammed paper. 1 Open the front cover of the main unit. 7 2 Open the stack bypass. Troubleshooting 7-4 Clearing Paper Jams - Canon imageCLASS 2300 | Reference Guide for imageCLASS 2300 - Page 160
pull it upward as it may easily come off.) 4 Turn the paper feeding dial counterclockwise. 7 5 Push the green fixing levers down over the toner cartridge. Troubleshooting Clearing Paper Jams 7-5 - Canon imageCLASS 2300 | Reference Guide for imageCLASS 2300 - Page 161
The parts located around the green lever of the exit slot guide are subject to high-temperatures. When removing jammed paper, take Enlarge Reduce 1 Two Page Separation 2 Frame Erase 4 3 PRIN FAX F1 Troubleshooting 8 Close the left cover of the stack bypass. 7-6 Clearing Paper Jams - Canon imageCLASS 2300 | Reference Guide for imageCLASS 2300 - Page 162
bypass, be careful not to get your fingers caught, as this may result in personal injury. 7 10 Close the front cover of the main unit. Troubleshooting CAUTION When closing the front cover, be careful not to get your fingers caught, as this may result in personal injury. Clearing Paper Jams 7-7 - Canon imageCLASS 2300 | Reference Guide for imageCLASS 2300 - Page 163
getting into your eyes or mouth. If the toner gets into your eyes or mouth, wash them immediately with cold water and immediately consult a physician. Troubleshooting 1 Open the front cover of the main unit. 7-8 Clearing Paper Jams - Canon imageCLASS 2300 | Reference Guide for imageCLASS 2300 - Page 164
the left. (Be careful not to pull it upward as it may easily come off.) 4 Push the green fixing levers down over the toner cartridge. Troubleshooting Clearing Paper Jams 7-9 - Canon imageCLASS 2300 | Reference Guide for imageCLASS 2300 - Page 165
Troubleshooting 5 Open the upper left cover. 6 Remove any jammed paper. 7 7 Close the upper left cover. CAUTION When closing the upper left cover, be careful not to get your fingers caught, as this may result in personal injury. 7-10 Clearing Paper Jams - Canon imageCLASS 2300 | Reference Guide for imageCLASS 2300 - Page 166
. When closing the left cover, be careful not to get your fingers caught, as this may result in personal injury. 10 Close the stack bypass. Troubleshooting Clearing Paper Jams 7-11 - Canon imageCLASS 2300 | Reference Guide for imageCLASS 2300 - Page 167
Troubleshooting CAUTION When closing the stack bypass, be careful not to get your fingers caught, as this may result in personal injury. 11 Close the front - Canon imageCLASS 2300 | Reference Guide for imageCLASS 2300 - Page 168
Troubleshooting 1 Open the front cover of the main unit. 2 Open the lower left cover of the main unit. 7 3 Remove any paper remaining in the fixing unit. Clearing Paper Jams 7-13 - Canon imageCLASS 2300 | Reference Guide for imageCLASS 2300 - Page 169
Troubleshooting 4 Close the lower left cover of the main unit. CAUTION When closing the lower left cover, be careful not to get your fingers caught, as - Canon imageCLASS 2300 | Reference Guide for imageCLASS 2300 - Page 170
Troubleshooting 6 Pull out the paper drawer and push the corners of the stack down under the tabs. 7 Gently push the paper drawer back into the machine - Canon imageCLASS 2300 | Reference Guide for imageCLASS 2300 - Page 171
Troubleshooting Stack Bypass If a paper jam occurs in the stack bypass, the following display appears. Follow the procedure below to remove the jammed paper. 1 Remove all - Canon imageCLASS 2300 | Reference Guide for imageCLASS 2300 - Page 172
Troubleshooting Feeder If a paper jam occurs in the feeder, the following display appears. Follow the procedure described below to remove the jammed paper. WARNING There are - Canon imageCLASS 2300 | Reference Guide for imageCLASS 2300 - Page 173
Troubleshooting 2 Remove any jammed original. If you cannot remove the original, proceed to step 3. IMPORTANT Do not pull the original forcefully, because it may tear. 3 Turn - Canon imageCLASS 2300 | Reference Guide for imageCLASS 2300 - Page 174
Troubleshooting 4 Close the feeder cover. CAUTION When closing the feeder cover, be careful not to get your fingers caught, as this may result in personal injury. 5 Open the feeder, and remove any jammed original. 7 6 Close the feeder. Clearing Paper Jams 7-19 - Canon imageCLASS 2300 | Reference Guide for imageCLASS 2300 - Page 175
Troubleshooting CAUTION When closing the feeder, be careful not to get your fingers caught, as this may result in personal injury. 7 7-20 Clearing Paper Jams - Canon imageCLASS 2300 | Reference Guide for imageCLASS 2300 - Page 176
that contains a document. Remedy You cannot delete the box. CHECK DOCUMENT Cause A paper jam may have occurred in the feeder. Remedy Remove the jammed document. Troubleshooting List of Error Messages 7-21 - Canon imageCLASS 2300 | Reference Guide for imageCLASS 2300 - Page 177
printer area. Remedy Please contact your service representative. CHECK PRINTER COVER Cause One or more covers are open. Remedy Close all the covers. DATA ERROR Cause The machine may have trouble. Remedy Please contact your service set the original again. Troubleshooting DOCUMENT TOO LONG Cause - Canon imageCLASS 2300 | Reference Guide for imageCLASS 2300 - Page 178
box, preset polling box, transfer box, confidential box, or relay box but no such box has been registered. Remedy Check the boxes once again. Troubleshooting List of Error Messages 7-23 - Canon imageCLASS 2300 | Reference Guide for imageCLASS 2300 - Page 179
not mind printing the document on different size paper, select . If not, select or press [Stop] © replace the paper © press [Start]. Troubleshooting REC. PAPER JAM Cause An original jam or paper jam has occurred, preventing you from making prints. Remedy Remove paper from the machine - Canon imageCLASS 2300 | Reference Guide for imageCLASS 2300 - Page 180
Troubleshooting RECEIVED IN MEMORY Cause A document was received in memory original again. SYSTEM ERROR/E100 Cause A malfunction has occurred in the machine. Remedy Please contact your service representative. SUPPLY REC. PAPER Cause The paper drawer is out of paper, or not inserted correctly. - Canon imageCLASS 2300 | Reference Guide for imageCLASS 2300 - Page 181
. Remedy Make sure the actual paper size matches the selected paper size. Set the correct paper size and open the front cover, then close it. Troubleshooting 7-26 List of Error Messages - Canon imageCLASS 2300 | Reference Guide for imageCLASS 2300 - Page 182
Call Message If a malfunction occurs to the machine, service call messages appear on the display. WARNING Do not connect or disconnect the power cord with . If appears on the display, see "List of Error Messages," on p. 7 7-21. Troubleshooting Service Call Message 7-27 - Canon imageCLASS 2300 | Reference Guide for imageCLASS 2300 - Page 183
Troubleshooting If You Cannot Solve the Problem If a malfunction occurs to the machine, service call messages appear on the display. Follow the procedure described below to solve the problem. Example: EXXX 1 Turn OFF the main power, wait for at least 10 seconds, then turn it ON again. ON OFF 7 2 If - Canon imageCLASS 2300 | Reference Guide for imageCLASS 2300 - Page 184
Appendix 8 CHAPTER Report Samples 8-2 User's Data List 8-2 One-Touch Speed Dialing List 1 8-3 Coded Speed Dialing List 1 8-3 One-Touch Speed Dialing List 2 8-3 Coded Speed Dialing List 2 8-5 Group Dialing List 8-5 Access Code List 8-6 Specifications 8-7 Main Unit 8-7 Feeder 8-9 Index 8- - Canon imageCLASS 2300 | Reference Guide for imageCLASS 2300 - Page 185
Report Samples You can confirm the dialing addresses, machine settings and transmission/ reception results by printing reports. User's Data List This lists all the settings made in the Additional Functions menu. For how to print the list, see "Printing Reports and Lists," on p. 3-31. 8 Appendix 8-2 - Canon imageCLASS 2300 | Reference Guide for imageCLASS 2300 - Page 186
One-Touch Speed Dialing List 1 This lists the recipient addresses registered to all the one-touch speed dialing codes. For how to print the list, see "Printing Reports and Lists," on p. 3-31. Appendix Coded Speed Dialing List 1 This lists the recipient addresses registered to all the coded speed - Canon imageCLASS 2300 | Reference Guide for imageCLASS 2300 - Page 187
Appendix 8 8-4 Report Samples - Canon imageCLASS 2300 | Reference Guide for imageCLASS 2300 - Page 188
Coded Speed Dialing List 2 This lists the detailed data of the recipient addresses registered to all the coded speed dialing codes. For how to print the list, see "Printing Reports and Lists," on p. 3-31. Group Dialing List This lists the recipient addresses registered to all the group dialing - Canon imageCLASS 2300 | Reference Guide for imageCLASS 2300 - Page 189
Access Code List This lists the recipient addresses registered to all the access codes. For how to print the list, see "Printing Reports and Lists," on p. 3-31. 8 Appendix 8-6 Report Samples - Canon imageCLASS 2300 | Reference Guide for imageCLASS 2300 - Page 190
fications are subject to change without notice for product improvement or future release. Main Unit Item Specifications Name Canon imageCLASS 2300 Type Desktop Platen Stationary Photoconductive Material OPC Copying System Indirect electrostatic copying Developing System One component dry - Canon imageCLASS 2300 | Reference Guide for imageCLASS 2300 - Page 191
Item Specifications Warm-Up Time When main power is turned ON: approx. 30 seconds Activation time from Energy Saver mode: Power Consumption at Energy Saver mode: : approx. 30 seconds Power Consumption at Energy Saver mode: : approx. 10 seconds *Activation time may vary depending on the - Canon imageCLASS 2300 | Reference Guide for imageCLASS 2300 - Page 192
sheets (Transparencies, Heavy weight paper, 24 to 32 lb bond (90 to 128 g/m2)) 10 envelopes 1 sheet (Labels) Exposure Control Automatic or manual exposure control Multiple Copies 99 sheets maximum Power Source 120 V AC 10% (50/60 Hz) Max Power Consumption 940W max. Dimensions (H x W x D) 29 - Canon imageCLASS 2300 | Reference Guide for imageCLASS 2300 - Page 193
Index Numerics 10Base-T/100Base-TX port, 1-10 Symbols + key, 1-14 A Access code, 2-4 Appendix Access Code List, 3-32 Additional Functions key, 1-13, 3-8 Additional Functions Settings table, 3-2 Add. registration, 3-6 8 Adjust/Clean settings, 3-7 Common settings, 3-2 Copy settings, 3-3 - Canon imageCLASS 2300 | Reference Guide for imageCLASS 2300 - Page 194
Function keys, 1-13 G Group dialing, 2-4 Group Dialing List, 3-32 H Hook key, 1-12 I ID key, 1-13 If you cannot solve a problem, 7-28 I-Fax, 2-2, 2-3 In Use Memory lamp, 1-13 Installation, location, and handling, 1-2 Handling precautions, 1-7 Installation precautions, 1-2 Interrupt key, 1-13 J Job - Canon imageCLASS 2300 | Reference Guide for imageCLASS 2300 - Page 195
, 3-34 Speed dialing lists, 3-32 Scanning area, 1-11 Shortcut keys, 2-5 Slide guides, 2-14 Space key, 1-14 Speaker volume switch, 1-14 Special Features key, 1-13 1-19 Date and timer setting, 1-19 Installing fax driver, 1-19 Installing printer driver, 1-19 Setting up and connecting to network, 1-19 - Canon imageCLASS 2300 | Reference Guide for imageCLASS 2300 - Page 196
Appendix T Telephone line jack, 1-10 Timer settings, 3-22 Auto clear time, 3-24 Daily timer settings, 3-27 Date format, 3-29 Energy Saver mode, 3-25 Tone key, 1-12 Toner cartridge, 1-11 Toner cartridge, replacing, 6-11 Transfer key, 1-14 TTI Selector key, 1-14 U Underside of feeder, 1-11 Upper left - Canon imageCLASS 2300 | Reference Guide for imageCLASS 2300 - Page 197
-
 1
1 -
 2
2 -
 3
3 -
 4
4 -
 5
5 -
 6
6 -
 7
7 -
8
-
9
-
10
-
11
-
12
-
13
-
14
-
15
-
16
-
17
-
18
-
19
-
20
-
21
-
22
-
23
-
24
-
25
-
26
-
27
-
28
-
29
-
30
-
31
-
32
-
33
-
34
-
35
-
36
-
37
-
38
-
39
-
40
-
41
-
42
-
43
-
44
-
45
-
46
-
47
-
48
-
49
-
50
-
51
-
52
-
53
-
54
-
55
-
56
-
57
-
58
-
59
-
60
-
61
-
62
-
63
-
64
-
65
-
66
-
67
-
68
-
69
-
70
-
71
-
72
-
73
-
74
-
75
-
76
-
77
-
78
-
79
-
80
-
81
-
82
-
83
-
84
-
85
-
86
-
87
-
88
-
89
-
90
-
91
-
92
-
93
-
94
-
95
-
96
-
97
-
98
-
99
-
100
-
101
-
102
-
103
-
104
-
105
-
106
-
107
-
108
-
109
-
110
-
111
-
112
-
113
-
114
-
115
-
116
-
117
-
118
-
119
-
120
-
121
-
122
-
123
-
124
-
125
-
126
-
127
-
128
-
129
-
130
-
131
-
132
-
133
-
134
-
135
-
136
-
137
-
138
-
139
-
140
-
141
-
142
-
143
-
144
-
145
-
146
-
147
-
148
-
149
-
150
-
151
-
152
-
153
-
154
-
155
-
156
-
157
-
158
-
159
-
160
-
161
-
162
-
163
-
164
-
165
-
166
-
167
-
168
-
169
-
170
-
171
-
172
-
173
-
174
-
175
-
176
-
177
-
178
-
179
-
180
-
181
-
182
-
183
-
184
-
185
-
186
-
187
-
188
-
189
-
190
-
191
-
192
-
193
-
194
-
195
-
196
-
197
 |
 |