Cisco 10720 Configuration Guide - Page 189
Verifying Access Card Functionality, Troubleshooting the Access Card Functionality
 |
View all Cisco 10720 manuals
Add to My Manuals
Save this manual to your list of manuals |
Page 189 highlights
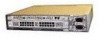
Chapter 5 Maintaining the Cisco 10720 Internet Router Removing and Installing an Access Card Figure 5-70 Attaching the Interface Cable to the Access Card PWARCSRAXASACPRPTTIKRIHTVEERRU 1 CONSOLE AUX RESET PSCOYOASWVRTEEDERRFMTAEISLMTPAUS AC OK DC OK OTF LINK/A1C00TCIAVMREB (DPGSF)AIL PCOAWREDRFAIL WODITROHNINTNSHOEERTPTROCEWAMEBORLVEOESN AC OK DC OK OTF INPUT 100-200- 50/60Hz 2-5A 57745 1 Interface cable connector Step 5 Step 6 Before connecting the optical fiber cables, clean the cable connection as well as the optical connection in the router. See the Inspection and Cleaning Procedures for Fiber-Optic Connections document. Attach the appropriate interface cables to the access card. (See Figure 5-70.) Note For additional information about SFP optical interface modules in the access card, refer to the Cisco 10720 Access Card Installation and Configuration Guide. Verifying Access Card Functionality You can verify that the access card is functioning by checking the LEDs located on the front panel of the access card. For a complete description of the access card LEDs, see the "Verifying the Cisco 10720 Internet Router LEDs" section on page 3-33. Also, refer to the Cisco 10720 Internet Router Access Card Installation and Configuration publication. Troubleshooting the Access Card Functionality The following tips will help you troubleshoot the functionality of the access card: • Verify LED status. • Ensure that the card is fully seated against the midplane. • Verify that all cables are connected properly. • Check that the power switch is turned to the on position. • Confirm that the power supply connection is secure. 78-13062-10 Cisco 10720 Internet Router Installation and Configuration Guide 5-67
-
 1
1 -
2
-
3
-
4
-
5
-
6
-
7
-
8
-
9
-
10
-
11
-
12
-
13
-
14
-
15
-
16
-
17
-
18
-
19
-
20
-
21
-
22
-
23
-
24
-
25
-
26
-
27
-
28
-
29
-
30
-
31
-
32
-
33
-
34
-
35
-
36
-
37
-
38
-
39
-
40
-
41
-
42
-
43
-
44
-
45
-
46
-
47
-
48
-
49
-
50
-
51
-
52
-
53
-
54
-
55
-
56
-
57
-
58
-
59
-
60
-
61
-
62
-
63
-
64
-
65
-
66
-
67
-
68
-
69
-
70
-
71
-
72
-
73
-
74
-
75
-
76
-
77
-
78
-
79
-
80
-
81
-
82
-
83
-
84
-
85
-
86
-
87
-
88
-
89
-
90
-
91
-
92
-
93
-
94
-
95
-
96
-
97
-
98
-
99
-
100
-
101
-
102
-
103
-
104
-
105
-
106
-
107
-
108
-
109
-
110
-
111
-
112
-
113
-
114
-
115
-
116
-
117
-
118
-
119
-
120
-
121
-
122
-
123
-
124
-
125
-
126
-
127
-
128
-
129
-
130
-
131
-
132
-
133
-
134
-
135
-
136
-
137
-
138
-
139
-
140
-
141
-
142
-
143
-
144
-
145
-
146
-
147
-
148
-
149
-
150
-
151
-
152
-
153
-
154
-
155
-
156
-
157
-
158
-
159
-
160
-
161
-
162
-
163
-
164
-
165
-
166
-
167
-
168
-
169
-
170
-
171
-
172
-
173
-
174
-
175
-
176
-
177
-
178
-
179
-
180
-
181
-
182
-
183
-
 184
184 -
 185
185 -
 186
186 -
 187
187 -
 188
188 -
 189
189 -
 190
190 -
 191
191 -
 192
192 -
 193
193 -
 194
194 -
195
-
196
-
197
-
198
-
199
-
200
-
201
-
202
 |
 |
