Cisco 10720 Configuration Guide - Page 73
Installing a Latch SFP, Installing the Bale Clasp SFP Module in the Access Card
 |
View all Cisco 10720 manuals
Add to My Manuals
Save this manual to your list of manuals |
Page 73 highlights
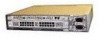
Chapter 3 Installing the Cisco 10720 Internet Router Connecting Ethernet Ports on the Access Card Figure 19 Installing the Bale Clasp SFP Module in the Access Card 10720-GE-FE-TX 1 LIENRKROARC (TIRV)E (G) 70188 10003B0-a1s2e9-9L-X01 2 1 4-Port Gigabit Ethernet 8-Port 10/100BASE-TX access card 2 SFP module Caution Close the bale lever on the SFP module prior to inserting the SFP module into the port cage to ensure proper engagement. The bale lever is considered closed when it is in the upright position. See Figure 3-14. If the bale lever is left open during insertion, there is a possibity that the SFP module may become stuck in the port cage. To remove the SFP module, use a small flathead screwdriver to gently lift the cage tongue (located underneath the SFP module) away from the SFP module body, thus disengaging the SFP module. The SFP module is not damaged by this operation. Step 3 Step 4 Close the bale clasp in the upward direction before inserting the SFP module. Insert the SFP into the appropriate Gigabit Ethernet slot and gently push on it until the module snaps into the slot tightly. (See Figure 19.) Installing a Latch SFP To install a latch SFP module in the access card, perform the following steps: Step 1 Step 2 Attach an ESD-preventive strap to your wrist, and to the router or to a bare metal surface. (See the "Preventing Electrostatic Discharge" section on page 2-3.) Hold the SFP module with the hardware label facing up, as illustrated in Figure 20. Caution The SFP module must be inserted with the hardware label facing up to avoiding damaging the SFP module or the access card. Step 3 Insert the SFP into the appropriate Gigabit Ethernet slot and gently push on it until the module snaps into the slot tightly. (See Figure 20.) 78-13062-10 Cisco 10720 Internet Router Installation and Configuration Guide 3-23
-
 1
1 -
2
-
3
-
4
-
5
-
6
-
7
-
8
-
9
-
10
-
11
-
12
-
13
-
14
-
15
-
16
-
17
-
18
-
19
-
20
-
21
-
22
-
23
-
24
-
25
-
26
-
27
-
28
-
29
-
30
-
31
-
32
-
33
-
34
-
35
-
36
-
37
-
38
-
39
-
40
-
41
-
42
-
43
-
44
-
45
-
46
-
47
-
48
-
49
-
50
-
51
-
52
-
53
-
54
-
55
-
56
-
57
-
58
-
59
-
60
-
61
-
62
-
63
-
64
-
65
-
66
-
67
-
 68
68 -
 69
69 -
 70
70 -
 71
71 -
 72
72 -
 73
73 -
 74
74 -
 75
75 -
 76
76 -
 77
77 -
 78
78 -
79
-
80
-
81
-
82
-
83
-
84
-
85
-
86
-
87
-
88
-
89
-
90
-
91
-
92
-
93
-
94
-
95
-
96
-
97
-
98
-
99
-
100
-
101
-
102
-
103
-
104
-
105
-
106
-
107
-
108
-
109
-
110
-
111
-
112
-
113
-
114
-
115
-
116
-
117
-
118
-
119
-
120
-
121
-
122
-
123
-
124
-
125
-
126
-
127
-
128
-
129
-
130
-
131
-
132
-
133
-
134
-
135
-
136
-
137
-
138
-
139
-
140
-
141
-
142
-
143
-
144
-
145
-
146
-
147
-
148
-
149
-
150
-
151
-
152
-
153
-
154
-
155
-
156
-
157
-
158
-
159
-
160
-
161
-
162
-
163
-
164
-
165
-
166
-
167
-
168
-
169
-
170
-
171
-
172
-
173
-
174
-
175
-
176
-
177
-
178
-
179
-
180
-
181
-
182
-
183
-
184
-
185
-
186
-
187
-
188
-
189
-
190
-
191
-
192
-
193
-
194
-
195
-
196
-
197
-
198
-
199
-
200
-
201
-
202
 |
 |
