Cisco 10720 Configuration Guide - Page 72
Connecting Ethernet Ports on the Access Card, Installing a Bale Clasp SFP
 |
View all Cisco 10720 manuals
Add to My Manuals
Save this manual to your list of manuals |
Page 72 highlights
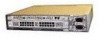
Connecting Ethernet Ports on the Access Card Chapter 3 Installing the Cisco 10720 Internet Router Connecting Ethernet Ports on the Access Card Install the cable-management tray before you connect the copper or optical fiber cable to a Fast Ethernet port or to an SFP module on the Gigabit Ethernet port on the access card. For more information, see the "Removing the Cable-Management System" section on page 5-68. For cable and connection specifications, refer to the Cisco 10720 Internet Router Access Card Installation and Configuration publication. See Figure 3-21 for an example of a typical cable used for the access card. To connect the interface cables to the access card ports, perform the following: Step 1 Step 2 Attach an ESD-preventive wrist strap to your wrist, and to the router or to a bare metal surface. See the "Preventing Electrostatic Discharge" section on page 2-3. Verify that the router is turned off and disconnected from its power source Installing a small form-factor pluggable Gigabit Ethernet (GE) (SFP) module in the access card GE port is described in the following sections: • Installing a Bale Clasp SFP, page 3-22 • Installing a Latch SFP, page 3-23 Note You do not need to power down the router before you install an SFP. The router may remain powered up during this procedure. Note The Fast Ethernet ports are suitable for connection to intra-building wiring only, as per GR-1089, Issue 3. Installing a Bale Clasp SFP To install a bale clasp GE SFP module in the access card, perform the following steps: Step 1 Step 2 Attach an ESD-preventive strap to your wrist, and to the router or to a bare metal surface. (See the "Preventing Electrostatic Discharge" section on page 2-3.) Hold the SFP module with the hardware label facing up, as illustrated in Figure 19. Caution The SFP module must be inserted with the hardware label facing up to avoiding damaging the SFP module or the access card. 3-22 Cisco 10720 Internet Router Installation and Configuration Guide 78-13062-10
-
 1
1 -
2
-
3
-
4
-
5
-
6
-
7
-
8
-
9
-
10
-
11
-
12
-
13
-
14
-
15
-
16
-
17
-
18
-
19
-
20
-
21
-
22
-
23
-
24
-
25
-
26
-
27
-
28
-
29
-
30
-
31
-
32
-
33
-
34
-
35
-
36
-
37
-
38
-
39
-
40
-
41
-
42
-
43
-
44
-
45
-
46
-
47
-
48
-
49
-
50
-
51
-
52
-
53
-
54
-
55
-
56
-
57
-
58
-
59
-
60
-
61
-
62
-
63
-
64
-
65
-
66
-
 67
67 -
 68
68 -
 69
69 -
 70
70 -
 71
71 -
 72
72 -
 73
73 -
 74
74 -
 75
75 -
 76
76 -
 77
77 -
78
-
79
-
80
-
81
-
82
-
83
-
84
-
85
-
86
-
87
-
88
-
89
-
90
-
91
-
92
-
93
-
94
-
95
-
96
-
97
-
98
-
99
-
100
-
101
-
102
-
103
-
104
-
105
-
106
-
107
-
108
-
109
-
110
-
111
-
112
-
113
-
114
-
115
-
116
-
117
-
118
-
119
-
120
-
121
-
122
-
123
-
124
-
125
-
126
-
127
-
128
-
129
-
130
-
131
-
132
-
133
-
134
-
135
-
136
-
137
-
138
-
139
-
140
-
141
-
142
-
143
-
144
-
145
-
146
-
147
-
148
-
149
-
150
-
151
-
152
-
153
-
154
-
155
-
156
-
157
-
158
-
159
-
160
-
161
-
162
-
163
-
164
-
165
-
166
-
167
-
168
-
169
-
170
-
171
-
172
-
173
-
174
-
175
-
176
-
177
-
178
-
179
-
180
-
181
-
182
-
183
-
184
-
185
-
186
-
187
-
188
-
189
-
190
-
191
-
192
-
193
-
194
-
195
-
196
-
197
-
198
-
199
-
200
-
201
-
202
 |
 |
