Cisco RV042 Administration Guide
Cisco RV042 - Small Business Dual WAN VPN Router Manual
 |
UPC - 745883560530
View all Cisco RV042 manuals
Add to My Manuals
Save this manual to your list of manuals |
Cisco RV042 manual content summary:
- Cisco RV042 | Administration Guide - Page 1
ADMINISTRATION GUIDE Cisco Small Business RV0xx Series Routers RV042 Dual WAN VPN Router RV042G Gigabit Dual WAN VPN Router RV082 Dual WAN VPN Router RV016 Multi-WAN VPN Router - Cisco RV042 | Administration Guide - Page 2
logo are trademarks or registered trademarks of Cisco and/or its affiliates in the U.S. and other countries. To view a list of Cisco trademarks, go to this URL: www.cisco.com/go/trademarks. Third-party trademarks mentioned are the property of their respective owners. The use of the word partner - Cisco RV042 | Administration Guide - Page 3
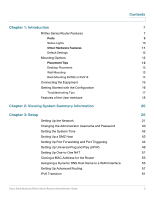
7 Ports 9 Status Lights 10 Other Hardware Features 11 Default Settings 12 Mounting Options 12 Placement Tips 12 Desktop Placement 12 Wall Mounting 13 Rack Mounting RV082 or RV016 14 Connecting the Equipment 15 Getting Started with the Configuration 16 Troubleshooting Tips - Cisco RV042 | Administration Guide - Page 4
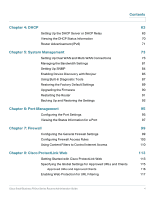
(IPv6) Chapter 5: System Management Setting Up Dual WAN and Multi-WAN Connections Managing the Bandwidth Settings Setting Up SNMP Enabling Device Discovery with Bonjour Using Built-In Diagnostic Tools Restoring the Factory Default Settings Upgrading the Firmware Restarting the Router Backing Up and - Cisco RV042 | Administration Guide - Page 5
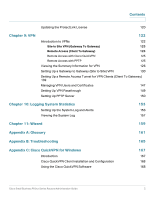
Remote Access (Client To Gateway) 123 Remote Access with Cisco QuickVPN 125 Remote Access with PPTP 125 Viewing the Summary Information for VPN 126 Setting Up a Gateway to Gateway (Site to Site) VPN 130 Setting Up a Remote Access Tunnel for VPN Clients (Client To Gateway) 139 Managing VPN - Cisco RV042 | Administration Guide - Page 6
F: Bandwidth Management Creation of New Services Creation of New Bandwidth Management Rules 186 186 187 Appendix G: Specifications RV042 RV042G Cisco RV082 Cisco RV016 189 189 191 194 196 Appendix H: Where to Go From Here 199 Cisco Small Business RV0xx Series Routers Administration Guide 6 - Cisco RV042 | Administration Guide - Page 7
Started with the Configuration, page 16 • Features of the User Interface, page 18 RV0xx Series Router Features Cisco RV0xx Series dual WAN and multi-WAN VPN routers offer highly secure, high-performance, reliable connectivity. All of these routers can support a second Internet connection to ensure - Cisco RV042 | Administration Guide - Page 8
RV042 RV082 Ports and Status Lights DIAG System Internet DMZ Internet DMZ Mode 1234 5678 1 2 3 4 5 6 7 8 DMZ/Internet Internet Cisco Small Business RV082 10/100 16-Port VPN Router RV016 Ports and Status Lights DIAG System 1 LAN/Act 9 LAN/Act Dual-Function Ports 7 Internet - Cisco RV042 | Administration Guide - Page 9
3-7 Dual Function Ports (RV016) Use these numbered ports as LAN ports (numbered 9-13) or configure them for use as Internet ports (numbered 3-7). The status is shown on the corresponding status lights: LAN/Act 9-13 or Internet/Act 3-7. Cisco Small Business RV0xx Series Routers Administration Guide - Cisco RV042 | Administration Guide - Page 10
to the port. Flashing-There is network activity over the port. Internet/Act 3-7 (RV016) Lit if the port is configured as an Internet port. Steady-A device is connected to the port. Flashing-There is network activity over the port. Cisco Small Business RV0xx Series Routers Administration Guide 10 - Cisco RV042 | Administration Guide - Page 11
restore connectivity: If the router is having problems connecting to the Internet, use the tip of a pen to press and hold the Reset button for one second. • To restore factory default settings: If you are experiencing extreme problems with the router and have tried all other troubleshooting measures - Cisco RV042 | Administration Guide - Page 12
Introduction Mounting Options 1 Default Settings Parameter Username Password LAN IP DHCP Range Netmask Default Value admin admin 192.168.1.1 192.168.1.100 to 149 255.255.255.0 Mounting Options Placement Tips • Ambient Temperature-To prevent the router from overheating, do not operate it in an - Cisco RV042 | Administration Guide - Page 13
For safety, ensure that the heat dissipation holes are facing sideways. STEP 1 Drill two pilot holes into the surface. • RV042 and RV042G: 58 mm apart • RV082 and RV016: 94 mm apart Cisco Small Business RV0xx Series Routers Administration Guide 13 - Cisco RV042 | Administration Guide - Page 14
Internet Cisco Small BusRiVne08s2s 16-Port VPN R10o/u1t0e0r DIAG System Internet InDteMrnZet MDoMdZe 1 2 3 5 4 6 7 8 1 2 3 4 5 6 7 8 DMZ/Internet Internet Cisco Small BusRiVne0s82s 16-Port VPN R10o/u1t0e0r 278825 Cisco Small Business RV0xx Series Routers Administration Guide 14 - Cisco RV042 | Administration Guide - Page 15
DMZ/Internet Internet Cisco Small Business RV082 10/100 16-Port VPN Router • RV016: Connect an Ethernet cable from the broadband network device to the Internet 1 port of the router. RV016 Internet 1 Port DIAG System 1 LAN/Act 9 LAN/Act Dual-Function Ports 7 Internet/Act 2345678 10 11 12 13 - Cisco RV042 | Administration Guide - Page 16
configuration utility, you need a PC with Internet Explorer (version 6 and higher), Firefox, or Safari (for Mac). STEP 3 In the address bar, enter the default IP address of the router: 192.168.1.1 STEP 4 When the login page appears, enter the default user name admin and the default password admin - Cisco RV042 | Administration Guide - Page 17
password to prevent unauthorized access to your router. For more information about all settings, refer to the online Help and the Cisco Small Business RV0xx Series VPN Router Administration Guide. Troubleshooting Tips If you have trouble connecting to the Internet or the web-based configuration - Cisco RV042 | Administration Guide - Page 18
the left navigation pane. Click a button to view more options. Click an option to open a configuration page. The selected page appears in the main window of the configuration utility. 1 2 1. Navigation tree 2. Configuration page Cisco Small Business RV0xx Series Routers Administration Guide 18 - Cisco RV042 | Administration Guide - Page 19
the basic settings for your Internet connection and DMZ. Follow the on-screen instructions. • Access Rule Setup: Click Launch Now to configure access rules for the WAN, LAN, and DMZ. Follow the on-screen instructions. Saving the Settings Your settings on a configuration page are not saved until you - Cisco RV042 | Administration Guide - Page 20
• System Information, page 21 • Cisco ProtectLink Web, page 21 • Configuration, page 22 • Port Statistics, page 22 • WAN Status, page 24 • Firewall Setting Status, page 25 • VPN Setting Status, page 25 • Log Setting Status, page 25 Cisco Small Business RV0xx Series Routers Administration Guide 20 - Cisco RV042 | Administration Guide - Page 21
Web service and wish to activate it. You will be redirected to the Cisco ProtectLink Web website. Follow the on-screen instructions. NOTE If the Cisco ProtectLink Web options are not displayed on the System Summary page, you can upgrade the router's firmware to enable this feature. Cisco Small - Cisco RV042 | Administration Guide - Page 22
If you need help to configure the router, click Setup Wizard. You can then use these wizards: • Basic Setup Wizard: Use this wizard to set up your Internet connection. • Access Rule Setup Wizard: Use this Wizard to set up the security policy for your VPN. Port Statistics This table shows the - Cisco RV042 | Administration Guide - Page 23
The current activity on the port, either Port Enabled, Port Disabled, or Port Connected. - Priority: The priority setting, High or Normal. - Speed Status: The speed, 10Mbps or 100Mbps. - Duplex Status: The duplex mode, Half or Full. Cisco Small Business RV0xx Series Routers Administration Guide 23 - Cisco RV042 | Administration Guide - Page 24
Cisco RV016, additional WAN interfaces may be configured. Use the tabs to view the IPv4 and IPv6 information. NOTE The IPv6 tab is available if Dual-Stack IP is enabled on the Setup > Network page. • WAN information: - IP Address: The current public IP address for this interface. - Default Gateway - Cisco RV042 | Administration Guide - Page 25
of Service): The status of this feature, On (green) or Off (red). • Block WAN Request: The status of this feature, On (green) or Off (red). • Remote Management: The status of this feature, On (green) or Off (red). • Access Rule: The number of access rules that have been set. VPN Setting Status - Cisco RV042 | Administration Guide - Page 26
Username and Password, page 40 • Setting the System Time, page 42 • Setting Up a DMZ Host, page 43 • Setting Up Port Forwarding and Port Triggering, page 44 • Setting Up Universal Plug and Play (UPnP), page 48 • Setting Up One-to-One NAT, page 51 • Cloning a MAC Address for the Router, page 53 - Cisco RV042 | Administration Guide - Page 27
27 • LAN Setting (device IP address and subnets), page 28 • WAN Setting (Internet connection), page 31 • DMZ Setting, page 32 Host Name and Domain Name Some ISPs require that you assign a host name and domain name to identify your router on the ISP network. Default values are provided, but you can - Cisco RV042 | Administration Guide - Page 28
on this page, you can configure both IPv4 and IPv6 addresses for LAN, WAN, and DMZ settings on this page. LAN Setting (device IP address and subnets) The default LAN settings should be sufficient for most small businesses, but if needed, you can change the LAN IP address of the router and enable - Cisco RV042 | Administration Guide - Page 29
multiple subnets (IPv4 only) Typically, a Cisco RV0xx Series router is used as an access router, with a single LAN subnet. By default, the firewall is pre-configured to deny LAN access if the source IP address is on a different subnet than the router's LAN IP address. However, you can enable - Cisco RV042 | Administration Guide - Page 30
window, add or edit entries as needed. • To add a new subnet: Enter a LAN IP Address and a Subnet Mask. Click Add to list. The IP address and subnet mask appear in the list. Repeat this step as needed to add other subnets. Examples: - Two subnets: If the router has a LAN IP then click Update. If you - Cisco RV042 | Administration Guide - Page 31
to undo them. WAN Setting (Internet connection) The router is pre-configured with default settings that are sufficient for many networks. However, special settings may be required by your ISP (Internet Service Provider) or broadband (DSL or cable) carrier. Refer to the setup information provided by - Cisco RV042 | Administration Guide - Page 32
the DMZ settings, as described below. If you want to use the port as a WAN port instead, uncheck the box, and be sure to configure the WAN settings on the Dual WAN page. (See Setting Up Dual WAN and Multi-WAN Connections, page 73.) Cisco Small Business RV0xx Series Routers Administration Guide 32 - Cisco RV042 | Administration Guide - Page 33
the Edit DMZ Connection page. For more information, see Editing a DMZ Connection, page 38. If you have not saved your settings, a warning appears. Click OK to save your settings, or click Cancel to close the window without saving. Cisco Small Business RV0xx Series Routers Administration Guide 33 - Cisco RV042 | Administration Guide - Page 34
ISP dynamically assigns an IP address. For example, most cable modem subscribers use this connection type. Your ISP will assign the settings, including the DNS server IP address. If you want to specify a DNS server, check the Use Cisco Small Business RV0xx Series Routers Administration Guide 34 - Cisco RV042 | Administration Guide - Page 35
option keeps your connection active indefinitely, even when it sits idle. If you enable this feature, also enter the Redial Period to specify how often the router verifies your Internet connection. The default period is 30 seconds. Cisco Small Business RV0xx Series Routers Administration Guide 35 - Cisco RV042 | Administration Guide - Page 36
ISP. PPTP is a service used in Europe, Israel, and other countries. Specify WAN IP Address: The external IP address that your ISP assigned to your account. Subnet Mask: The subnet mask specified by your ISP. Default Gateway Address: The IP address of the default gateway. Username and Password: Enter - Cisco RV042 | Administration Guide - Page 37
the MTU (Maximum Transmission Unit) in bytes (see the Glossary). Unless a change is required by your ISP, Cisco recommends that you use the default setting, Auto. To specify another value, select Manual, and then enter the size in bytes. • Enabled DHCP-PD: Check this box to enable the DHCPv6 client - Cisco RV042 | Administration Guide - Page 38
subnet than the WAN (default setting). Enter an IP address and subnet mask for the DMZ. • Range: Choose this option to place the DMZ on the same subnet as the WAN. Enter the range of IP addresses to reserve for the DMZ port. Cisco Small Business RV0xx Series Routers Administration Guide 38 - Cisco RV042 | Administration Guide - Page 39
following information: • Specify DMZ IPv6 Address: Enter an IPv6 address for the DMZ. Replace the default double colon (::) with a valid IPv6 address for your DMZ. • Prefix Length: Enter the prefix length. The default value is 64. Cisco Small Business RV0xx Series Routers Administration Guide 39 - Cisco RV042 | Administration Guide - Page 40
forgotten, you have to reset the router to its factory default settings. Doing so will remove all of your configuration changes. NOTE • You must change the administrator password if you enable remote access on the Firewall > General page. • Before navigating away from this page, click Save to save - Cisco RV042 | Administration Guide - Page 41
) to green (strong). • Password Aging Enforcement: Choose Disable if you do not want the password to expire. Choose Change the password after if you want the password to expire after the specified number of Days (default 180). Cisco Small Business RV0xx Series Routers Administration Guide 41 - Cisco RV042 | Administration Guide - Page 42
the Month and Day when daylight savings time begins. Use mm.dd format, such as 6.25 for June 25. Also enter the End Date in the same format. - NTP Server: Enter the URL or IP address of the NTP server. The default is time.nist.gov. Cisco Small Business RV0xx Series Routers Administration Guide 42 - Cisco RV042 | Administration Guide - Page 43
tree. Enter the IP address of the network device that you want to use as a DMZ host. NOTE Before navigating away from this page, click Save to save your settings, or click Cancel to undo them. Any unsaved changes are abandoned. Cisco Small Business RV0xx Series Routers Administration Guide 43 - Cisco RV042 | Administration Guide - Page 44
IP address in order to properly run an Internet server.) For added security, Internet users will be able to communicate with the server, but they will not actually be connected. The packets will simply be forwarded through the router. Cisco Small Business RV0xx Series Routers Administration Guide - Cisco RV042 | Administration Guide - Page 45
while clicking the entry. • To view the port range table: Click View, near the bottom of the page. Choose Port Range Forwarding or Port Triggering. To update the display, click Refresh. To return to the Forwarding page, click Close. Cisco Small Business RV0xx Series Routers Administration Guide 45 - Cisco RV042 | Administration Guide - Page 46
Setup Setting Up Port Forwarding and Port Triggering 3 Adding a service To add a new entry to the Service list, or to change an entry that you created previously, click Service Management. If the web browser displays a warning about the pop-up window, allow the blocked content. In the Service - Cisco RV042 | Administration Guide - Page 47
Setup Setting Up Port Forwarding and Port Triggering 3 • To modify a service you created: Click the service in the list. The information appears in the text fields. Make the changes, and then click Update. If you do not need to make changes, you can click Add New to deselect the service and clear - Cisco RV042 | Administration Guide - Page 48
Range Forwarding or Port Triggering. To update the display, click Refresh. To return to the Forwarding page, click Close. Setting Up Universal Plug and Play (UPnP) Use the Setup > UPnP page to enable Universal Plug and Play (UPnP). This feature allows Windows to automatically configure the router to - Cisco RV042 | Administration Guide - Page 49
Refresh to update the data, or click Close to close the pop-up window. • To view the UPnP forwarding table: Click View, near the bottom of the page. To update the display, click Refresh. To return to the UPnP page, click Close. Cisco Small Business RV0xx Series Routers Administration Guide 49 - Cisco RV042 | Administration Guide - Page 50
- Protocol: Choose the required protocol. Refer to the documentation for the service that you are hosting. - Port Range: Enter the required port range. • To add another new service: Enter the information, and then click Add to list. Cisco Small Business RV0xx Series Routers Administration Guide 50 - Cisco RV042 | Administration Guide - Page 51
). The first internal address is mapped to the first external address, the second IP internal IP address is mapped to the second external address, and so on. To open this page: Click Setup > One-to-One NAT in the navigation pane. Cisco Small Business RV0xx Series Routers Administration Guide 51 - Cisco RV042 | Administration Guide - Page 52
Before navigating away from this page, click Save to save router's LAN IP address in this range. - Public Range Begin: Enter the starting IP address of the public IP address range provided by the ISP. Do not include the router's WAN IP Cisco Small Business RV0xx Series Routers Administration Guide 52 - Cisco RV042 | Administration Guide - Page 53
Click Setup > MAC Address Clone in the navigation tree. This page displays the current settings. Click the Edit icon to display the Edit MAC Address Clone page. For more information, see Editing the MAC Address Clone Settings, page 54. Cisco Small Business RV0xx Series Routers Administration Guide - Cisco RV042 | Administration Guide - Page 54
that you registered with your ISP. • MAC Address from this PC: To clone the MAC address of the computer you are currently using to configure the router, click this radio button. The MAC address of your PC is displayed automatically. Cisco Small Business RV0xx Series Routers Administration Guide 54 - Cisco RV042 | Administration Guide - Page 55
in your LAN. Use the Setup > Dynamic DNS page to configure the WAN interfaces with your Dynamic DNS information. Before configuring Dynamic DNS on the router, you need to visit www.dyndns.org and register a domain name. (The service is provided by DynDNS.org). For users in China, visit www.3322 - Cisco RV042 | Administration Guide - Page 56
service. Click the Sign up FREE link, and then continue through all of the steps. • Password: Enter the password read-only information appears: • Internet IP Address: The current WAN IP address for the interface. Because it service. Cisco Small Business RV0xx Series Routers Administration Guide 56 - Cisco RV042 | Administration Guide - Page 57
, page 58 - Configuring Static Routing, page 59 • To view current data: Click View near the bottom of the page. The Routing Table Entry List appears. You can click Refresh to update the data, or click Close to close the pop-up window. Cisco Small Business RV0xx Series Routers Administration Guide - Cisco RV042 | Administration Guide - Page 58
to the Internet. In Router mode, Internet connectivity is available only if you have another router that functions as the Gateway. Since firewall protection is provided by the gateway router, disable this router's firewall. See Configuring the General Firewall Settings, page 99. • RIP: Routing - Cisco RV042 | Administration Guide - Page 59
only): Enter the prefix length. - Default Gateway: Enter the IP address of the router of the network, for which this static route is created. For example, if this network is connected to the local router's LAN port through another router, use the WAN IP address of that router. - Hop Count: Enter the - Cisco RV042 | Administration Guide - Page 60
press the Ctrl key while clicking the entry. • To view current data: Click View near the bottom of the page. The Routing Table Entry List appears. You can click Refresh to update the data, or click Close to close the pop-up window. Cisco Small Business RV0xx Series Routers Administration Guide 60 - Cisco RV042 | Administration Guide - Page 61
. • After verifying the tunnel as described above, enable the firewall and add access rules on the Firewall > Access Rules page. For example, add a rule to allow all traffic through the WAN interface where the source is a single IP Cisco Small Business RV0xx Series Routers Administration Guide 61 - Cisco RV042 | Administration Guide - Page 62
or a range of addresses on the remote network. • Complete the required tasks on the router at the other end of the 6to4 tunnel. NOTE For detailed application notes, see the documentation links in Appendix H, "Where to Go From Here." Cisco Small Business RV0xx Series Routers Administration Guide 62 - Cisco RV042 | Administration Guide - Page 63
IP addresses manually, you can disable the DHCP feature and enable DHCP Relay. For more information, see Enabling DHCP Server and DHCP Relay, page 64. NOTE DHCP Relay is available only on the IPv4 tab. DHCPv6 Relay is not available. Cisco Small Business RV0xx Series Routers Administration Guide - Cisco RV042 | Administration Guide - Page 64
. Note: The IPv6 tab is available only if you enabled Dual-Stack IP on the Network > Setup page. Enter the following settings: • Enable DHCP server: Check the box to allow the router to dynamically assign IP addresses to up to 50 connected devices. Uncheck the box if you have another DHCP server on - Cisco RV042 | Administration Guide - Page 65
the router, it automatically includes the information of the WINS server to support NetBIOS. • If a client has a static IP address, then the IP address, subnet mask, default gateway address, and DNS server settings must be configured on the Internet Protocol (TCP/IP) page of the Windows operating - Cisco RV042 | Administration Guide - Page 66
configured to use a static IP address. For example, on a Windows computer, open the Local Area Connection Properties, select Internet Protocol (TCP/IP), and then click the Properties button. Choose Use the following IP address, and enter the IP address, subnet mask, and default gateway (the router - Cisco RV042 | Administration Guide - Page 67
Static IP list, or click Close to close the pop-up window without IP addresses by entering devices manually In the Static IP IP address to this device. • To add another new entry: Enter the information, and then click Add to list. Cisco Small Business RV0xx Series Routers Administration Guide - Cisco RV042 | Administration Guide - Page 68
that are not included in the Static IP list. This feature prevents unknown devices from accessing your network. Uncheck the box to allow access by any connected device that is configured with an IP address in the correct range. Cisco Small Business RV0xx Series Routers Administration Guide 68 - Cisco RV042 | Administration Guide - Page 69
Setup > Network page, WAN Setting section. If you enable this feature, you also must configure the client devices to use the router as the DNS server. By default, Windows computers are set to obtain a DNS server address automatically, from the WAN settings. You need to change the TCP/IP connection - Cisco RV042 | Administration Guide - Page 70
to view the clients. Note: The IPv6 tab is available only if you enabled Dual-Stack IP on the Network > Setup page. • Client Host Name: The name assigned to a client host. • IP Address: The dynamic IP address assigned to a client. Cisco Small Business RV0xx Series Routers Administration Guide 70 - Cisco RV042 | Administration Guide - Page 71
user can remain connected to the router with a dynamic IP address. • Delete (IPv4 only): Click the icon to delete the lease and disconnect the client. Router Advertisement (IPv6) Use the DHCP > Router Advertisement page to enable the RADVD (Router Advertisement Daemon) for IPv6 auto-configuration - Cisco RV042 | Administration Guide - Page 72
hosts have access to multiple routers. This metric helps a host to choose an appropriate router. If two routers are reachable, the one with the higher preference will be chosen. These values are ignored by hosts that do not implement router preference. The default setting is High. • MTU: Enter the - Cisco RV042 | Administration Guide - Page 73
, page 87 • Restoring the Factory Default Settings, page 89 • Upgrading the Firmware, page 90 • Restarting the Router, page 91 • Backing Up and Restoring the Settings, page 92 Setting Up Dual WAN and Multi-WAN Connections Use the System Management > Dual WAN page (or Multi-WAN on RV016) to configure - Cisco RV042 | Administration Guide - Page 74
System Management Setting Up Dual WAN and Multi-WAN Connections Mode - Cisco RV042, RV042G, and RV082 5 You can configure up to two Internet connections by using the Internet port and the DMZ/Internet port. You can choose one of the following modes to manage your WAN connections: • Smart Link - Cisco RV042 | Administration Guide - Page 75
each service, IP address, or range of IP addresses. NOTE: The Router reserves at least one WAN port for non-IP Group users, so WAN1 will always be set to Intelligent Balancer (Auto Mode). Protocol binding is not available for WAN1. Cisco Small Business RV0xx Series Routers Administration Guide 75 - Cisco RV042 | Administration Guide - Page 76
System Management Setting Up Dual WAN and Multi-WAN Connections 5 Interface Setting Click the Edit icon for the interface that you want to set up. Then enter the settings on the Edit Dual WAN settings page. For more information, see Editing the Dual WAN and Multi-WAN Settings, page 77. NOTE If - Cisco RV042 | Administration Guide - Page 77
settings as specified by your Internet Service Provider. If the bandwidth exceeds the specified number, then the router uses another WAN interface for the next connection. • Upstream: Enter the maximum upstream bandwidth provided by your ISP. The default is 512 kbit/sec. • Downstream: Enter - Cisco RV042 | Administration Guide - Page 78
determine network connectivity. For an ISP host or a remote host, enter the IP address. For a DNS Lookup host, enter a host name or domain name. Uncheck a box if you do not want to ping this device for network service detection. Protocol Binding (for Cisco RV016 only, when Load Balancer is selected - Cisco RV042 | Administration Guide - Page 79
have up to 30 services in the list. - Service Name: Enter a short description. - Protocol: Choose the required protocol. Refer to the documentation for the service that you are hosting. - Port Range: Enter the required port range. Cisco Small Business RV0xx Series Routers Administration Guide 79 - Cisco RV042 | Administration Guide - Page 80
changes, and then click Update. If you do not need to make changes, you can click Add New to de-select the service and clear the text fields. - To delete a service from the list: Click down the Ctrl key while clicking. Click Delete. Cisco Small Business RV0xx Series Routers Administration Guide 80 - Cisco RV042 | Administration Guide - Page 81
and to configure Quality of Service (QoS) settings for various types of traffic. For example, you can enter bandwidth rules to ensure quality for voice services. For a detailed example, see Appendix F, "Bandwidth Management." To open this page: Click System Management > Bandwidth Management in the - Cisco RV042 | Administration Guide - Page 82
100 services. - Service: Select a service to manage. If a service is not listed, you can click Service Management to add a service. For more information, see Adding a service, page 83. - IP (for Rate Control only): Enter the IP . Cisco Small Business RV0xx Series Routers Administration Guide 82 - Cisco RV042 | Administration Guide - Page 83
- Protocol: Choose the required protocol. Refer to the documentation for the service that you are hosting. - Port Range: Enter the required port range. • To add another new service: Enter the information, and then click Add to list. Cisco Small Business RV0xx Series Routers Administration Guide 83 - Cisco RV042 | Administration Guide - Page 84
WAN link events. To open this page: Click System Management > SNMP in the navigation tree. NOTE Before navigating away from this page, click Save to save your settings, or click Cancel to undo them. Any unsaved changes are abandoned. Cisco Small Business RV0xx Series Routers Administration Guide - Cisco RV042 | Administration Guide - Page 85
alphanumeric characters. The default is public. • Send SNMP Trap to (For IPv4): Enter the IP address or domain name for the server where you are running your SNMP management software. • Send SNMP Trap to (For IPv6): When Dual-Stack IP is enabled on the Network > Setup page, this field is available - Cisco RV042 | Administration Guide - Page 86
display basic information, such as serial numbers and IP addresses, to aid in the configuration and deployment. For more information and to download the utility, please visit www.cisco.com/go/findit. To open this page: Click System Management > Discovery-Bonjour in the navigation tree. Check the - Cisco RV042 | Administration Guide - Page 87
such as http://. Then click Go. If the test is successful, the IP address of the host appears. NOTE This tool requires that the router can connect to a valid DNS server, based on the WAN interface settings (Setup > Network page). Cisco Small Business RV0xx Series Routers Administration Guide 87 - Cisco RV042 | Administration Guide - Page 88
test connectivity to a specified host by entering the IP address. If you do not know the IP address, use the DNS Lookup tool to learn it. The ping test shows if the router is able to send a packet to a remote host and receive a response. If users on the LAN are having problems accessing services on - Cisco RV042 | Administration Guide - Page 89
the settings and preferences that you have configured. To open this page: Click System Management > Factory Default in the navigation tree. STEP 1 Click Return to Factory Default Setting if you want to restore the router to its factory default settings. STEP 2 When the confirmation message appears - Cisco RV042 | Administration Guide - Page 90
Upgrading the Firmware 5 Upgrading the Firmware Use the System Management > Firmware Upgrade page to download the latest firmware for your router and to install it. WARNING If you choose an earlier firmware version, the factory default settings will be used. All custom settings. WARNING Upgrading - Cisco RV042 | Administration Guide - Page 91
latest router firmware and to download the file. Extract the file on your computer. Then perform the firmware upgrade as described above. Restarting the Router If you need to restart the router, Cisco recommends that you use the Restart tool on this page. When you restart from the System Management - Cisco RV042 | Administration Guide - Page 92
Use the System Management > Backup and Restore page to import, export, and copy your configuration files. The router has two configuration files: the startup and the mirror. The Startup file is the configuration file that the router loads when it boots up. The router automatically copies the - Cisco RV042 | Administration Guide - Page 93
making your changes. If you are dissatisfied with your changes, copy the mirror to the startup to restore the settings. NOTE • The startup configuration file is automatically copied to the mirror configuration file every 24 hours. Cisco Small Business RV0xx Series Routers Administration Guide 93 - Cisco RV042 | Administration Guide - Page 94
immediately, with no option to cancel. After a short time, the router restarts. If your PC is unable to immediately reload the login page, re-enter the IP address for the configuration utility in the Address bar. Then log in. Cisco Small Business RV0xx Series Routers Administration Guide 94 - Cisco RV042 | Administration Guide - Page 95
network. To open this page: Click Port Management > Port Setup in the navigation tree. NOTE Before navigating away from this page, click Save to save your settings, or click Cancel to undo them. Any unsaved changes are abandoned. Cisco Small Business RV0xx Series Routers Administration Guide 95 - Cisco RV042 | Administration Guide - Page 96
Port Management Configuring the Port Settings 6 For Cisco RV016 only, choose the number of WAN ports from the drop-down list, or keep the default number, 2. If you change the number, save your settings. (You can also change the number of WAN ports by using the Setup > Network page.) The following - Cisco RV042 | Administration Guide - Page 97
the connection • Port Activity: The status of the port • Speed Status: The speed of the port, 10 Mbps or 100 Mbps • Duplex Status: The duplex mode: Half or Full. • Auto negotiation: The status of the feature • VLAN: The VLAN of the port Cisco Small Business RV0xx Series Routers Administration Guide - Cisco RV042 | Administration Guide - Page 98
: The number of packet bytes received • Port Transmit Packet Count: The number of packets transmitted • Port Transmit Packet Byte Count: The number of packet bytes transmitted • Port Packet Error Count: The number of packet errors Cisco Small Business RV0xx Series Routers Administration Guide 98 - Cisco RV042 | Administration Guide - Page 99
users' Internet activities. Refer to these topics: • Configuring the General Firewall Settings, page 99 • Managing Access Rules, page 104 • Configuring Firewall Access Rules, page 103 • Using Content Filters to Control Internet Access, page 110 Configuring the General Firewall Settings The default - Cisco RV042 | Administration Guide - Page 100
should first configure a strong administrator password on the Setup > Password page. This precaution prevents an unauthorized user from accessing the router with the default password. If you enable this feature, you can keep the Cisco Small Business RV0xx Series Routers Administration Guide 100 - Cisco RV042 | Administration Guide - Page 101
7 default Port setting, 80, or enter another port number (8080 is usually used for this purpose). NOTE: When remote management is enabled, you can use a web browser to access the configuration utility from anywhere on the Internet. In a web browser, enter http://:port - Cisco RV042 | Administration Guide - Page 102
Domains below). By default, ActiveX is not blocked. • Access to HTTP Proxy Servers: Check this box if you want to block access to HTTP proxy servers. Use of WAN proxy servers may compromise the router's security. If you enable this feature, you block access to proxy servers using port 80 or 8080 - Cisco RV042 | Administration Guide - Page 103
. Refer to these topics: • About Access Rules, page 103 • Managing Access Rules, page 104 • Configuring Access Rules, page 106 About Access Rules The router has the following default rules: • All traffic from the LAN to the WAN is allowed. • All traffic from the WAN to the LAN is denied. • All - Cisco RV042 | Administration Guide - Page 104
from the LAN is always allowed. • DNS service from the LAN is always allowed. • Ping service from the LAN to the router is always allowed. Managing Access Rules Except for the default rules, all configured access rules are listed in the Access Rules table, and you can set the priority for each - Cisco RV042 | Administration Guide - Page 105
described in Configuring Access Rules, page 106. • To delete an access rule: Click the Delete icon. When the confirmation message appears, click OK to continue, or click Cancel to close the message without deleting the rule. • To delete all custom rules: Click Restore to Default Rules. Cisco Small - Cisco RV042 | Administration Guide - Page 106
: Choose the action that the rule performs, to Allow or Deny access. • Service: Choose the service that is affected by this rule. If you need to add a service, click Service Management. For more information, see Adding a service, page 108. • Log: To include events for this rule in the log, click Log - Cisco RV042 | Administration Guide - Page 107
box, and then enter the final IP address in the second box. - Subnet: This rule applies to a subnetwork (IPv6 only). Enter the IP address and the CIDR notation number for the subnet. - ANY: This rule applies to any IP address. Schedule (IPv4 Only) Keep the default settings or specify a schedule when - Cisco RV042 | Administration Guide - Page 108
Protocol: Choose the required protocol. Refer to the documentation for the service that you are hosting. - Port Range: Enter the required port range. • To add another new service: Enter the information, and then click Add to list. Cisco Small Business RV0xx Series Routers Administration Guide 108 - Cisco RV042 | Administration Guide - Page 109
changes, and then click Update. If you do not need to make changes, you can click Add New to deselect the service and clear the text fields. • To delete a service from the list: Click the the Ctrl key while clicking. Click Delete. Cisco Small Business RV0xx Series Routers Administration Guide 109 - Cisco RV042 | Administration Guide - Page 110
by Keywords, page 111 • Schedule, page 112 NOTE The content filter rules will be automatically disabled if the Cisco ProtectLink service is activated on the router. Instead configure the ProtectLink features to control Internet access. For more information, see Chapter 8, "Cisco ProtectLink Web - Cisco RV042 | Administration Guide - Page 111
cannot successfully enter any URL that begins with yahoo.com. Access also is blocked if the user performs a web search and clicks a link for a page within the specified domain, such as yahoo.com/news. However, the user can connect to mail.yahoo.com, which is a different domain. • To modify an entry - Cisco RV042 | Administration Guide - Page 112
these check boxes to specify the days when the rule is active. Check the Everyday box if the rule is active on all days. To choose specific days, uncheck the Everyday box and then check the box for each day when the rule is active. Cisco Small Business RV0xx Series Routers Administration Guide 112 - Cisco RV042 | Administration Guide - Page 113
Series routers except Cisco RV042G. Cisco ProtectLink web filters website addresses (URLs) and blocks potentially malicious websites. Refer to these topics: • Getting Started with Cisco ProtectLink Web, page 113 • Specifying the Global Settings for Approved URLs and Clients, page 115 • Updating the - Cisco RV042 | Administration Guide - Page 114
. The Global Settings page appears. NOTE If you replace one router with another router that supports this service, you can use the Use the Activation Code link to transfer your license for the ProtectLink service to the new router. Cisco Small Business RV0xx Series Routers Administration Guide 114 - Cisco RV042 | Administration Guide - Page 115
if you activated your Cisco ProtectLink Web service. See Getting Started with Cisco ProtectLink Web, page 113. You can specify approved URLs that the users are always able to access. You also can specify approved clients who are not subject to the restrictions that you configure in Web Protection - Cisco RV042 | Administration Guide - Page 116
type a semi-colon between entries, such as 10.1.1.1;10.1.1.5. To enter a range of IP addresses, type a hyphen between the first and last address in the range, such as 10.1.1.0-10.1.1.10. • To delete an entry: Click the Delete icon. Cisco Small Business RV0xx Series Routers Administration Guide 116 - Cisco RV042 | Administration Guide - Page 117
Web Protection page to configure URL filtering and Web Reputation settings. To open this page: Click ProtectLink > Web Protection in the navigation tree. NOTE • This page is available only if you activated your Cisco ProtectLink Web service. See Getting Started with Cisco ProtectLink Web, page 113 - Cisco RV042 | Administration Guide - Page 118
you keep the default Business Hour settings, sign (+). • To block access for all sub-categories within Reset Counters: The router counts the number of attempted visits to a restricted URL. To reset the counter to zero, click the button. Cisco Small Business RV0xx Series Routers Administration Guide - Cisco RV042 | Administration Guide - Page 119
Leisure Hours filters apply. • Business Times: To use the same settings all day, keep the default setting, All day (24 hours). To specify the hours when your business is open, click and therefore reduces the risk of false positives. Cisco Small Business RV0xx Series Routers Administration Guide 119 - Cisco RV042 | Administration Guide - Page 120
your license. To open this page: Click ProtectLink > License in the navigation tree. NOTE This page is available only if you activated your Cisco ProtectLink Web service. See Getting Started with Cisco ProtectLink Web, page 113. Cisco Small Business RV0xx Series Routers Administration Guide 120 - Cisco RV042 | Administration Guide - Page 121
your license when the license expires (one year after the service was activated) • Renew: For information about renewing your license, click Renew. After you purchase an extension key, you can register it and activate your service. Cisco Small Business RV0xx Series Routers Administration Guide 121 - Cisco RV042 | Administration Guide - Page 122
. There are several ways to create a VPN connection: • Site to Site VPN (Gateway To Gateway), page 123 • Remote Access (Client To Gateway), page 123 • Remote Access with Cisco QuickVPN, page 125 • Remote Access with PPTP, page 125 Cisco Small Business RV0xx Series Routers Administration Guide 122 - Cisco RV042 | Administration Guide - Page 123
with VPN client software connects to a VPN router. For this scenario, you can install third-party VPN client software on the users' computers. Alternatively, a VPN tunnel can be accessed from any computer with the built-in IPSec Security Manager (Windows 2000, Windows XP, and Windows 7). Cisco - Cisco RV042 | Administration Guide - Page 124
other remote access options: Remote Access with Cisco QuickVPN, page 125 and Remote Access with PPTP, page 125. The following is an example of a client-to-gateway VPN. A business traveler connects to the Internet from her hotel room. Her notebook computer has VPN client software that is configured - Cisco RV042 | Administration Guide - Page 125
in this protocol. Configuration Tasks: 1. Use the VPN > PPTP Server page to enable PPTP server, set the IP address range for clients, and enter the usernames and passwords. 2. Distribute the user names and passwords to the users. Cisco Small Business RV0xx Series Routers Administration Guide 125 - Cisco RV042 | Administration Guide - Page 126
about the router's VPN tunnel settings. The router supports up to 100 tunnels. NOTE If the PPTP Server is enabled, summary information about PPTP clients appears on the VPN > PPTP Server page. For more information, see Setting Up PPTP Server, page 150. To open this page: Click VPN > Summary in - Cisco RV042 | Administration Guide - Page 127
. • Remote Gateway: The IP address of the Remote Gateway. • Tunnel Test: Click Connect to verify the status of the VPN tunnel. The test result will be updated in the Status column. If the tunnel is connected, a Disconnect button will be available so you can end the connection. • Configure: Click - Cisco RV042 | Administration Guide - Page 128
of the remote clients: Online or Offline. Click Detail List to open the Group List window. This window displays the Group Name, IP address, and Connection Time. You can click Refresh to update the data, or click Close to close the pop-up window and return to the VPN > Summary page. • Tunnel Test - Cisco RV042 | Administration Guide - Page 129
when the VPN client ended its VPN connection to the router. • Duration: The period of time that the VPN connection has been active. • Disconnect: Click this button to disconnect any VPN client. • Navigation controls: If you have numerous rules, you can adjust the display. Use the Rows per page list - Cisco RV042 | Administration Guide - Page 130
Up a Gateway to Gateway (Site to Site) VPN 9 Setting Up a Gateway to Gateway (Site to Site) VPN Use the VPN > Gateway to Gateway page to create a new tunnel between two VPN devices, such as a Cisco RV082 router at your office and a Cisco RV042 router at a remote office. Outside Site A 209.165.200 - Cisco RV042 | Administration Guide - Page 131
the tunnel. By default, the tunnel is enabled. Local Group Setup and Remote Group Setup Enter the settings described below. The Local settings are for this router, and the Remote settings are for the router on the other end of the tunnel. Mirror these settings when configuring the VPN tunnel on the - Cisco RV042 | Administration Guide - Page 132
remote VPN router, select IP by DNS Resolved, and then enter the real domain name of the router on the Internet. Cisco RV082 will get the IP address of remote VPN device by DNS Resolved, and IP address of remote VPN device will be displayed in the VPN Status section of the VPN > Summary page. - IP - Cisco RV042 | Administration Guide - Page 133
for any encryption to occur, the two ends of a VPN tunnel must agree on the methods of encryption, decryption, and authentication. Enter exactly the same settings on both routers. • Keying Mode: Choose one of the following key management methods: - Manual: Choose this option if you want to generate - Cisco RV042 | Administration Guide - Page 134
to Gateway (Site to Site) VPN 9 Preshared Key, page 135 and Advanced settings for IKE with Preshared Key, page 136. • Required fields for Manual mode Enter the settings for manual mode. Be sure to enter the same settings when configuring other router for this tunnel. The Incoming / Outgoing - Cisco RV042 | Administration Guide - Page 135
sure that both ends of the VPN tunnel use the same authentication method. - Phase 1 / Phase 2 SA Life Time: Configure the length of time a VPN tunnel is active in this phase. The default value for Phase 1 is 28800 seconds. The default value for Phase 2 is 3600 seconds. - Perfect Forward Secrecy: If - Cisco RV042 | Administration Guide - Page 136
router at the other end of the tunnel. - Keep-Alive: This feature enables the router to attempt to automatically re-establish the VPN connection if it is dropped. Check the box to enable this feature, or uncheck the box to disable it. Cisco Small Business RV0xx Series Routers Administration Guide - Cisco RV042 | Administration Guide - Page 137
below. This feature is available only if Dead Peer Detection is enabled. Remote Backup IP Address: Specify an alternative IP address for the remote peer, or re-enter the WAN IP address that was already set for the remote gateway. Cisco Small Business RV0xx Series Routers Administration Guide 137 - Cisco RV042 | Administration Guide - Page 138
to Site) VPN 9 Local Interface: Choose the WAN interface to use to reestablish the connection. VPN Tunnel Backup Idle Time: This setting is used when the router boots up. If the primary tunnel is not connected within the specified period, then the backup tunnel is used. The default idle time is - Cisco RV042 | Administration Guide - Page 139
VPN Software Client To open this page: Click VPN > Client to Gateway in the navigation tree. Alternatively, you can click the Add Tunnel button on the VPN > Summary page, in the Tunnel Status section. Then choose Client to Gateway. Cisco Small Business RV0xx Series Routers Administration Guide - Cisco RV042 | Administration Guide - Page 140
a tunnel for a group of users. Group VPN facilitates setup and eliminates the need to configure individual users. All of the remote users can use the same Preshared Key to connect to RV0xx, up to the maximum number of supported tunnels. The router supports up to two VPN groups. The group number is - Cisco RV042 | Administration Guide - Page 141
the End IP field. • Domain Name: If you chose to use domain name authentication, enter the domain name. • Email: If you chose to use email authentication, enter the email address. Remote Client Setup for Single User ("Tunnel" Type) Specify the method for identifying the client to establish the VPN - Cisco RV042 | Administration Guide - Page 142
remote VPN client, select IP by DNS Resolved, and then enter the real domain name of the client on the Internet. Cisco RV082 will get the IP address of remote VPN client by DNS Resolved, and IP address of remote VPN device will be displayed in the VPN Status section of the Summary page. • Dynamic IP - Cisco RV042 | Administration Guide - Page 143
Setting Up a Remote Access Tunnel for VPN Clients (Client To Gateway) 9 IPSec Setup Enter the Internet Protocol Security settings for this tunnel. IMPORTANT: In order for any encryption to occur, the two ends of a VPN tunnel must agree on the methods of encryption, decryption, and authentication - Cisco RV042 | Administration Guide - Page 144
sure that both ends of the VPN tunnel use the same authentication method. - Phase 1 / Phase 2 SA Life Time: Configure the length of time a VPN tunnel is active in this phase. The default value for Phase 1 is 28800 seconds. The default value for Phase 2 is 3600 seconds. - Perfect Forward Secrecy: If - Cisco RV042 | Administration Guide - Page 145
Setting Up a Remote Access Tunnel for VPN Clients (Client To Gateway) 9 Check the box to enable this feature, or uncheck the box to disable this feature. This feature is recommended. - Preshared Key: Enter a pre-shared key to use to authenticate the remote IKE peer. You can enter up to 30 keyboard - Cisco RV042 | Administration Guide - Page 146
Setting Up a Remote Access Tunnel for VPN Clients (Client To Gateway) 9 always accept compression, even if compression is not enabled. If you enable this feature for this router, also enable it on the client. - Keep-Alive: This feature enables the router to attempt to automatically re-establish - Cisco RV042 | Administration Guide - Page 147
see Cisco QuickVPN for Windows, page 167. To open this page: Click VPN > VPN Client Access in the navigation tree. Add or update users as needed. For each new user, export a client certificate to install on the user's PC for a more secure connection. • Users, page 148 • Certificate Management, page - Cisco RV042 | Administration Guide - Page 148
an IP conflict occurs, the QuickVPN client will not connect to the router. Users • To add a VPN user to the list: Enter the following information, and then click Add to list. After adding users, you can generate certificates to be installed on their computers (see details in Certificate Management - Cisco RV042 | Administration Guide - Page 149
connect to the VPN endpoint without problems. The administrator can disable the VPN Passthrough to block VPN clients from reaching the VPN endpoint on the Internet. To open this page: Click VPN > VPN Passthrough in the navigation tree. Cisco Small Business RV0xx Series Routers Administration Guide - Cisco RV042 | Administration Guide - Page 150
Network connection. The user will need to know the host name or IP address for the router. This value needs to match the value that you enter on the VPN > PPTP Server page. The wizard guides the user to create a desktop shortcut, which can be used to launch the client. To connect, the Cisco Small - Cisco RV042 | Administration Guide - Page 151
enter the final address in the Range End field. The default range is 192.168.1.200 to 92.168.1.204. NOTE The LAN IP address range for PPTP VPN clients should be outside of the normal DHCP range of the router. PPTP Server Add or edit the list of PPTP VPN users. • To add a user to the list: Enter the - Cisco RV042 | Administration Guide - Page 152
to update the data. • Username: The name of the PPTP VPN client. • Remote Address: The WAN IP address of the PPTP VPN client. • PPTP IP Address: The LAN IP address that the PPTP server assigned to the client upon connection. Cisco Small Business RV0xx Series Routers Administration Guide 152 - Cisco RV042 | Administration Guide - Page 153
Before navigating away from this page, click Save to save your settings, or click Cancel to undo them. Any unsaved changes are abandoned. This page has the following sections: • Syslog section, page 154 • E-mail section, page 154 Cisco Small Business RV0xx Series Routers Administration Guide 153 - Cisco RV042 | Administration Guide - Page 154
the router will send all log activities, including every source/destination IP address and service, to default is 10. • Email Log Now: Click this button to immediately send a message to the specified email address, to test your settings. Cisco Small Business RV0xx Series Routers Administration Guide - Cisco RV042 | Administration Guide - Page 155
log or excluded based on the Log setting in the access rule configuration. For more information, see Configuring Firewall Access Rules, page 103. - Configuration Changes: Instances when someone saved changes in the configuration. Cisco Small Business RV0xx Series Routers Administration Guide 155 - Cisco RV042 | Administration Guide - Page 156
of policy, such as Access Rule, the LAN IP address of the source (SRC), and the MAC address • Outgoing Log Table: Click this button to view the outgoing packet information. The information appears in a new window. In the Outgoing Log Table window, you can click Refresh to update the data. When you - Cisco RV042 | Administration Guide - Page 157
statistics about all of the router's ports (LAN and WAN ports). To open this page: click Log > System Statistics in the navigation tree. Statistics appear for each interface, such as LAN, WAN1, WAN2 or DMZ. You can click Refresh to update the data. For each port, the following statistics are listed - Cisco RV042 | Administration Guide - Page 158
Logging System Statistics Viewing the System Log 10 • Received Bytes: The number of bytes received through this interface • Sent Bytes: The number number of received packets that were dropped due to issues such as error checksum. Cisco Small Business RV0xx Series Routers Administration Guide 158 - Cisco RV042 | Administration Guide - Page 159
for the router. To open this page: Click Wizard in the navigation tree. Alternatively click Setup Wizard on the System Summary page. This page includes the following sections: • Basic Setup, page 160 • Access Rule Setup, page 160 Cisco Small Business RV0xx Series Routers Administration Guide 159 - Cisco RV042 | Administration Guide - Page 160
your connection. Access Rule Setup Use the Access Rule Setup Wizard to create firewall access rules. Click Launch Now to run the Access Rule Setup Wizard. The wizard provides information about the router's default rules to help you get started. Follow the on-screen instructions to proceed. Cisco - Cisco RV042 | Administration Guide - Page 161
clients of the next window for listening to broadcast and multicast messages. When the Cisco RV220W has buffered broadcast or multicast messages for associated clients The RIP protocol regularly broadcasts routing information to other routers on the network. It determines the best route based - Cisco RV042 | Administration Guide - Page 162
range while the WAN port on the router is configured with a single "public" IP address. The router translates the internal private addresses into a public address, hiding internal IP addresses from computers on the Internet. The 802.11b standard requires adding a preamble to every frame before it - Cisco RV042 | Administration Guide - Page 163
in the IPv6 LAN. It responds with router advertisements to support stateless address auto-configuration. When a new host connects to the network, it sends a request for its configuration parameters, and the router responds with a router advertisement packet that contains the network-layer - Cisco RV042 | Administration Guide - Page 164
support dynamic routing protocols. • If the router is connected to more than one network or there are multiple routers installed on your network, it may be necessary to set up static routes to enable traffic between them. • You can use static routing to allow users in different IP domain to access - Cisco RV042 | Administration Guide - Page 165
System Management > Firmware Upgrade page of the configuration utility. For more information, see Upgrading the Firmware, page 90. If the Diag status light continues to flash, the firmware image is damaged. Use the TFTP utility to upgrade the firmware. You can download the TFTP utility at www.cisco - Cisco RV042 | Administration Guide - Page 166
router does not replace your modem. You still need your cable modem in order to use the router. Connect your cable connection to the cable modem, insert the setup CD into your computer, and then follow the on-screen instructions. Cisco Small Business RV0xx Series Routers Administration Guide 166 - Cisco RV042 | Administration Guide - Page 167
configuration process, see Managing VPN Users and Certificates, page 147. Introduction The Cisco RV0xx Series VPN routers support IPSec VPN client software, including the Cisco QuickVPN software. For the latest features, install QuickVPN Client 1.4.0.5 or later, which supports Windows 7. The router - Cisco RV042 | Administration Guide - Page 168
tray. STEP 2 When the QuickVPN Login page appears, enter the following information: • Profile Name: Enter a name for your profile. • Username: Enter the username assigned to you. • Password: Enter the password assigned to you. Cisco Small Business RV0xx Series Routers Administration Guide 168 - Cisco RV042 | Administration Guide - Page 169
QuickVPN for Windows Using the Cisco QuickVPN Software C • Server Address: Enter the WAN IP address or domain name of the remote router. • Port for QuickVPN: Enter the port number that the QuickVPN client will use to communicate with the remote VPN router, or keep the default, Auto. • Use Remote - Cisco RV042 | Administration Guide - Page 170
. You can then repeat the procedures to add tunnels to your other sites. A Cisco RV0xx Series router supports up to 100 VPN tunnels. NOTE Even if you have an RV0xx Series router on one end of the tunnel, and a different model on the other end, you can use this information to set up your RV0xx Series - Cisco RV042 | Administration Guide - Page 171
all branch employees to access the main network. It works well if most traffic is from the remote sites to the main network and there is little traffic among the sites. Too much inter-site traffic may create bottlenecks at the hub. Cisco Small Business RV0xx Series Routers Administration Guide 171 - Cisco RV042 | Administration Guide - Page 172
2 VPN Tunnel VPN Tunnel VPN Tunnel VPN Tunnel Internet VPN Tunnel VPN Tunnel Site 3 Site 4 This topology requires much more configuration on each router. the devices can support at a reasonable CPU utilization. 284287 Cisco Small Business RV0xx Series Routers Administration Guide 172 - Cisco RV042 | Administration Guide - Page 173
D Other Design Considerations Before you configure your VPN tunnels, consider the following points about your network setup. WAN Setup The WAN setup pertains to the network that your router connects to outside your office. The first consideration is the type of IP addresses that you received for - Cisco RV042 | Administration Guide - Page 174
update.ods.org - http://www.dhs.org - http://www.3322.org - http://www.no-ip.com LAN Setup The LAN setup pertains to the network that your router connects to inside your office. It should not be necessary to make any changes in your LAN setup, unless both sites have the same addressing. The two ends - Cisco RV042 | Administration Guide - Page 175
other end of the tunnel (Site B): • Remote Security Gateway Type-Depending on the type of IP address for the Internet connection, choose one of the following options: - If the remote gateway (Site B) has a static WAN IP address: Select IP Only. Enter the WAN IP Address of the Site B router. Cisco - Cisco RV042 | Administration Guide - Page 176
to Windows Help for more information). If the ping test is successful, then the VPN tunnel is configured correctly. STEP 12 Repeat this procedure to configure additional VPN tunnel. Example: Sites with Static WAN IP Addresses Settings on the Site A Router: Field Value Local Group Setup Local - Cisco RV042 | Administration Guide - Page 177
a Gateway-to-Gateway VPN Tunnel Between RV0xx Series Routers Configuring a VPN Tunnel on a Cisco RV0xx Series Router Field Value IP Address 192.168.1.0 Subnet Mask 255.255.255.0 Remote Group Setup Remote Security IP Only Gateway Type IP Address 209.165.200.238 Remote Security Subnet Group - Cisco RV042 | Administration Guide - Page 178
Gateway VPN Tunnel Between RV0xx Series Routers Configuring a VPN Tunnel on a Cisco RV0xx Series Router Field Minimum Preshared Key Complexity Advanced Value Enabled Default settings Settings on the Site B Router: Field Values Local Group Setup Local Security Gateway Type IP Only IP Address - Cisco RV042 | Administration Guide - Page 179
Advanced Default settings Example: Site with a Dynamic WAN IP Address Settings on the Site A Router: Field Value Local Group Setup Local Security Gateway Type IP Only IP Address (Automatically detected) 203.165.200.226 D Cisco Small Business RV0xx Series Routers Administration Guide 179 - Cisco RV042 | Administration Guide - Page 180
a Gateway-to-Gateway VPN Tunnel Between RV0xx Series Routers Configuring a VPN Tunnel on a Cisco RV0xx Series Router D Field Value Local Security Group Type Subnet IP Address 192.168.1.0 Subnet Mask 255.255.255.0 Remote Group Setup Remote Security Dynamic IP + Domain Name (FQDN - Cisco RV042 | Administration Guide - Page 181
Series Routers Configuring a VPN Tunnel on a Cisco RV0xx Series Router D Field Phase 2 SA Life Time Preshared Key Minimum Preshared Key Complexity Advanced Value 3600 13572468#123456789 Enabled Default settings Settings on the Site B Router: Field Values Local Group Setup Local Security - Cisco RV042 | Administration Guide - Page 182
-to-Gateway VPN Tunnel Between RV0xx Series Routers Configuring a VPN Tunnel on a Cisco RV0xx Series Router Field Values IPSec Setup Keying Mode IKE with Preshared Key Phase 1 Encryption DES Phase 1 Authentication MD5 Phase 1 SA Life 28800 Time Perfect Forward Enabled Secrecy Phase - Cisco RV042 | Administration Guide - Page 183
.111.1 RV016 WAN: 192.168.99.22 Router B - Responder LAN: 192.168.2.0/24 RV042 WAN: 192.168.111.101 NAT 1 LAN: 192.168.11.1 RV016 WAN: 192.168.11.101 Router A - Initiator LAN: 192.168.1.0/24 192.168.2.100 199787 192.168.1.101 Cisco Small Business RV0xx Series Routers Administration Guide 183 - Cisco RV042 | Administration Guide - Page 184
in the path and changing to a new port, as defined in RFC 3947. Configuration of Router A Follow these instructions for Router A. STEP 1 Launch the web browser for a networked computer, designated PC 1. STEP 2 Access the configuration utility of Router A. STEP 3 Click VPN > Gateway to Gateway in the - Cisco RV042 | Administration Guide - Page 185
PC 2. STEP 2 Access the configuration utility of Router B. STEP 3 Click VPN > Gateway to Gateway in the navigation tree. STEP 4 Enter a name in the Tunnel Name field. STEP 5 For the VPN Tunnel setting, select Enable. STEP 6 For the Local Security Gateway Type, select IP Only. The WAN IP address of - Cisco RV042 | Administration Guide - Page 186
Creation of New Bandwidth Management Rules, page 187 Creation of New Services Create two new services, Vonage VoIP and Vonage 2. STEP 1 Visit Vonage's website at http://www.vonage.com. Find out the ports used for Vonage VoIP service. STEP 2 Access the router's configuration utility. STEP 3 Click the - Cisco RV042 | Administration Guide - Page 187
2 (Downstream). STEP 1 Set up a rule for upstream bandwidth for Vonage 1: a. On the Bandwidth Management page, select Vonage VoIP from the Service drop-down menu. b. Enter the IP address or range you need to control. To include all internal IP addresses, keep the default value. c. From the Direction - Cisco RV042 | Administration Guide - Page 188
field, enter the maximum rate for the maximum bandwidth. For example, you can set a maximum rate of 80 kbit/sec. f. Select Enable to enable this rule. g. After you have set up the rule, click Add to list. STEP 5 Click Save. Cisco Small Business RV0xx Series Routers Administration Guide 188 - Cisco RV042 | Administration Guide - Page 189
1 10/100 RJ-45 DMZ/Internet port Button Reset Cabling Type Category 5 Ethernet Status Lights (LEDs) System, Internet, DMZ/Internet, DMZ Mode, Diag, 1 to 4 Operating System Linux Performance NAT Throughput 100 Mbps IPSec Throughput 59 Mbps Security Firewall SPI Firewall Access Rules - Cisco RV042 | Administration Guide - Page 190
bandwidth can be configured per service Priority Each service can be mapped to one of the 3 priority levels VPN IPSec 50 IPSec tunnels for branch office connectivity QuickVPN 50 QuickVPN users for remote client access PPTP Built-in PPTP server supporting 5 PPTP clients Encryption DES, 3DES - Cisco RV042 | Administration Guide - Page 191
Ports 4 10/100/1000 RJ-45 ports, 1 10/100/1000 RJ-45 Internet port, 1 10/100/1000 RJ-45 DMZ/Internet port Button Reset Cabling Type Category 5 Ethernet Status Lights (LEDs) System, Internet, DMZ/Internet, DMZ Mode, Diag, 1 to 4 Cisco Small Business RV0xx Series Routers Administration Guide - Cisco RV042 | Administration Guide - Page 192
G Operating System Performance NAT Throughput IPSec Throughput Security Firewall Access Rules Port Forwarding Port Triggering URL Filtering Network Dual WANs Protocol Binding DHCP DNS NAT DMZ Routing QoS Port-based QoS Service based QoS Rate Control Priority Linux 800 Mbps 75 Mbps SPI Firewall - Cisco RV042 | Administration Guide - Page 193
connectivity QuickVPN 50 QuickVPN users for remote client access PPTP Built-in PPTP server supporting 5 PPTP clients Encryption DES, 3DES, AES-128, AES-192, AES-256 Authentication MD5, SHA1 IPSec NAT-T Supported for gateway-to-gateway and client-togateway tunnels VPN Passthrough PPTP - Cisco RV042 | Administration Guide - Page 194
Lights (LEDs) Security Features Operating System Performance NAT Throughput IPSec Throughput Security Firewall DoS Prevention Access Rules Port Forwarding Port Triggering Blocking URL Filtering Network Dual WANs WAN Type Cisco RV082 10/100 8-port VPN router IEEE 802.3, 802.3u 8 10/100 RJ-45 ports - Cisco RV042 | Administration Guide - Page 195
Cisco RV082 G Protocol Binding DHCP DNS NAT DMZ Routing QoS Port-based QoS Service based QoS Rate Control Priority VPN IPSec QuickVPN PPTP Encryption Authentication IKE IPSec NAT-T Advanced Options VPN Passthrough Management Web-Based SNMP Protocols can be bound to particular WAN port under load - Cisco RV042 | Administration Guide - Page 196
Type Status Lights (LEDs) Operating System Performance NAT Throughput IPSec Throughput Cisco RV016 10/100 16-port VPN router IEEE 802.3, 802.3u 16 10/100 RJ-45 ports, including 2 Internet ports, 1 DMZ port, 8 LAN ports, and 5 Configurable Internet/LAN ports Reset Category 5 Ethernet Diag, System - Cisco RV042 | Administration Guide - Page 197
per LAN port Supports rate control or priority Upstream/downstream bandwidth can be configured per service Each service can be mapped to one of the 3 priority levels 100 IPSec tunnels for branch office connectivity 50 QuickVPN users for remote client access Cisco Small Business RV0xx Series Routers - Cisco RV042 | Administration Guide - Page 198
Built-in PPTP server supporting 10 PPTP clients DES, 3DES, AES-128, AES-192, AES-256 MD5, SHA1 Support Internet Key Exchange Supported for gateway-to-gateway and client-togateway tunnels Support for DPD PPTP, L2TP, IPSec HTTPS Supports SNMP v1 and v2c Syslog, Email Alert, VPN Tunnels, Status - Cisco RV042 | Administration Guide - Page 199
full benefits of your Cisco Small Business router. Support Cisco Small Business Support Community Cisco Small Business Support and Resources Cisco Small Business Firmware Downloads Product Documentation Cisco Small Business Routers Documentation Cisco Small Business Cisco Partner Central for Small
-
 1
1 -
 2
2 -
 3
3 -
 4
4 -
 5
5 -
 6
6 -
 7
7 -
8
-
9
-
10
-
11
-
12
-
13
-
14
-
15
-
16
-
17
-
18
-
19
-
20
-
21
-
22
-
23
-
24
-
25
-
26
-
27
-
28
-
29
-
30
-
31
-
32
-
33
-
34
-
35
-
36
-
37
-
38
-
39
-
40
-
41
-
42
-
43
-
44
-
45
-
46
-
47
-
48
-
49
-
50
-
51
-
52
-
53
-
54
-
55
-
56
-
57
-
58
-
59
-
60
-
61
-
62
-
63
-
64
-
65
-
66
-
67
-
68
-
69
-
70
-
71
-
72
-
73
-
74
-
75
-
76
-
77
-
78
-
79
-
80
-
81
-
82
-
83
-
84
-
85
-
86
-
87
-
88
-
89
-
90
-
91
-
92
-
93
-
94
-
95
-
96
-
97
-
98
-
99
-
100
-
101
-
102
-
103
-
104
-
105
-
106
-
107
-
108
-
109
-
110
-
111
-
112
-
113
-
114
-
115
-
116
-
117
-
118
-
119
-
120
-
121
-
122
-
123
-
124
-
125
-
126
-
127
-
128
-
129
-
130
-
131
-
132
-
133
-
134
-
135
-
136
-
137
-
138
-
139
-
140
-
141
-
142
-
143
-
144
-
145
-
146
-
147
-
148
-
149
-
150
-
151
-
152
-
153
-
154
-
155
-
156
-
157
-
158
-
159
-
160
-
161
-
162
-
163
-
164
-
165
-
166
-
167
-
168
-
169
-
170
-
171
-
172
-
173
-
174
-
175
-
176
-
177
-
178
-
179
-
180
-
181
-
182
-
183
-
184
-
185
-
186
-
187
-
188
-
189
-
190
-
191
-
192
-
193
-
194
-
195
-
196
-
197
-
198
-
199
 |
 |
Cisco Small Business
RV0xx Series Routers
RV042 Dual WAN VPN Router
RV042G Gigabit Dual WAN VPN Router
RV082 Dual WAN VPN Router
RV016 Multi-WAN VPN Router
ADMINISTRATION
GUIDE