Cisco WRV210 Administration Guide
Cisco WRV210 Manual
 |
View all Cisco WRV210 manuals
Add to My Manuals
Save this manual to your list of manuals |
Cisco WRV210 manual content summary:
- Cisco WRV210 | Administration Guide - Page 1
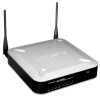
ADMINISTRATION GUIDE Cisco Small Business WRV210 Wireless-G VPN Router with RangeBooster - Cisco WRV210 | Administration Guide - Page 2
, Cisco Lumin, Cisco Nexus, Cisco Nurse Connect, Cisco Stackpower, Cisco StadiumVision, Cisco TelePresence, Cisco Unified Computing System, Cisco WebEx, DCE, Flip Channels, Flip for Good, Flip Mino, Flip Video, Flip Video (Design), Flipshare (Design), Flip Ultra, and Welcome to the Human Network are - Cisco WRV210 | Administration Guide - Page 3
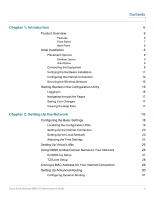
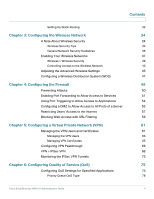
Virtual LANs Using DDNS to Map Domain Names to Your Network DynDNS.org Setup TZO.com Setup Cloning a MAC Address for Your Internet Connection Setting Up Advanced Routing Configuring Dynamic Routing Cisco Small Business WRV210 Administration Guide Contents 6 6 6 7 8 8 9 9 9 9 11 12 13 16 16 17 17 17 - Cisco WRV210 | Administration Guide - Page 4
Certificates 65 Configuring VPN Passthrough 66 VPN > IPSec VPN 68 Monitoring the IPSec VPN Tunnels 73 Chapter 6: Configuring Quality of Service (QoS) 75 Configuring QoS Settings for Specified Applications 75 Priority Queue QoS Type 76 Cisco Small Business WRV210 Administration Guide - Cisco WRV210 | Administration Guide - Page 5
to the Factory Default Settings Upgrading the Firmware Rebooting the Router Chapter 8: Monitoring the Status of the Network Monitoring the Router Status Monitoring the LAN Monitoring the Wireless Network Monitoring the System Performance Monitoring the QuickVPN Clients Appendix A: Specifications - Cisco WRV210 | Administration Guide - Page 6
but also a Virtual Private Networking (VPN) engine for secure communication between mobile or remote workers and branch offices. For your wired and wireless local area network, there is support for multiple SSIDs and VLANs for traffic separation. The WRV210 Wireless Access Point implements WPA2-PSK - Cisco WRV210 | Administration Guide - Page 7
flexibility. The WRV210 has the capability to expand or reduce the area of your wireless network. There is support for Wireless Distribution System (WDS), which allows the wireless coverage to be expanded without wires through wireless bridging between it and select Cisco Small Business stand - Cisco WRV210 | Administration Guide - Page 8
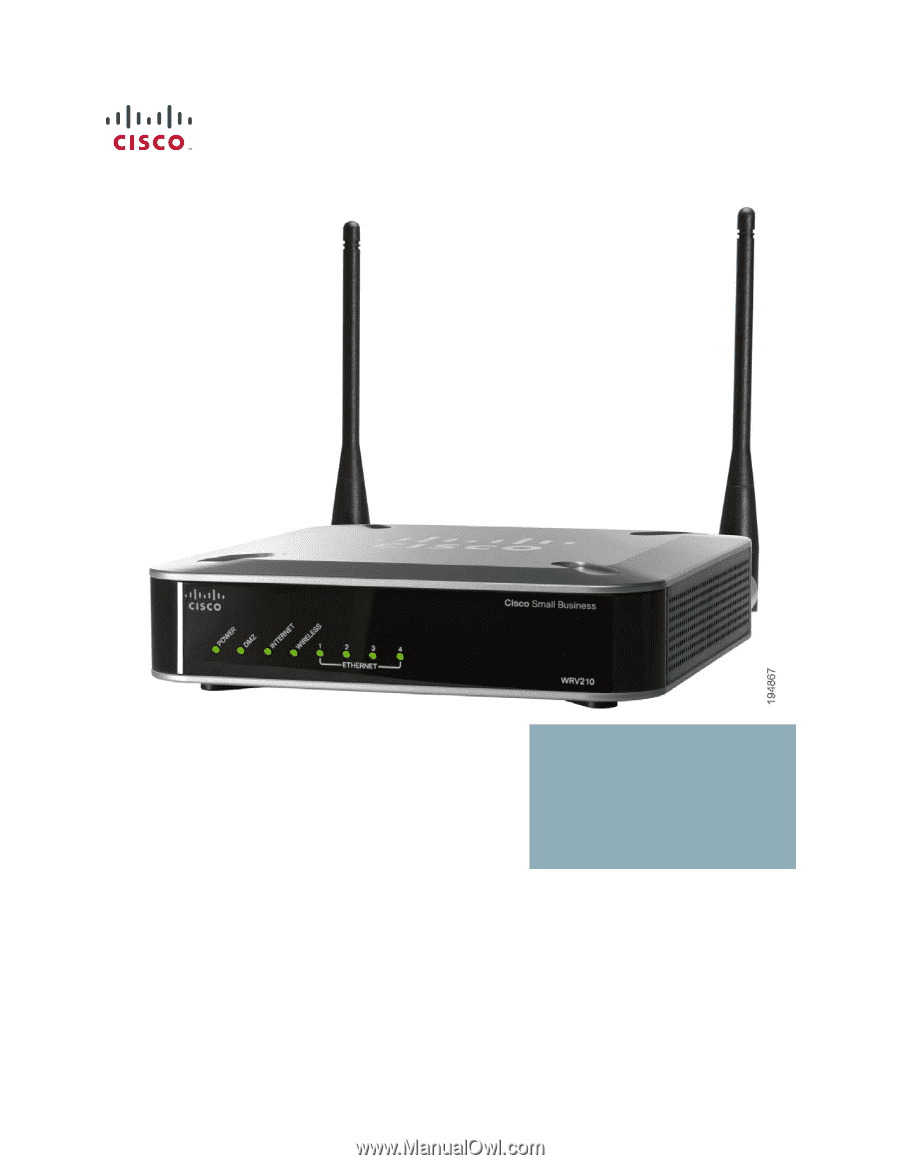
factory defaults from the Administration > Factory Defaults screen of the Router's Configuration Utility. INTERNET-The Internet port connects to your cable or DSL modem. 1-4 (ETHERNET)-The four Ethernet ports connect to your PCs and other network devices. Initial Installation Follow the instructions - Cisco WRV210 | Administration Guide - Page 9
the network hardware is powered off, including the Router, PCs, and cable or DSL modem. STEP 2 Connect one end of an Ethernet network cable to one of the LAN ports (labeled 14) on the back of the Router, and the other end to an Ethernet port on a PC. Cisco Small Business WRV210 Administration Guide - Cisco WRV210 | Administration Guide - Page 10
a wireless connection. STEP 3 Repeat the previous step to connect more PCs, a switch, or other network devices to the Router. STEP 4 Connect an Ethernet network cable from the cable or DSL modem to the Internet port on the Router's back panel. Cisco Small Business WRV210 Administration Guide 10 - Cisco WRV210 | Administration Guide - Page 11
in Front Panel, page 7. NOTE If you need help resolving a problem, visit the Cisco Small Business Support Community at www.cisco.com/go/smallbizsupport. For technical documentation and other links, see Appendix B, "Where to Go From Here." Cisco Small Business WRV210 Administration Guide 11 - Cisco WRV210 | Administration Guide - Page 12
menu. Complete the Internet IP Address, Subnet Mask, Default Gateway, and DNS fields. Enter at least one DNS address. • PPPoE: If you are connecting through PPPoE, select PPPoE from the dropdown menu. Complete the User Name and Password fields. Cisco Small Business WRV210 Administration Guide 12 - Cisco WRV210 | Administration Guide - Page 13
you want to configure. You will need to repeat this procedure for each SSID that you enabled on the Basic Wireless Settings page. STEP 3 Choose the Security Mode. Cisco recommends using the highest level of security that is supported by your network devices. Choose from the following options: • WEP - Cisco WRV210 | Administration Guide - Page 14
is also known as a Pre-Shared Key. - For WPA Personal, this key also must be configured in the wireless clients who want to connect to the network. - For WPA Enterprise and RADIUS, this key is shared between the router and the RADIUS server. Cisco Small Business WRV210 Administration Guide 14 - Cisco WRV210 | Administration Guide - Page 15
instructs the router how often it should change the encryption keys. The default is 3600 seconds, which is 1 hour. For WEP mode and RADIUS (WEP) mode: • Authentication Type: Choose one of the following options: - Open System: A wireless client . Cisco Small Business WRV210 Administration Guide 15 - Cisco WRV210 | Administration Guide - Page 16
the Wireless-G VPN router with RangeBooster is complete. Use this Administration Guide to configure other settings, as needed. Getting Started in the Configuration Utility Logging In To access the Configuration Utility, launch Internet Explorer or Firefox, and enter the Router's default IP address - Cisco WRV210 | Administration Guide - Page 17
your changes. Viewing the Help Files To view more information about a configuration page, click the Help link near the top right corner of the page. Cisco Small Business WRV210 Administration Guide 17 - Cisco WRV210 | Administration Guide - Page 18
2 Setting Up the Network Use the Setup module to configure the Internet connection, local network settings, VLANs, DDNS, MAC Address cloning, and advanced routing. • Configuring the Basic Settings, page 18 • Setting Up Virtual LANs, page 25 • Using DDNS to Map Domain Names to Your Network, page 26 • - Cisco WRV210 | Administration Guide - Page 19
on the configuration pages. STEP 1 Click Setup > Basic Settings in the navigation tree. STEP 2 From the Language Selection drop-down list, choose one of the following languages: English (default), French, German, Italian, Portuguese, or Spanish. Cisco Small Business WRV210 Administration Guide 19 - Cisco WRV210 | Administration Guide - Page 20
information for the selected connection. The Router supports six types of connections, as described below. • Automatic Configuration - DHCP: Select this option if your ISP supports DHCP or you are connecting through a dynamic IP address. This option is selected by default. • Static IP: If your ISP - Cisco WRV210 | Administration Guide - Page 21
Enter the Default Gateway Address, which is the ISP server's IP address. - PPTP Server IP: Enter the IP address of the ISP's PPTP server. - User Name and Password: Enter the User Name and Password provided by your ISP. - Connect on Demand and Max Idle Time: You can configure the Router to disconnect - Cisco WRV210 | Administration Guide - Page 22
: Enter the Default Gateway Address, which is the ISP server's IP address. - L2TP Server IP: Enter the IP address of the L2TP server. - User Name and Password: Enter the User Name and Password provided by your ISP. - Connect on Demand and Max Idle Time: You can configure the Router to disconnect the - Cisco WRV210 | Administration Guide - Page 23
that are assigned by the DHCP server. Assuming that you are using the default router IP address of 192.168.1.1, the Start IP address must be greater than 192.168.1.1 but smaller than 192.168.1.255, which is reserved as the broadcast IP address. Cisco Small Business WRV210 Administration Guide 23 - Cisco WRV210 | Administration Guide - Page 24
that a DHCP client can keep an assigned IP address before it sends a renewal request to the DHCP server. The default value is 86400 seconds, which is 24 hours. • Assign Static IP: Click this button if you need to assign fixed IP addresses to particular network devices. When the Static Table appears - Cisco WRV210 | Administration Guide - Page 25
VLAN: Select Enabled to enable the feature. When enabled, and a VLAN is selected, VLAN1 is enabled as a default VLAN, so you have two VLANs. Select Disabled to disable the feature. When this feature is disabled, all LAN ports are on the same LAN. Cisco Small Business WRV210 Administration Guide - Cisco WRV210 | Administration Guide - Page 26
the Router and your ISP does not give you a fixed IP address. Before you can use this feature, you need to sign up for DDNS service at one of two DDNS service providers, DynDNS.org or TZO.com. • DynDNS.org Setup, page 27 • TZO.com Setup, page 28 Cisco Small Business WRV210 Administration Guide 26 - Cisco WRV210 | Administration Guide - Page 27
: • User Name, Password, and Host Name: Enter the User Name, Password, and Host Name of the account you set up with DynDNS.org. • Internet IP Address: The Router's current Internet IP Address is displayed here. Because it is dynamic, it changes. • Status: The status of the DDNS service connection is - Cisco WRV210 | Administration Guide - Page 28
IP Address is displayed here. Because it is dynamic, it changes. • Status: The status of the DDNS service connection is displayed here. STEP 4 Click Save to save your settings, or click Cancel to refresh the page with the previously saved settings. Cisco Small Business WRV210 Administration Guide - Cisco WRV210 | Administration Guide - Page 29
ISP, you can use the MAC Address Clone feature to associate the registered MAC address with your WRV210 Router. This feature saves you the trouble of contacting your ISP to change the registered MAC address to the Router's MAC address. STEP 1 Click Setup > MAC Address Clone in the navigation tree - Cisco WRV210 | Administration Guide - Page 30
Setting Up the Network Setting Up Advanced Routing 2 address. It is recommended to use the PC registered with the ISP for this operation. STEP 4 and static routing. • Configuring Dynamic Routing, page 31 • Setting Up Static Routing, page 32 Cisco Small Business WRV210 Administration Guide 30 - Cisco WRV210 | Administration Guide - Page 31
change the Operation Mode to Router. This selection indicates that another router on your network hosts your Internet connection. NOTE If this Router is hosting your network's connection to the Internet, leave the default selection, Gateway. This setting enables NAT (Network Address Translation) to - Cisco WRV210 | Administration Guide - Page 32
the Router and the remote network or host. • Interface: Select the interface that is used to connect to the destination. Choose one of the following options: - LAN & Wireless: The destination device is connected to your LAN or wireless network. Cisco Small Business WRV210 Administration Guide 32 - Cisco WRV210 | Administration Guide - Page 33
IP address, Subnet Mask, Gateway, and Interface are displayed. Click Refresh to update the information. Click Close to exit this screen. STEP 3 Click Save to save your settings, or click Cancel to refresh the page with the previously saved settings. Cisco Small Business WRV210 Administration Guide - Cisco WRV210 | Administration Guide - Page 34
prevent someone from connecting to your wireless network, you need to take some additional steps to keep your network secure. • Change the default wireless network name or SSID Wireless devices have a default wireless network name or Service Set Identifier (SSID) set by the factory. This is the - Cisco WRV210 | Administration Guide - Page 35
by the factory. The Linksys default password is admin. Hackers know these defaults and may try to use them to access your wireless device and change your network settings. To thwart any unauthorized changes, customize the device's password so it will be hard to guess. • Enable MAC address filtering - Cisco WRV210 | Administration Guide - Page 36
in the dictionary. General Network Security Guidelines Wireless network security is useless if the underlying network is not secure. Cisco recommends that you take the following precautions: • Password protect all computers on the network and individually password protect sensitive files. • Change - Cisco WRV210 | Administration Guide - Page 37
Basic Wireless Settings in the navigation tree. STEP 2 From the Wireless Network Mode drop-down list, choose the wireless standards running on your network. • Mixed: Choose this option if you have both 802.11g and 802.11b devices in your network. Cisco Small Business WRV210 Administration Guide 37 - Cisco WRV210 | Administration Guide - Page 38
) feature to conserve power. STEP 4 In the Wireless LAN Schedule, set up schedules when your the SSID2-SSID4 networks are available. NOTE SSID 1 is the default and is always operational, unless the Wireless Network Mode option is set to Disable. Cisco Small Business WRV210 Administration Guide 38 - Cisco WRV210 | Administration Guide - Page 39
Dial-In User Service) can be used with either WPA or WEP to authenticate users from a database on a RADIUS server. For detailed instructions on configuring wireless security for the Router, see "A Note About Wireless Security" on page 34. NOTE If you configured multiple networks (SSIDs), repeat this - Cisco WRV210 | Administration Guide - Page 40
Enter the required information, based on the chosen mode: For WPA Enterprise modes and RADIUS (WEP) mode: • RADIUS Server IP Address: Enter the IP address for the RADIUS server. • RADIUS Server Port: Enter the port number for the RADIUS server. Cisco Small Business WRV210 Administration Guide 40 - Cisco WRV210 | Administration Guide - Page 41
WEP mode and RADIUS (WEP) mode: • Authentication Type: Choose one of the following options: - Open System: A wireless client doesn't need to provide a shared key in order to access the wireless network. Any client can associate to the router. Cisco Small Business WRV210 Administration Guide 41 - Cisco WRV210 | Administration Guide - Page 42
Configuring the Wireless Network Enabling Your Wireless Networks 3 - Share Key: A wireless client must provide the correct shared key in order to access the wireless network. • Default Transmit Key: To indicate which WEP key to use, select the appropriate Default Transmit Key number. • Encryption: - Cisco WRV210 | Administration Guide - Page 43
access policy that you want to create, as described below. - Disabled: Choose this option if you do not want to use an access policy. Any client that provides the correct security credentials can connect. This option is the default selection. Cisco Small Business WRV210 Administration Guide 43 - Cisco WRV210 | Administration Guide - Page 44
addresses. For a more convenient way to add MAC addresses, click the Select MAC Address From Networked Computers link below the table. When the Select MAC Address screen appears, select the MAC Addresses page with the previously saved settings. Cisco Small Business WRV210 Administration Guide 44 - Cisco WRV210 | Administration Guide - Page 45
that it automatically selects the best rate for transmission. The default setting is Default, when the Router can transmit at all standard wireless rates (1-2Mbps, 5.5Mbps, 11Mbps, 18Mbps, and 24Mbps). Other options are 1-2Mbps, for use with Cisco Small Business WRV210 Administration Guide 45 - Cisco WRV210 | Administration Guide - Page 46
unwanted eavesdropping on your wireless network. You can select from a range of power levels, from Full, Half, Quarter, Eighth, or Min. The default setting is Full. • CTS Protection Mode: CTS (Clear-To-Send) Protection Mode's default setting is Auto. The Router automatically uses CTS Protection - Cisco WRV210 | Administration Guide - Page 47
wireless client to connect to the Router through an access point, such as WAP54GP or WAP54GPE, when operating in the Repeater Mode. You can install up to three repeaters. NOTE WDS works only with SSID1. Make sure that the channel and security settings are the same for all WDS-enabled devices. Cisco - Cisco WRV210 | Administration Guide - Page 48
the method for allowing repeaters to connect: • Auto Select: Choose this option to automatically allow access from an access point that is operating in Repeater Mode. • Manual: Choose this option if you want to allow access only from specified access points. Then enter the MAC address of up to three - Cisco WRV210 | Administration Guide - Page 49
Port Forwarding to Allow Access to Services, page 51 • Using Port Triggering to Allow Access to Applications, page 54 • Configuring a DMZ to Allow Access to All Ports of a Server, page 55 • Restricting Users' Access to the Internet, page 57 • Blocking Web Access with URL Filtering, page 59 Cisco - Cisco WRV210 | Administration Guide - Page 50
of Service (DoS) Prevention checks incoming packets before allowing them to enter your network. To default. • Block Multicast: Multicasting allows a transmission to be forwarded automatically to multiple recipients at the same time. Check the box to Cisco Small Business WRV210 Administration Guide - Cisco WRV210 | Administration Guide - Page 51
prevent ActiveX controls from being downloaded by a web browser. Port Forwarding to Allow Access to Services By default, the Router's firewall prevents access from the Internet to your private network. You can use the Port Forwarding forwarding. Cisco Small Business WRV210 Administration Guide 51 - Cisco WRV210 | Administration Guide - Page 52
Services 4 When users send this type of request to your network via the Internet, the Router forwards those requests to the appropriate PC. Any PC whose port is being forwarded must have its DHCP client function disabled and must have a new static IP address assigned to it because its IP address - Cisco WRV210 | Administration Guide - Page 53
IP Address of the PC that hosts the specified application. • Enabled: Check the box to enable port forwarding for the relevant application. Uncheck the box to disable this feature. STEP 3 Click Save to save your settings, or click Cancel to refresh the page with the previously saved settings. Cisco - Cisco WRV210 | Administration Guide - Page 54
first port number in the range. In the End Port field, enter the final port number in the range. • Forwarded Range: Use these two fields to enter the port range for the ports where the Router forwards the data. In the Start field, enter the first Cisco Small Business WRV210 Administration Guide 54 - Cisco WRV210 | Administration Guide - Page 55
, Port Range Forwarding can forward to a maximum of 10 ranges of ports on different PCs, while a DMZ can forward all the ports for one PC.For information about Port Forwarding, see Enabling Port Forwarding to Allow Access to Services, page 51. Cisco Small Business WRV210 Administration Guide 55 - Cisco WRV210 | Administration Guide - Page 56
and saving the settings. STEP 3 Enter the IP address of the PC that hosts the service that you want to expose to Internet traffic. STEP 4 Click Save to save your settings, or click Cancel to refresh the page with the previously saved settings. Cisco Small Business WRV210 Administration Guide 56 - Cisco WRV210 | Administration Guide - Page 57
Configuring the Firewall Restricting Users' Access to the Internet 4 Restricting Users' Access to the Internet By default, the Router's firewall allows your users to access the Internet. You click Delete. To view all the policies, click Summary. Cisco Small Business WRV210 Administration Guide 57 - Cisco WRV210 | Administration Guide - Page 58
UDP, All. • Port: If this policy applies to traffic through a specific port, enter the port number. Otherwise, leave 0 in the field. STEP 4 Click Save to save your settings, or click Cancel to refresh the page with the previously saved settings. Cisco Small Business WRV210 Administration Guide 58 - Cisco WRV210 | Administration Guide - Page 59
configure. You can configure up to 8 policies. NOTE To delete a policy, select the policy, and then click Delete. To view all the policies, click Summary. Cisco Small Business WRV210 Administration Guide 59 - Cisco WRV210 | Administration Guide - Page 60
default. • Enter Policy Name: Type a name to identify the policy. After you save the policy, this name will appear with the policy number in the Internet Access Policy drop-down list. • Start IP Address and End IP Address: Enter the IP address . Cisco Small Business WRV210 Administration Guide 60 - Cisco WRV210 | Administration Guide - Page 61
2000, XP, or Vista. QuickVPN allows remote workers to log on securely to the corporate network from anywhere on the Internet. You can use the VPN > VPN Client Access page to manage the VPN users and to generate certificates for added security. Cisco Small Business WRV210 Administration Guide 61 - Cisco WRV210 | Administration Guide - Page 62
Configuring a Virtual Private Network (VPN) Managing the VPN Users and Certificates 5 Refer to the following topics: • Managing the VPN Users, page 63 • Managing VPN Certificates, page 65 Cisco Small Business WRV210 Administration Guide 62 - Cisco WRV210 | Administration Guide - Page 63
the VPN Users and Certificates 5 Managing the VPN Users The Router supports up to 10 remote users. They use QuickVPN software to connect to your local network through the VPN tunnel. STEP 1 Click VPN > VPN Client Access in the navigation tree. STEP 2 To add a user, enter the username and password - Cisco WRV210 | Administration Guide - Page 64
Private Network (VPN) Managing the VPN Users and Certificates 5 a. Optionally, enter a new Local IP Address and Subnet Mask for your router, and then click Save. NOTE IMPORTANT: You need to ensure that the local router and the remote router have different IP addresses. Otherwise a VPN tunnel - Cisco WRV210 | Administration Guide - Page 65
the communication between the router and the QuickVPN clients. Use the VPN Certificates area of the VPN Client Access page to generate and manage the certificates. NOTE Certificates are used if you want additional security beyond the user name and password. The certificate must be installed on - Cisco WRV210 | Administration Guide - Page 66
the Router. To disable IPSec Passthrough, select Disabled. • PPTP Passthrough: Point-to-Point Tunneling Protocol (PPTP) allows the Point-to-Point Protocol (PPP) to be tunneled through an IP network. PPTP Passthrough is enabled by default. To disable it, select Disabled. Cisco Small Business WRV210 - Cisco WRV210 | Administration Guide - Page 67
sessions via the Internet on the Layer 2 level. L2TP Passthrough is enabled by default. To disable L2TP Passthrough, select Disabled. STEP 3 Click Save to save your settings, or click Cancel to refresh the page with the previously saved settings. Cisco Small Business WRV210 Administration Guide 67 - Cisco WRV210 | Administration Guide - Page 68
VPN > IPSec VPN page to create and configure a Virtual Private Network (VPN) tunnel for site-to-site VPN. For example, you can use IPSec VPN to connect two offices of your company that are in different locations. You can configure up to 5 tunnels. Cisco Small Business WRV210 Administration Guide - Cisco WRV210 | Administration Guide - Page 69
entire network to access the tunnel. Enter the IP Address and Mask of the local VPN Router in the fields provided. To allow access to the entire IP subnet, enter 0 for the last octet of the IP Address, as in the following example: 192.168.1.0. Cisco Small Business WRV210 Administration Guide 69 - Cisco WRV210 | Administration Guide - Page 70
0 for the last set of IP Address, as in the following example: 192.168.1.0. • Host: Terminates VPN at the Router, instead of the PC. Use Port Range Forwarding to direct traffic to the correct computer. For more information, see "Enabling Port Forwarding to Allow Access to Services" on page 51. • Any - Cisco WRV210 | Administration Guide - Page 71
(default) or Aggressive. Main Mode operation is supported in ISAKMP SA establishment. • ISAKMP Encryption Method: There are four different types of encryption: 3DES, AES-128, AES-192, or ES-256. You may choose any of these, but it must be the same type of encryption that is being used by the VPN - Cisco WRV210 | Administration Guide - Page 72
This feature enables the Router to block unauthorized IP addresses. Specify the number of times IKE must fail before the Router blocks that unauthorized IP address. also specify the number of seconds that the unauthorized IP address is blocked. This feature is enabled by default. You can uncheck the - Cisco WRV210 | Administration Guide - Page 73
a IPSec VPN tunnel is established. If the preconfigured type of the remote group is IP Addr., the field displays the IP address of the remote peer. If the pre-configured type of the remote group is Subnet, the field displays the subnet type "IP Address/Mask". If the pre- Cisco Small Business WRV210 - Cisco WRV210 | Administration Guide - Page 74
overall related VPN behaviors and contact messages of a VPN Tunnel and VPN Client. After viewing the log information, you can clear it by clicking Clear Log Now. • Refresh: Click this button to update the page with current VPN status information. Cisco Small Business WRV210 Administration Guide 74 - Cisco WRV210 | Administration Guide - Page 75
of Service (QoS) Quality of Service (QoS) ensures better service to high-priority service. Use the QoS module to configure the Router's QoS settings. • Configuring QoS Settings for Specified Applications, page 75 • Configuring QoS Settings for Specified Ports, page 78 Configuring QoS Settings - Cisco WRV210 | Administration Guide - Page 76
application, enter a name, classify it as High Priority or Low Priority, and enter the port number that is used by the application. STEP 4 Click Save to save your settings, or click Cancel to refresh the page with the previously saved settings. Cisco Small Business WRV210 Administration Guide 76 - Cisco WRV210 | Administration Guide - Page 77
4 Optionally, if you want to configure advanced policies, click User Define. You can configure up to 5 policies. • Specify the source IP address or the destination IP address, the subnet mask, and the protocol. • Specify the port range, the Bandwidth Allocation Policy (Spare or Guaranteed), and the - Cisco WRV210 | Administration Guide - Page 78
Configuring Quality of Service (QoS) Configuring QoS Settings for Specified Ports 6 Configuring QoS Settings for Specified Ports Port-based QoS ensures better service to specified LAN ports. For example, if there is an email server connected to a particular port, you can prioritize traffic to that - Cisco WRV210 | Administration Guide - Page 79
Service (QoS) Configuring QoS Settings for Specified Ports 6 • Ingress Rate: Choose the input data rate for a port. . Full is the default. • Egress Rate: This setting lets the user choose the output data rate for a port. Packets exceeding this Cisco Small Business WRV210 Administration Guide 79 - Cisco WRV210 | Administration Guide - Page 80
Logs, page 87 • Performing Diagnostic Tests, page 89 • Reverting to the Factory Default Settings, page 91 • Upgrading the Firmware, page 92 • Rebooting the Router, page 94 Managing Access and Configuring Other Management Options Use the Administration > Management page to reset the admin password - Cisco WRV210 | Administration Guide - Page 81
you access the Router's Configuration Utility. The default user name and password is admin. You should change this setting to prevent unauthorized access. Make these changes in the Admin Password section of the Administration > Management page. Cisco Small Business WRV210 Administration Guide 81 - Cisco WRV210 | Administration Guide - Page 82
to the Configuration Utility With the default settings, the Configuration Utility can be accessed only from a computer that is physically connected to one of the Router's LAN ports. You can adjust the LAN access to enable access through a wireless connection, and enable WAN access from a computer - Cisco WRV210 | Administration Guide - Page 83
Remote Management, click Enabled to allow access to upgrade the Router remotely from outside the local network. Otherwise, keep the default setting, Disabled. This option is available only if the Remote Management feature enabled. • Allow Remote IP Address: If you enabled Remote Management, you can - Cisco WRV210 | Administration Guide - Page 84
: Select Enable if you wish to use SNMP. To use SNMP, you need SNMP software on your PC. • Contact: Enter the contact information for the Router. Cisco Small Business WRV210 Administration Guide 84 - Cisco WRV210 | Administration Guide - Page 85
used to set up public services on your network. When the UPnP function is enabled, Windows XP can add or delete entries to the underlined UPnP Forwarding Table. Some Internet games require enable UPnP, or click Disabled to disable this feature. Cisco Small Business WRV210 Administration Guide 85 - Cisco WRV210 | Administration Guide - Page 86
: Click Backup Configuration. When the File Download window appears, click Save. Find the Setup page appears, the process is finished. STEP 3 Click Save to save your settings, or click Cancel to refresh the page with the previously saved settings. Cisco Small Business WRV210 Administration Guide - Cisco WRV210 | Administration Guide - Page 87
: May involve the following two scenarios: (1) remote management is enabled and a remote client establishes a management connection, and (2) port forwarding or DMZ is enabled, and traffic is allowed into the private network through this service Cisco Small Business WRV210 Administration Guide 87 - Cisco WRV210 | Administration Guide - Page 88
requires the installation of an external log viewer or syslog viewer on your PC. If you enable the system log, also check the box for each type of event that you want to include in the log. - Logviewer IP Address: Enter the address where you want the system log to be sent. - Event Types: Check - Cisco WRV210 | Administration Guide - Page 89
the following information: • IP or URL Address: Enter the IP address or URL address of the network device whose connection status you wish to test. • Packet Size: Enter the size of the ping packets, in bytes. Acceptable values are 32 to 56300. Cisco Small Business WRV210 Administration Guide 89 - Cisco WRV210 | Administration Guide - Page 90
Stop to stop the test. • Click Clear Log to clear the results. • Click Close to return to the Administration > Diagnostics page. STEP 3 Click Save to save your settings, or click Cancel to refresh the page with the previously saved settings. Cisco Small Business WRV210 Administration Guide 90 - Cisco WRV210 | Administration Guide - Page 91
page allows you to restore the Router's configuration to its factory default settings. NOTE Do not restore the factory defaults unless you are having difficulties with the Router and have exhausted all other troubleshooting measures. After the Router is reset, you have to re-enter all of your - Cisco WRV210 | Administration Guide - Page 92
File Download window appears, click Save. Find the location where you want to save the file, and click Save. A message appears when the download is complete. The file is a .bin file. You can change the filename before saving, if you choose to do so. Cisco Small Business WRV210 Administration Guide - Cisco WRV210 | Administration Guide - Page 93
address: tools.cisco.com/support/downloads b. When prompted, enter your Cisco online login. c. In the Software Search box, enter WRV210. Click Go. d. Follow the instructions to find the latest firmware and download it to your PC. STEP 3 Perform the upgrade: a. Click Administration > Firmware Upgrade - Cisco WRV210 | Administration Guide - Page 94
to reboot the router during remote troubleshooting. STEP 1 Click Administration > Reboot in the navigation tree. STEP 2 To reboot the router, click Yes to confirm and then click Save. If you do not want to reboot the router, click No or Cancel. Cisco Small Business WRV210 Administration Guide 94 - Cisco WRV210 | Administration Guide - Page 95
the Status module to monitor your network. • Monitoring the Router Status, page 96 • Monitoring the LAN, page 97 • Monitoring the Wireless Network, page 99 • Monitoring the System Performance, page 100 • Monitoring the QuickVPN Clients, page 102 Cisco Small Business WRV210 Administration Guide 95 - Cisco WRV210 | Administration Guide - Page 96
reboot • MAC Address: The MAC Address of the Router's Internet interface • Host Name: The host name that was entered on the Basic Setup page, if applicable • Domain Name: The domain name that was entered on the Basic Setup page, if applicable Cisco Small Business WRV210 Administration Guide 96 - Cisco WRV210 | Administration Guide - Page 97
Internet port. This button is available only if the Router has a DHCP connection. • Refresh: Click this button to update the on-screen information. Monitoring the LAN The Status > Local Network page displays information about the local network. Cisco Small Business WRV210 Administration Guide 97 - Cisco WRV210 | Administration Guide - Page 98
network • End IP: The final IP address in the range of addresses that the DHCP server issues to connected devices on the local network • DHCP Clients Table: Click this button to view a list of PCs that have been assigned IP addresses by the Router. The DHCP Active IP Table lists the DHCP Server IP - Cisco WRV210 | Administration Guide - Page 99
SSID of your network • MAC Address: The MAC Address of the SSID listed in the table and on your network • Security Mode: The type of wireless security that is used by the Router • WMM: The status of the Router's WMM feature: Enabled or Disabled Cisco Small Business WRV210 Administration Guide 99 - Cisco WRV210 | Administration Guide - Page 100
, and wired connectivity. NOTE The page automatically refreshes every 10 seconds. Internet/Wireless: Statistics for the network traffic on the Internet connection and wireless connectivity are shown in five separate columns. • Connection: The status of the connection Cisco Small Business WRV210 - Cisco WRV210 | Administration Guide - Page 101
LAN Statistics for the network traffic on each of the four LAN ports are shown in four separate columns. • Connection: The status of the connection • Packets Received: received • Refresh: Click this button to update the on-screen information. Cisco Small Business WRV210 Administration Guide 101 - Cisco WRV210 | Administration Guide - Page 102
: The length of time that the VPN connection has lasted • Disconnect: Check the Disconnect box for each VPN client that you want to disconnect. Then click the Disconnect button. • Refresh: Click this button to update the on-screen information. Cisco Small Business WRV210 Administration Guide 102 - Cisco WRV210 | Administration Guide - Page 103
System Performance NAT Throughput IPSec Throughput Setup/Config User Interface Management SNMP Version Event Logging Details WRV210 IEEE802.11g, IEEE802.11b, IEEE802.3, IEEE802.3u, 802.1x (Security Authentication), 802.11i (Security WPA2), 802.11e (Wireless QoS) One Power port (12V 1A), Four 10/100 - Cisco WRV210 | Administration Guide - Page 104
Specifications A Feature Details Firmware Upgrade Firmware Upgradeable Through Web Browser and TFTP Utility Diagnostics Flash, RAM, LAN, WLAN Wireless Spec/Modulation Radio and Modulation Type: 802.11b/DSSS, 802.11g/ ODFM Supported Data Rates 802.11b: 1, 2, 5.5, 11 Mbps 802.11g: 6, 9, 11, - Cisco WRV210 | Administration Guide - Page 105
Username/Password Network VLAN Support 4 LAN Ports and 4 SSIDs can be mapped to up to 5 VLANs SSID Broadcast SSID Broadcast Enable/Disable Multiple SSID Supports Multiple BSSIDs (4) which can operate on predefined schedules Wireless VLAN Map Supports SSID-to-VLAN Mapping with Wireless Client - Cisco WRV210 | Administration Guide - Page 106
Feature Details Power 12V 1A Certification FCC Class B, CE, IC Operating Temp. 32 to 104ºF (0 to 40ºC) Storage Temp. -4 to 158ºF (-20 to 70ºC) Operating Humidity 10 to 85% Noncondensing Storage Humidity 5 to 90% Noncondensing A Cisco Small Business WRV210 Administration Guide 106 - Cisco WRV210 | Administration Guide - Page 107
Phone Support Contacts www.cisco.com/en/US/support/tsd_cisco_small_ business_support_ center_contacts.html Software Downloads (Login Required) Go to tools.cisco.com/support/downloads, and enter the model number in the Software Search box. Product Documentation Cisco Small Business Routers (Login
-
 1
1 -
 2
2 -
 3
3 -
 4
4 -
 5
5 -
 6
6 -
 7
7 -
8
-
9
-
10
-
11
-
12
-
13
-
14
-
15
-
16
-
17
-
18
-
19
-
20
-
21
-
22
-
23
-
24
-
25
-
26
-
27
-
28
-
29
-
30
-
31
-
32
-
33
-
34
-
35
-
36
-
37
-
38
-
39
-
40
-
41
-
42
-
43
-
44
-
45
-
46
-
47
-
48
-
49
-
50
-
51
-
52
-
53
-
54
-
55
-
56
-
57
-
58
-
59
-
60
-
61
-
62
-
63
-
64
-
65
-
66
-
67
-
68
-
69
-
70
-
71
-
72
-
73
-
74
-
75
-
76
-
77
-
78
-
79
-
80
-
81
-
82
-
83
-
84
-
85
-
86
-
87
-
88
-
89
-
90
-
91
-
92
-
93
-
94
-
95
-
96
-
97
-
98
-
99
-
100
-
101
-
102
-
103
-
104
-
105
-
106
-
107
 |
 |
Cisco Small Business
WRV210 Wireless-G VPN Router with RangeBooster
ADMINISTRATION
GUIDE