D-Link DES-3226SM Product Manual - Page 52
Console CLI show stack Command, show stacking
 |
UPC - 790069247118
View all D-Link DES-3226SM manuals
Add to My Manuals
Save this manual to your list of manuals |
Page 52 highlights
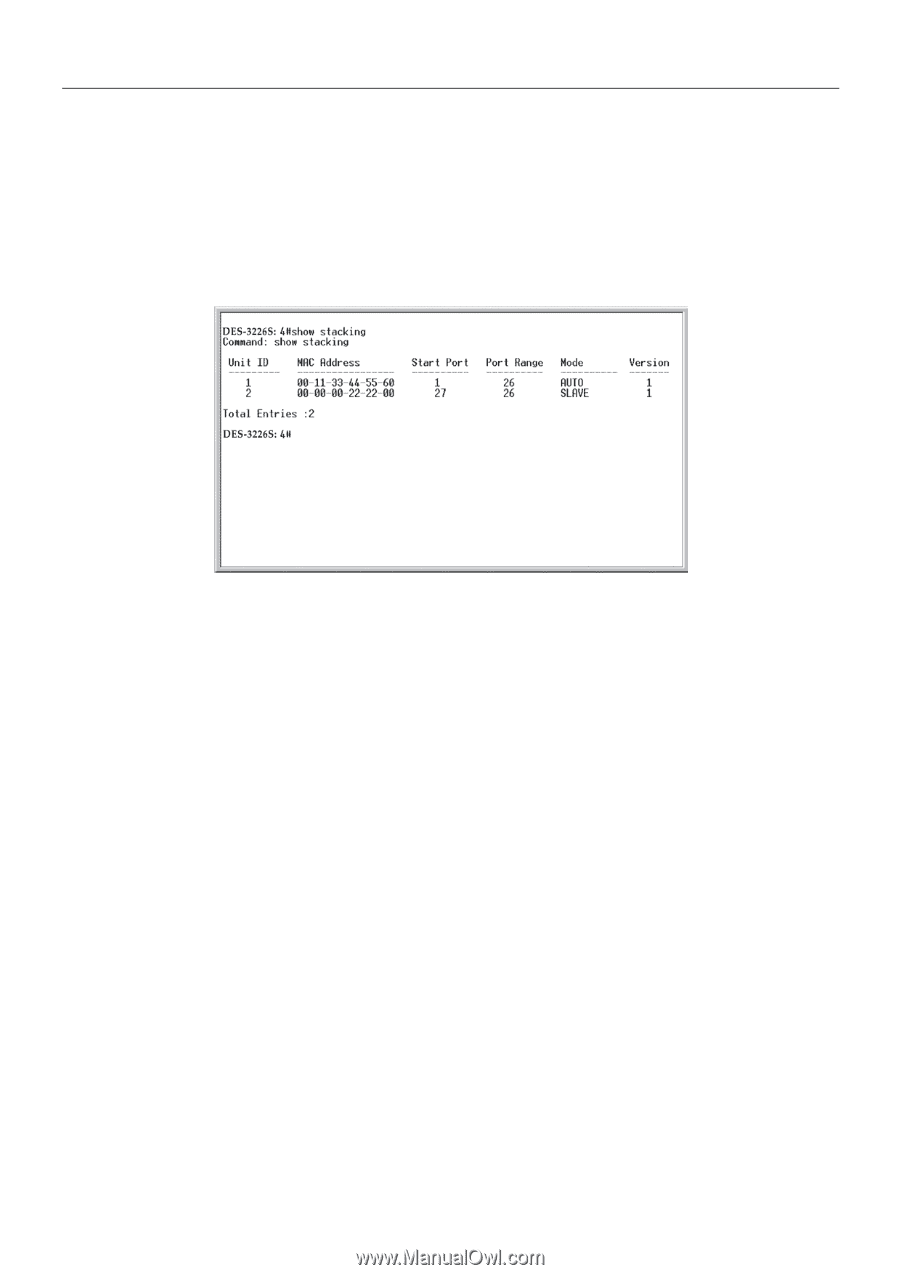
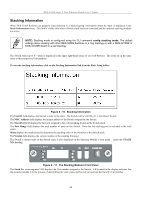
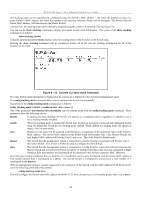
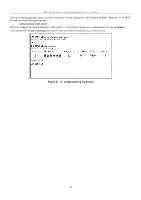
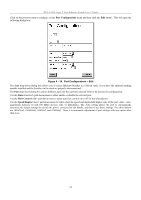
DES-3226S Layer 2 Fast Ethernet Switch User's Guide The stacking order can be automatically configured using the Switch's MAC address − the lower the numerical value of a given Switch's MAC address, the lower the number in the stacking order the Switch will be assigned. The Switch with the lowest MAC address, will then become the Master Switch. Alternatively, the stacking order can be manually assigned using the console's Command Line Interface (CLI). You can use the show stacking command to display the current Switch stack information. The syntax of the show stacking command is as follows: show stacking {mode} Using the optional parameter mode displays only the stacking mode of the Switches in the Switch stack. Entering the show stacking command with no parameters returns all of the relevant stacking information for all of the Switches in the stack: Figure 6 - 12. Console CLI show stack Command The same Switch stack information is displayed in the console as is displayed in the web-based management agent. The config stacking mode command allows you to configure the Switch stack manually. The syntax of the config stacking mode command is as follows: config stacking mode [ disable | enable [master | auto | slave ] ] One of the parameters auto/master/slave/standalone must be entered along with the config stacking mode command. These parameters have the following effects: disable If stacking has been disabled, the Switch will operate as a standalone device regardless of whether or not it has a stacking module installed. enable When the stacking mode is enabled the Switch may function in a properly connected and configured Switch stack. By default the Switch has the stacking mode enabled. When enabled the stacking mode can operate in master, slave or auto modes. auto Switches in the stack will be assigned a unit ID using a comparison of the numerical value of the Switch's MAC address. The lowest MAC address in the Switch stack will become Unit 1 (the Master Switch), the next highest MAC address will become Unit 2, and so on. This is the Switch's default mode. master The Switch that the management station is connected to (via the Switch's serial port) will become Unit 1 − the master Switch. This Switch will then be used to configure the Switch stack. slave The Switch that the management station is connected to (via the Switch's serial port) will never become the Master Switch and will always be Unit 2 or higher. If multiple Switches in the stack are configured as slave Switches, their unit numbers are determined by the numerical value of their respective MAC addresses. The following example configures the two Switches in a two-Switch stack to give the Switch with the lowest MAC address a Unit number greater than 1 (configured as a slave). The second Switch is configured to always have a Unit number of 1 (configured as the master): With the management station's console connected to the serial port of the Switch with the MAC address 00-00-00-22-22-00, enter the following command at the prompt: config stacking mode slave This will configure the Switch with MAC address 00-00-00-22-22-00 to always have a Unit number greater than 1 (as a slave). 49
-
 1
1 -
2
-
3
-
4
-
5
-
6
-
7
-
8
-
9
-
10
-
11
-
12
-
13
-
14
-
15
-
16
-
17
-
18
-
19
-
20
-
21
-
22
-
23
-
24
-
25
-
26
-
27
-
28
-
29
-
30
-
31
-
32
-
33
-
34
-
35
-
36
-
37
-
38
-
39
-
40
-
41
-
42
-
43
-
44
-
45
-
46
-
 47
47 -
 48
48 -
 49
49 -
 50
50 -
 51
51 -
 52
52 -
 53
53 -
 54
54 -
 55
55 -
 56
56 -
 57
57 -
58
-
59
-
60
-
61
-
62
-
63
-
64
-
65
-
66
-
67
-
68
-
69
-
70
-
71
-
72
-
73
-
74
-
75
-
76
-
77
-
78
-
79
-
80
-
81
-
82
-
83
-
84
-
85
-
86
-
87
-
88
-
89
-
90
-
91
-
92
-
93
-
94
-
95
-
96
-
97
-
98
-
99
-
100
-
101
-
102
-
103
-
104
-
105
-
106
-
107
-
108
-
109
-
110
-
111
-
112
-
113
-
114
-
115
-
116
-
117
-
118
-
119
-
120
-
121
-
122
-
123
-
124
 |
 |