DIRECTV HR24 System Manual - Page 101
Definition DVRs - set to native
 |
View all DIRECTV HR24 manuals
Add to My Manuals
Save this manual to your list of manuals |
Page 101 highlights
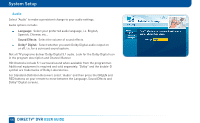
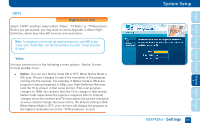
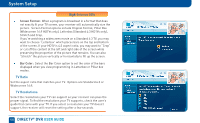
HDTV High-Definition DVRs Select "HDTV" and then select either "Video", "TV Ratio" or "TV Resolution". Before you get started, you may want to review Appendix 3, About HighDefinition, which describes HD formats and resolutions. Note: To change your screen format and resolution temporarily, press INFO on your remote, select "Audio/ Video" from the Channel Banner and select "Change Resolution & Format". Video Set your preference for the following screen options: Native, Screen Format and Bar Color. Native: You can turn Native mode ON or OFF. When Native Mode is ON, your TV auto-changes to match the resolution of the program coming into the receiver. For example, if Native mode is ON and a program is being broadcast in 480p, your High-Definition Receiver tells the TV to show it in that same format. If the next program changes to 1080i, the receiver tells the TV to change to that format. Native mode slows down the system's response time to channel changes since the receiver and TV must adjust the picture resolution at every channel change. Because of this, the default setting is OFF. When Native Mode is OFF, your receiver will display the program at the highest resolution set on the "TV Resolutions" screen. System Setup CHAPTER 6 - Settings 101 8 7 6 5 4 3 2 1 Chapter Chapter Chapter Chapter Chapter Chapter Chapter Chapter
-
 1
1 -
2
-
3
-
4
-
5
-
6
-
7
-
8
-
9
-
10
-
11
-
12
-
13
-
14
-
15
-
16
-
17
-
18
-
19
-
20
-
21
-
22
-
23
-
24
-
25
-
26
-
27
-
28
-
29
-
30
-
31
-
32
-
33
-
34
-
35
-
36
-
37
-
38
-
39
-
40
-
41
-
42
-
43
-
44
-
45
-
46
-
47
-
48
-
49
-
50
-
51
-
52
-
53
-
54
-
55
-
56
-
57
-
58
-
59
-
60
-
61
-
62
-
63
-
64
-
65
-
66
-
67
-
68
-
69
-
70
-
71
-
72
-
73
-
74
-
75
-
76
-
77
-
78
-
79
-
80
-
81
-
82
-
83
-
84
-
85
-
86
-
87
-
88
-
89
-
90
-
91
-
92
-
93
-
94
-
95
-
 96
96 -
 97
97 -
 98
98 -
 99
99 -
 100
100 -
 101
101 -
 102
102 -
 103
103 -
 104
104 -
 105
105 -
 106
106 -
107
-
108
-
109
-
110
-
111
-
112
-
113
-
114
-
115
-
116
-
117
-
118
-
119
-
120
-
121
-
122
-
123
-
124
-
125
-
126
-
127
-
128
-
129
-
130
-
131
-
132
-
133
-
134
-
135
-
136
-
137
-
138
-
139
-
140
-
141
-
142
-
143
-
144
-
145
-
146
-
147
-
148
-
149
-
150
-
151
-
152
-
153
-
154
-
155
-
156
-
157
-
158
-
159
-
160
-
161
-
162
-
163
-
164
-
165
-
166
-
167
-
168
-
169
-
170
-
171
-
172
-
173
-
174
-
175
-
176
-
177
-
178
 |
 |