Dell 1815dn Owners Manual - Page 63
Scanning Using the Windows Image Acquisition WIA Driver, Scroll, Select, Version, Resolution, Cancel - driver windows xp
 |
UPC - 000061100008
View all Dell 1815dn manuals
Add to My Manuals
Save this manual to your list of manuals |
Page 63 highlights
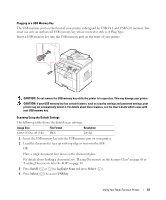
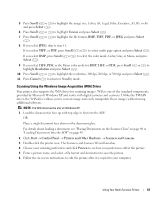
5 Press Scroll ( or ) to highlight the image size, Letter, A4, Legal, Folio, Executive, A5, B5, or A6 and press Select ( ). 6 Press Scroll ( or ) to highlight Version and press Select ( ). 7 Press Scroll ( or ) to highlight the file format, BMP, TIFF, PDF, or JPEG and press Select ( ). 8 If you select JPEG, skip to step 11. If you select TIFF, or PDF, press Scroll ( or ) to select multi page option and press Select ( ). If you select BMP, press Scroll ( or ) to select the color mode, Color, Gray, or Mono, and press Select ( ). 9 If you select TIFF, PDF, or the Mono color mode for BMP, TIFF, or PDF, press Scroll ( or ) to highlight Resolution and press Select ( ). 10 Press Scroll ( or ) to highlight the resolution, 100 dpi, 200 dpi, or 300 dpi and press Select ( ). 11 Press Cancel ( ) to return to Standby mode. Scanning Using the Windows Image Acquisition (WIA) Driver Your printer also supports the WIA driver for scanning images. WIA is one of the standard components provided by Microsoft Windows XP and works with digital cameras and scanners. Unlike the TWAIN driver, the WIA driver allows you to scan an image and easily manipulate those images without using additional software. NOTE: The WIA driver works only on Windows XP. 1 Load the document(s) face up with top edge in first into the ADF. OR Place a single document face down on the document glass. For details about loading a document, see "Placing Documents on the Scanner Glass" on page 48 or "Loading Documents Into the ADF" on page 49. 2 Click Start → Control Panel → Printers and Other Hardware → Scanners and Cameras. 3 Double-click the printer icon. The Scanners and Camera Wizard launches. 4 Choose your scanning preferences and click Preview to see how your preferences affect the picture. 5 Enter a picture name, and select a file format and destination to save the picture. 6 Follow the on-screen instructions to edit the picture after it is copied to your computer. Using Your Multi-Function Printer 63
-
 1
1 -
2
-
3
-
4
-
5
-
6
-
7
-
8
-
9
-
10
-
11
-
12
-
13
-
14
-
15
-
16
-
17
-
18
-
19
-
20
-
21
-
22
-
23
-
24
-
25
-
26
-
27
-
28
-
29
-
30
-
31
-
32
-
33
-
34
-
35
-
36
-
37
-
38
-
39
-
40
-
41
-
42
-
43
-
44
-
45
-
46
-
47
-
48
-
49
-
50
-
51
-
52
-
53
-
54
-
55
-
56
-
57
-
 58
58 -
 59
59 -
 60
60 -
 61
61 -
 62
62 -
 63
63 -
 64
64 -
 65
65 -
 66
66 -
 67
67 -
 68
68 -
69
-
70
-
71
-
72
-
73
-
74
-
75
-
76
-
77
-
78
-
79
-
80
-
81
-
82
-
83
-
84
-
85
-
86
-
87
-
88
-
89
-
90
-
91
-
92
-
93
-
94
-
95
-
96
-
97
-
98
-
99
-
100
-
101
-
102
-
103
-
104
-
105
-
106
-
107
-
108
-
109
-
110
-
111
-
112
-
113
-
114
-
115
-
116
-
117
-
118
-
119
-
120
-
121
-
122
-
123
-
124
-
125
-
126
-
127
-
128
-
129
-
130
-
131
-
132
-
133
-
134
-
135
-
136
-
137
-
138
-
139
-
140
-
141
-
142
-
143
-
144
-
145
-
146
-
147
-
148
-
149
-
150
 |
 |
