Dell 5310n Mono Laser Printer User's Guide - Page 105
Printing on Specialty Media, Loading Standard Trays and Optional Trays
 |
View all Dell 5310n Mono Laser Printer manuals
Add to My Manuals
Save this manual to your list of manuals |
Page 105 highlights
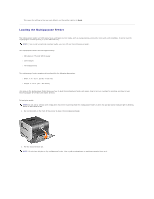
The job will print or be deleted according to the type of print job and action you selected. Printing on Specialty Media Media is paper, card stock, transparencies, labels,and envelopes. The last four are sometimes referred to as specialty media. Follow these instructions to print on specialty media. 1. Load the media as specified for the tray being used. See Loading Standard Trays and Optional Trays for help. 2. From the printer operator panel, set the Paper Type and Paper Size according to the media you loaded. See Setting the Paper Type and Paper Size for help. 3. From the computer software application, set the paper type, size, and source according to the media you loaded. Windows 1. With your document open, click File® Print. 2. Click Preferences, Properties, Options, or Setup (depending on the program or operating system). 3. Click the Paper tab. A paper tray list will appear. 4. Select the tray containing the specialty media. NOTE: If you have difficulty, click Help, and then follow the driver instructions. 5. Select the media type (transparencies, envelopes, and so on) from the Paper Type list box. 6. Select the size of the specialty media from the Paper Size list box. 7. Click OK, and then send the print job as usual. Mac OS 9 1. Select File® Page Setup. 2. Select the size of the specialty media from the Paper pop-up menu, and then click OK. 3. Select File® Print. 4. With General selected on the top pop-up menu, go to the Paper Source pop-up menu, and select the tray containing the specialty media or the name of the media. 5. Click Print. Mac OS X 1. Select File® Page Setup. 2. Select the printer from the Format for pop-up menu. 3. Select the size of the specialty media from the Paper pop-up menu, and then click OK. 4. Select File® Print. 5. On the Copies & Pages pop-up menu, select Imaging. 6. Select the specialty media on the Paper Type pop-up menu. 7. On the Imaging pop-up menu, select Paper Feed. 8. Select the tray containing the specialty media from the All pages from or First page from / Remaining from pop-up menus. 9. Click Print. Loading Standard Trays and Optional Trays The printer has a 500-sheet standard tray. You may have also purchased one or more 250-sheet or 500-sheet optional trays. The steps for loading a 250sheet tray or 500-sheet tray are the same. To load print media: 1. Remove the tray from the printer, and place it on a flat, level surface.
-
 1
1 -
2
-
3
-
4
-
5
-
6
-
7
-
8
-
9
-
10
-
11
-
12
-
13
-
14
-
15
-
16
-
17
-
18
-
19
-
20
-
21
-
22
-
23
-
24
-
25
-
26
-
27
-
28
-
29
-
30
-
31
-
32
-
33
-
34
-
35
-
36
-
37
-
38
-
39
-
40
-
41
-
42
-
43
-
44
-
45
-
46
-
47
-
48
-
49
-
50
-
51
-
52
-
53
-
54
-
55
-
56
-
57
-
58
-
59
-
60
-
61
-
62
-
63
-
64
-
65
-
66
-
67
-
68
-
69
-
70
-
71
-
72
-
73
-
74
-
75
-
76
-
77
-
78
-
79
-
80
-
81
-
82
-
83
-
84
-
85
-
86
-
87
-
88
-
89
-
90
-
91
-
92
-
93
-
94
-
95
-
96
-
97
-
98
-
99
-
 100
100 -
 101
101 -
 102
102 -
 103
103 -
 104
104 -
 105
105 -
 106
106 -
 107
107 -
 108
108 -
 109
109 -
 110
110 -
111
-
112
-
113
-
114
-
115
-
116
-
117
-
118
-
119
-
120
-
121
-
122
-
123
-
124
-
125
-
126
-
127
-
128
-
129
-
130
-
131
-
132
-
133
-
134
-
135
-
136
-
137
-
138
-
139
-
140
-
141
-
142
-
143
-
144
-
145
-
146
-
147
-
148
-
149
-
150
 |
 |
