Dell 5310n Mono Laser Printer User's Guide - Page 75
Direct Attachment With a Network Cable No Print Server, Local Attachment With a USB or Parallel
 |
View all Dell 5310n Mono Laser Printer manuals
Add to My Manuals
Save this manual to your list of manuals |
Page 75 highlights
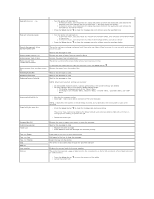
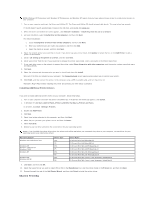
For remote installation: a. Select Install printer on one or more remote computers, and then click Next. b. Enter your Administrator user name and password, and then click Add. c. Select the clients or servers, and then click Next. 5. Select the network printer you would like to install. If you do not see your printer listed, click Update to refresh the list, or click Add Printer to add a printer to the network. 6. Select I am setting up this printer on a server, and then click Next. 7. Select your printer from the list. If you would like to change the printer name listed, enter a new name in the Printer Name field. 8. If you want other users on the network to access this printer, select Share this printer with other computers, and then enter a share name that users will easily identify. 9. Click Next. 10. Select the software and documentation you want to install, and then click Install. 11. When the Congratulations! screen appears, select whether or not to restart your computer, and then click Finish. Direct Attachment With a Network Cable (No Print Server) If you are sharing your printer in a small workgroup environment and do not want to use a print server, follow these instructions to attach the printer directly to a client computer. 1. Insert the Drivers and Utilities CD into your computer. 2. The Drivers and Utilities CD should launch the installation software automatically. If the CD does not automatically launch, click Start®Run, type D:\setup.exe (where D is the drive letter of your CD), and then click OK. 3. When the Drivers and Utilities CD screen appears, click Network Installation - Install the printer for use on a network. 4. Select Install printer on one or more remote computers, and then click Next. 5. Enter your Administrator user name and password, and then click Add. 6. Select the clients or servers, and then click Next. 7. Select the network printer you would like to install, and then click Next. If you do not see your printer listed, click Update to refresh the list or click Add Printer to add a printer to the network. 8. Select your printer from the list. If you would like to change the printer name listed, enter a new name in the Printer Name field. 9. If you want other users on the network to access this printer, select Share this printer with other computers, and then enter a share name that users will easily identify. 10. Click Next. 11. Select the software and documentation you want to install, and then click Install. 12. When the Congratulations! screen appears, print a test page to verify the software is installed correctly. 13. Click Finish to exit. Local Attachment With a USB or Parallel Cable (Using a Print Server) If you are connecting the printer with a USB cable or a parallel cable and want to share it with multiple users, follow these instructions to attach the printer to a print server. NOTE: Use a network cable to connect the printer to access the Dell Printer Configuration Web Tool. This application is not available when the printer is connected to a computer with a USB or parallel cable. Some Windows operating systems may already include a printer driver that is compatible with the printer. NOTE: Installing a custom driver will not replace the system driver. A separate printer object will be created and appear in the Printers folder. Computer Operating System: Windows XP Professional x64 Windows XP Windows 2003 Server Windows 2000 Windows Me Windows 98 SE Windows NT Use this type of cable: USB or Parallel Parallel Installing the Printer Software
-
 1
1 -
2
-
3
-
4
-
5
-
6
-
7
-
8
-
9
-
10
-
11
-
12
-
13
-
14
-
15
-
16
-
17
-
18
-
19
-
20
-
21
-
22
-
23
-
24
-
25
-
26
-
27
-
28
-
29
-
30
-
31
-
32
-
33
-
34
-
35
-
36
-
37
-
38
-
39
-
40
-
41
-
42
-
43
-
44
-
45
-
46
-
47
-
48
-
49
-
50
-
51
-
52
-
53
-
54
-
55
-
56
-
57
-
58
-
59
-
60
-
61
-
62
-
63
-
64
-
65
-
66
-
67
-
68
-
69
-
 70
70 -
 71
71 -
 72
72 -
 73
73 -
 74
74 -
 75
75 -
 76
76 -
 77
77 -
 78
78 -
 79
79 -
 80
80 -
81
-
82
-
83
-
84
-
85
-
86
-
87
-
88
-
89
-
90
-
91
-
92
-
93
-
94
-
95
-
96
-
97
-
98
-
99
-
100
-
101
-
102
-
103
-
104
-
105
-
106
-
107
-
108
-
109
-
110
-
111
-
112
-
113
-
114
-
115
-
116
-
117
-
118
-
119
-
120
-
121
-
122
-
123
-
124
-
125
-
126
-
127
-
128
-
129
-
130
-
131
-
132
-
133
-
134
-
135
-
136
-
137
-
138
-
139
-
140
-
141
-
142
-
143
-
144
-
145
-
146
-
147
-
148
-
149
-
150
 |
 |
