Dell 5310n Mono Laser Printer User's Guide - Page 107
Setting the Paper Type and Paper Size
 |
View all Dell 5310n Mono Laser Printer manuals
Add to My Manuals
Save this manual to your list of manuals |
Page 107 highlights
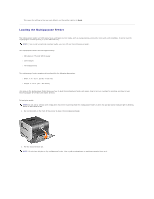
NOTE: Do not fill paper above the load line. Overfilling the tray may cause jams. 6. Squeeze the side guide tab, and slide the guide toward the inside of the tray until it lightly rests against the edge of the media. 7. Insert the tray into the printer. Setting the Paper Type and Paper Size After setting the Paper Type and Paper Size to the correct values for the type and size used in the trays, then any trays containing the same size and type are automatically linked by the printer. NOTE: If the size of the media you are loading is the same size of the media previously loaded, do not change the Paper Size setting. To change the Paper Size and Paper Type setting: 1. Make sure the printer is on. 2. Press the Menu button on the operator panel. 3. Press the Down arrow button until appears next to Paper Menu, and then press the Select button . 4. Press the Down arrow button until appears next to Paper Size/Type, and then press the Select button . 5. Press the Down arrow button 6. Press the Down arrow button 7. Press the Down arrow button until until until appears next to the input source you want to use, and then press the Select button . appears next to the paper size you want to use, and then press the Select button . appears next to the paper type you want to use, and then press the Select button .
-
 1
1 -
2
-
3
-
4
-
5
-
6
-
7
-
8
-
9
-
10
-
11
-
12
-
13
-
14
-
15
-
16
-
17
-
18
-
19
-
20
-
21
-
22
-
23
-
24
-
25
-
26
-
27
-
28
-
29
-
30
-
31
-
32
-
33
-
34
-
35
-
36
-
37
-
38
-
39
-
40
-
41
-
42
-
43
-
44
-
45
-
46
-
47
-
48
-
49
-
50
-
51
-
52
-
53
-
54
-
55
-
56
-
57
-
58
-
59
-
60
-
61
-
62
-
63
-
64
-
65
-
66
-
67
-
68
-
69
-
70
-
71
-
72
-
73
-
74
-
75
-
76
-
77
-
78
-
79
-
80
-
81
-
82
-
83
-
84
-
85
-
86
-
87
-
88
-
89
-
90
-
91
-
92
-
93
-
94
-
95
-
96
-
97
-
98
-
99
-
100
-
101
-
 102
102 -
 103
103 -
 104
104 -
 105
105 -
 106
106 -
 107
107 -
 108
108 -
 109
109 -
 110
110 -
 111
111 -
 112
112 -
113
-
114
-
115
-
116
-
117
-
118
-
119
-
120
-
121
-
122
-
123
-
124
-
125
-
126
-
127
-
128
-
129
-
130
-
131
-
132
-
133
-
134
-
135
-
136
-
137
-
138
-
139
-
140
-
141
-
142
-
143
-
144
-
145
-
146
-
147
-
148
-
149
-
150
 |
 |
