Dell 5310n Mono Laser Printer User's Guide - Page 74
Verifying the IP Settings, Windows
 |
View all Dell 5310n Mono Laser Printer manuals
Add to My Manuals
Save this manual to your list of manuals |
Page 74 highlights
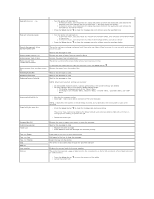
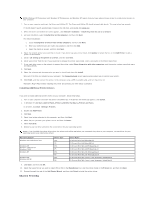
8. Press the Down arrow button until appears next to Gateway, and then press the Select button . 9. Using the numeric pad, enter the IP gateway. When the address is entered, press the Select button . Submitting Selection appears briefly. 10. Press the Select button until the printer returns to Ready. Verifying the IP Settings 1. Print another network setup page. Look under the "TCP/IP" heading, and make sure the IP address, netmask, and gateway are correct. See Printing a Network Setup Page if you need help. 2. Ping the printer, and verify that it responds. At a command prompt on a network computer, type ping followed by the new printer IP address (for example, 192.168.0.11). NOTE: On Windows computers, click Start® Programs® Command prompt or Start® Programs® Accessories® Command prompt. If the printer is active on the network, a reply is sent. After the TCP/IP settings are assigned and verified, install the printer on each network computer. Operating System Windows Macintosh Linux/UNIX NetWare Windows In Windows environments, network printers can be configured for direct printing or shared printing. Both network printing methods require the installation of a printer driver and the creation of a network printer port. Supported Printer Drivers Custom drivers are available on the Drivers and Utilities CD. Supported Network Printer Ports l Microsoft Standard TCP/IP port - Windows XP Professional x64, Windows XP, Windows Server 2003, and Windows 2000 l LPR - Windows NT 4.0 l Printer network ports - Windows XP Professional x64, Windows XP, Windows Server 2003, Windows 2000, and Windows 98 SE/Me For basic printer functionality, install a printer driver, and use a system network printer port, such as an LPR or a standard TCP/IP port. The printer driver and port let you maintain a consistent user interface for use with all the printers on the network. Using a custom network port provides enhanced functionality, such as printer status alerts. Direct Attachment With a Network Cable (Using a Print Server) A print server is any designated computer that centrally manages all client print jobs. If you are sharing your printer in a small workgroup environment and want to control all print jobs on the network, follow these instructions to attach the printer to a print server. 1. Insert the Drivers and Utilities CD into your computer. 2. The Drivers and Utilities CD should launch the installation software automatically. If the CD does not automatically launch, click Start®Run, type D:\setup.exe (where D is the drive letter of your CD), and then click OK. 3. When the Drivers and Utilities CD screen appears, click Network Installation - Install the printer for use on a network. 4. For local installation, select Install printer on this computer, and then click Next.
-
 1
1 -
2
-
3
-
4
-
5
-
6
-
7
-
8
-
9
-
10
-
11
-
12
-
13
-
14
-
15
-
16
-
17
-
18
-
19
-
20
-
21
-
22
-
23
-
24
-
25
-
26
-
27
-
28
-
29
-
30
-
31
-
32
-
33
-
34
-
35
-
36
-
37
-
38
-
39
-
40
-
41
-
42
-
43
-
44
-
45
-
46
-
47
-
48
-
49
-
50
-
51
-
52
-
53
-
54
-
55
-
56
-
57
-
58
-
59
-
60
-
61
-
62
-
63
-
64
-
65
-
66
-
67
-
68
-
 69
69 -
 70
70 -
 71
71 -
 72
72 -
 73
73 -
 74
74 -
 75
75 -
 76
76 -
 77
77 -
 78
78 -
 79
79 -
80
-
81
-
82
-
83
-
84
-
85
-
86
-
87
-
88
-
89
-
90
-
91
-
92
-
93
-
94
-
95
-
96
-
97
-
98
-
99
-
100
-
101
-
102
-
103
-
104
-
105
-
106
-
107
-
108
-
109
-
110
-
111
-
112
-
113
-
114
-
115
-
116
-
117
-
118
-
119
-
120
-
121
-
122
-
123
-
124
-
125
-
126
-
127
-
128
-
129
-
130
-
131
-
132
-
133
-
134
-
135
-
136
-
137
-
138
-
139
-
140
-
141
-
142
-
143
-
144
-
145
-
146
-
147
-
148
-
149
-
150
 |
 |