Dell OptiPlex 755 User's Guide - Page 301
Migrating to a RAID Level 0 Configuration, Create RAID Volume From Existing Hard Drive
 |
View all Dell OptiPlex 755 manuals
Add to My Manuals
Save this manual to your list of manuals |
Page 301 highlights
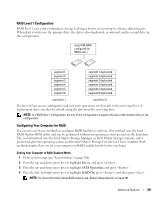
Migrating to a RAID Level 0 Configuration 1 Set your computer to RAID-enabled mode (see "Setting Your Computer to RAID-Enabled Mode" on page 297). 2 Click the Start button and point to All Programs→ Intel(R) Matrix Storage Manager→ Intel Matrix Storage Console to launch the Intel Storage Utility. NOTE: If you do not see an Actions menu option, you have not yet set your computer to RAID-enabled mode. 3 On the Actions menu, select Create RAID Volume From Existing Hard Drive to launch the Migration Wizard. 4 Click Next on the Migration Wizard screen. 5 Enter a RAID volume name or accept the default. 6 From the drop-down box, select RAID 0 as the RAID level. NOTE: Select the stripe size closest to the size of the average file you want to store on the RAID volume. If you do not know the average file size, choose 128 KB as your stripe size. 7 Select the appropriate stripe size from the drop-down box, and then click Next. NOTE: Select the hard drive that you want to use as your source hard drive (it should be the hard drive containing the data or operating system files that you want to keep on the RAID volume). 8 On the Select Source Hard Drive screen, double-click the hard drive from which you want to migrate, and click Next. 9 On the Select Member Hard Drive screen, double-click the hard drive(s) to select the member drive(s) to span the stripe array, and click Next. 10 On the Specify Volume Size screen, select the Volume Size you want, and click Next. NOTE: In step 11, all data contained on the member drive removed. 11 Click Finish to start migrating, or click Back to make changes. You can use your computer normally during the migration process. Migrating to a RAID Level 1 Configuration 1 Set your computer to RAID-enabled mode (see "Setting Your Computer to RAID-Enabled Mode" on page 297). 2 Click the Start button and point to All Programs→ Intel(R) Matrix Storage Manager→ Intel Matrix Storage Console to launch the Intel Storage Utility. NOTE: If you do not see an Actions menu option, you have not yet set your computer to RAID-enabled mode. 3 On the Actions menu, click Create RAID Volume From Existing Hard Drive to launch the Migration Wizard. 4 Click Next on the first Migration Wizard screen. 5 Enter a RAID volume name or accept the default. Advanced Features 301
-
 1
1 -
2
-
3
-
4
-
5
-
6
-
7
-
8
-
9
-
10
-
11
-
12
-
13
-
14
-
15
-
16
-
17
-
18
-
19
-
20
-
21
-
22
-
23
-
24
-
25
-
26
-
27
-
28
-
29
-
30
-
31
-
32
-
33
-
34
-
35
-
36
-
37
-
38
-
39
-
40
-
41
-
42
-
43
-
44
-
45
-
46
-
47
-
48
-
49
-
50
-
51
-
52
-
53
-
54
-
55
-
56
-
57
-
58
-
59
-
60
-
61
-
62
-
63
-
64
-
65
-
66
-
67
-
68
-
69
-
70
-
71
-
72
-
73
-
74
-
75
-
76
-
77
-
78
-
79
-
80
-
81
-
82
-
83
-
84
-
85
-
86
-
87
-
88
-
89
-
90
-
91
-
92
-
93
-
94
-
95
-
96
-
97
-
98
-
99
-
100
-
101
-
102
-
103
-
104
-
105
-
106
-
107
-
108
-
109
-
110
-
111
-
112
-
113
-
114
-
115
-
116
-
117
-
118
-
119
-
120
-
121
-
122
-
123
-
124
-
125
-
126
-
127
-
128
-
129
-
130
-
131
-
132
-
133
-
134
-
135
-
136
-
137
-
138
-
139
-
140
-
141
-
142
-
143
-
144
-
145
-
146
-
147
-
148
-
149
-
150
-
151
-
152
-
153
-
154
-
155
-
156
-
157
-
158
-
159
-
160
-
161
-
162
-
163
-
164
-
165
-
166
-
167
-
168
-
169
-
170
-
171
-
172
-
173
-
174
-
175
-
176
-
177
-
178
-
179
-
180
-
181
-
182
-
183
-
184
-
185
-
186
-
187
-
188
-
189
-
190
-
191
-
192
-
193
-
194
-
195
-
196
-
197
-
198
-
199
-
200
-
201
-
202
-
203
-
204
-
205
-
206
-
207
-
208
-
209
-
210
-
211
-
212
-
213
-
214
-
215
-
216
-
217
-
218
-
219
-
220
-
221
-
222
-
223
-
224
-
225
-
226
-
227
-
228
-
229
-
230
-
231
-
232
-
233
-
234
-
235
-
236
-
237
-
238
-
239
-
240
-
241
-
242
-
243
-
244
-
245
-
246
-
247
-
248
-
249
-
250
-
251
-
252
-
253
-
254
-
255
-
256
-
257
-
258
-
259
-
260
-
261
-
262
-
263
-
264
-
265
-
266
-
267
-
268
-
269
-
270
-
271
-
272
-
273
-
274
-
275
-
276
-
277
-
278
-
279
-
280
-
281
-
282
-
283
-
284
-
285
-
286
-
287
-
288
-
289
-
290
-
291
-
292
-
293
-
294
-
295
-
 296
296 -
 297
297 -
 298
298 -
 299
299 -
 300
300 -
 301
301 -
 302
302 -
 303
303 -
 304
304 -
 305
305 -
 306
306 -
307
-
308
-
309
-
310
-
311
-
312
-
313
-
314
-
315
-
316
-
317
-
318
-
319
-
320
-
321
-
322
-
323
-
324
-
325
-
326
-
327
-
328
-
329
-
330
-
331
-
332
-
333
-
334
-
335
-
336
-
337
-
338
-
339
-
340
-
341
-
342
-
343
-
344
-
345
-
346
-
347
-
348
-
349
-
350
-
351
-
352
-
353
-
354
-
355
-
356
-
357
-
358
-
359
-
360
-
361
-
362
-
363
-
364
-
365
-
366
-
367
-
368
-
369
-
370
-
371
-
372
-
373
-
374
-
375
-
376
-
377
-
378
-
379
-
380
-
381
-
382
-
383
-
384
-
385
-
386
 |
 |
