Dell OptiPlex 755 User's Guide - Page 341
Printer Problems, Start, Control Panel, Printers and Other Hardware
 |
View all Dell OptiPlex 755 manuals
Add to My Manuals
Save this manual to your list of manuals |
Page 341 highlights
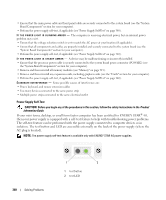
To perform the power supply self-test: 1 Turn your computer off and disconnect the computer from the electrical outlet. 2 Disconnect the DC power supply connectors from the system board and all internal devices. The procedure for disconnecting the power supply cables depends on the form factor of your computer: • For the mini tower, see "Power Supply" on page 79 • For the desktop, see "Power Supply" on page 155 • For the small form factor, see "Power Supply" on page 219 3 Connect your computer to a working electrical outlet. 4 Press and hold the power supply test button. - If the test LED illuminates, the power supply is functioning properly. Connect the DC power supply connector to the system board, and then perform the test again. Continue to connect devices (one at a time) and perform the self-test until the test LED fails to illuminate and a faulty device is identified. Replace the defective device/part or contact Dell (see "Contacting Dell" on page 370). - If the test LED does not illuminate, the power supply is defective. Replace the power supply or contact Dell (see "Contacting Dell" on page 370). Printer Problems CAUTION: Before you begin any of the procedures in this section, follow the safety instructions in the Product Information Guide. NOTE: If you need technical assistance for your printer, contact the printer's manufacturer. C H E C K T H E P R I N T E R D O C U M E N T A T I O N - See the printer documentation for setup and troubleshooting information. ENSURE THAT THE PRINTER IS TURNED ON CHECK THE PRINTER CABLE CONNECTIONS - • See the printer documentation for cable connection information. • Ensure that the printer cables are securely connected to the printer and the computer. TE ST T H E E L E CT R I C A L O U T L E T - Ensure that the electrical outlet is working by testing it with another device, such as a lamp. VERIFY THAT THE PRINTER IS RECOGNIZED BY WINDOWS - Windows XP: 1 Click Start→ Control Panel→ Printers and Other Hardware→ View installed printers or fax printers. 2 If the printer is listed, right-click the printer icon. 3 Click Properties→ Ports. For a parallel printer, ensure that the Print to the following port(s): setting is LPT1 (Printer Port). For a USB printer, ensure that the Print to the following port(s): setting is USB. Solving Problems 341
-
 1
1 -
2
-
3
-
4
-
5
-
6
-
7
-
8
-
9
-
10
-
11
-
12
-
13
-
14
-
15
-
16
-
17
-
18
-
19
-
20
-
21
-
22
-
23
-
24
-
25
-
26
-
27
-
28
-
29
-
30
-
31
-
32
-
33
-
34
-
35
-
36
-
37
-
38
-
39
-
40
-
41
-
42
-
43
-
44
-
45
-
46
-
47
-
48
-
49
-
50
-
51
-
52
-
53
-
54
-
55
-
56
-
57
-
58
-
59
-
60
-
61
-
62
-
63
-
64
-
65
-
66
-
67
-
68
-
69
-
70
-
71
-
72
-
73
-
74
-
75
-
76
-
77
-
78
-
79
-
80
-
81
-
82
-
83
-
84
-
85
-
86
-
87
-
88
-
89
-
90
-
91
-
92
-
93
-
94
-
95
-
96
-
97
-
98
-
99
-
100
-
101
-
102
-
103
-
104
-
105
-
106
-
107
-
108
-
109
-
110
-
111
-
112
-
113
-
114
-
115
-
116
-
117
-
118
-
119
-
120
-
121
-
122
-
123
-
124
-
125
-
126
-
127
-
128
-
129
-
130
-
131
-
132
-
133
-
134
-
135
-
136
-
137
-
138
-
139
-
140
-
141
-
142
-
143
-
144
-
145
-
146
-
147
-
148
-
149
-
150
-
151
-
152
-
153
-
154
-
155
-
156
-
157
-
158
-
159
-
160
-
161
-
162
-
163
-
164
-
165
-
166
-
167
-
168
-
169
-
170
-
171
-
172
-
173
-
174
-
175
-
176
-
177
-
178
-
179
-
180
-
181
-
182
-
183
-
184
-
185
-
186
-
187
-
188
-
189
-
190
-
191
-
192
-
193
-
194
-
195
-
196
-
197
-
198
-
199
-
200
-
201
-
202
-
203
-
204
-
205
-
206
-
207
-
208
-
209
-
210
-
211
-
212
-
213
-
214
-
215
-
216
-
217
-
218
-
219
-
220
-
221
-
222
-
223
-
224
-
225
-
226
-
227
-
228
-
229
-
230
-
231
-
232
-
233
-
234
-
235
-
236
-
237
-
238
-
239
-
240
-
241
-
242
-
243
-
244
-
245
-
246
-
247
-
248
-
249
-
250
-
251
-
252
-
253
-
254
-
255
-
256
-
257
-
258
-
259
-
260
-
261
-
262
-
263
-
264
-
265
-
266
-
267
-
268
-
269
-
270
-
271
-
272
-
273
-
274
-
275
-
276
-
277
-
278
-
279
-
280
-
281
-
282
-
283
-
284
-
285
-
286
-
287
-
288
-
289
-
290
-
291
-
292
-
293
-
294
-
295
-
296
-
297
-
298
-
299
-
300
-
301
-
302
-
303
-
304
-
305
-
306
-
307
-
308
-
309
-
310
-
311
-
312
-
313
-
314
-
315
-
316
-
317
-
318
-
319
-
320
-
321
-
322
-
323
-
324
-
325
-
326
-
327
-
328
-
329
-
330
-
331
-
332
-
333
-
334
-
335
-
 336
336 -
 337
337 -
 338
338 -
 339
339 -
 340
340 -
 341
341 -
 342
342 -
 343
343 -
 344
344 -
 345
345 -
 346
346 -
347
-
348
-
349
-
350
-
351
-
352
-
353
-
354
-
355
-
356
-
357
-
358
-
359
-
360
-
361
-
362
-
363
-
364
-
365
-
366
-
367
-
368
-
369
-
370
-
371
-
372
-
373
-
374
-
375
-
376
-
377
-
378
-
379
-
380
-
381
-
382
-
383
-
384
-
385
-
386
 |
 |
