Epson EPL-N1200 Service Manual - Page 92
Front Cover Removal
 |
View all Epson EPL-N1200 manuals
Add to My Manuals
Save this manual to your list of manuals |
Page 92 highlights
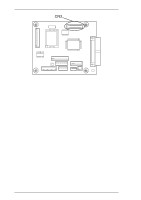
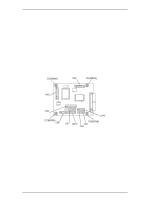
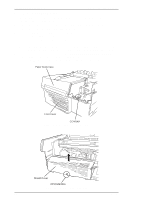
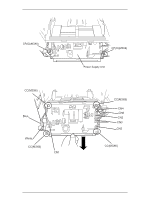
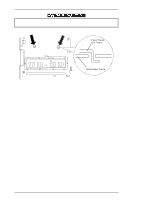
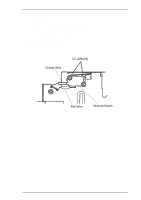
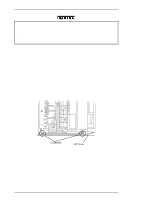
Disassembly and Assembly EPL-N1200 Service Manual 3.2.2.2 Power Supply Unit Removal 1. Open the top cover. Remove the imaging cartridge. Cover the imaging cartridge to protect it from light or place it in a dark area. 2. Remove one CC (M3 × 6) screw from the control panel then lift the panel forward. 3. Remove two CC (M3x8) screws on the paper guide case. 4. Loosen one CC (M3x8) screw which secures the front cover. 5. Remove the paper guide case and the front cover. 6. Remove one CP(O) (M3x6) screw on the power supply board shield cover and take the PS unit shield cover away. 7. Remove two CP(O) (M3x8) screws which secure the power supply unit frame and release two fooks from the bottom frame. Then remove the power supply unit frame by pulling it forward. 8. Remove all connectors on the power supply board, CN1, CN2, CN3, CN4, CN5, CN6, blue socket and white socket cables on the power supply board. 9. Remove four CC (M3x6) screws securing the power supply board and its frame. Paper Guide Case Front Cover CC(M3X8) Figure 3-7. Front Cover Removal Shield Cover CP(O)(M3X6) Figure 3-8. Shield Cover Removal 3-8 Rev. A
-
 1
1 -
2
-
3
-
4
-
5
-
6
-
7
-
8
-
9
-
10
-
11
-
12
-
13
-
14
-
15
-
16
-
17
-
18
-
19
-
20
-
21
-
22
-
23
-
24
-
25
-
26
-
27
-
28
-
29
-
30
-
31
-
32
-
33
-
34
-
35
-
36
-
37
-
38
-
39
-
40
-
41
-
42
-
43
-
44
-
45
-
46
-
47
-
48
-
49
-
50
-
51
-
52
-
53
-
54
-
55
-
56
-
57
-
58
-
59
-
60
-
61
-
62
-
63
-
64
-
65
-
66
-
67
-
68
-
69
-
70
-
71
-
72
-
73
-
74
-
75
-
76
-
77
-
78
-
79
-
80
-
81
-
82
-
83
-
84
-
85
-
86
-
 87
87 -
 88
88 -
 89
89 -
 90
90 -
 91
91 -
 92
92 -
 93
93 -
 94
94 -
 95
95 -
 96
96 -
 97
97 -
98
-
99
-
100
-
101
-
102
-
103
-
104
-
105
-
106
-
107
-
108
-
109
-
110
-
111
-
112
-
113
-
114
-
115
-
116
-
117
-
118
-
119
-
120
-
121
-
122
-
123
-
124
-
125
-
126
-
127
-
128
-
129
-
130
-
131
-
132
-
133
-
134
-
135
-
136
-
137
-
138
-
139
-
140
-
141
-
142
-
143
-
144
-
145
-
146
-
147
-
148
-
149
 |
 |
