Garmin Edge Explore 2 Owners Manual - Page 41
Setting Range Alerts, Auto Lap®, Marking Laps by Position
 |
View all Garmin Edge Explore 2 manuals
Add to My Manuals
Save this manual to your list of manuals |
Page 41 highlights
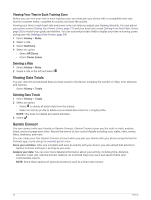
Setting Range Alerts If you have an optional heart rate monitor, cadence sensor, or power meter, you can set up range alerts. A range alert notifies you when the device measurement is above or below a specified range of values. For example, you can set the device to alert you when your cadence is below 40 RPM and over 90 RPM. You can also use a training zone for the range alert (Training Zones, page 24). 1 Select > Activity Profiles. 2 Select a profile. 3 Select Alerts and Prompts. 4 Select Heart Rate Alert, Cadence Alert, or Power Alert. 5 Select the minimum and maximum values, or select zones. Each time you exceed or drop below the specified range, a message appears. The device also beeps if audible tones are turned on (Turning the Device Tones On and Off, page 39). Setting Recurring Alerts A recurring alert notifies you each time the device records a specified value or interval. For example, you can set the device to alert you every 30 minutes. 1 Select > Activity Profiles. 2 Select a profile. 3 Select Alerts and Prompts. 4 Select an alert type. 5 Turn on the alert. 6 Enter a value. 7 Select . Each time you reach the alert value, a message appears. The device also beeps if audible tones are turned on (Turning the Device Tones On and Off, page 39). Auto Lap® Marking Laps by Position You can use the Auto Lap feature to mark the lap at a specific position automatically. This feature is helpful for comparing your performance over different parts of a ride (for example, a long climb or training sprints). During courses, you can use the By Position option to trigger laps at all of the lap positions saved in the course. 1 Select > Activity Profiles. 2 Select a profile. 3 Select Alerts and Prompts > Lap. 4 Turn on the Auto Lap alert. 5 Select Auto Lap Trigger > By Position. 6 Select Lap At. 7 Select an option: • Select Lap Press Only to trigger the lap counter each time you press those locations again. and each time you pass any of • Select Start and Lap to trigger the lap counter at the GPS location where you press during the ride where you press . and at any location • Select Mark and Lap to trigger the lap counter at a specific GPS location marked before the ride and at any location during the ride where you press . 8 If necessary, customize the lap data fields (Adding a Data Screen, page 34). Customizing Your Device 35
-
 1
1 -
2
-
3
-
4
-
5
-
6
-
7
-
8
-
9
-
10
-
11
-
12
-
13
-
14
-
15
-
16
-
17
-
18
-
19
-
20
-
21
-
22
-
23
-
24
-
25
-
26
-
27
-
28
-
29
-
30
-
31
-
32
-
33
-
34
-
35
-
 36
36 -
 37
37 -
 38
38 -
 39
39 -
 40
40 -
 41
41 -
 42
42 -
 43
43 -
 44
44 -
 45
45 -
 46
46 -
47
-
48
-
49
-
50
-
51
-
52
-
53
-
54
-
55
-
56
-
57
-
58
-
59
-
60
-
61
-
62
 |
 |
