Garmin Edge Explore 2 Owners Manual - Page 42
Marking Laps by Distance, Customizing the Lap Banner, Using Auto Pause
 |
View all Garmin Edge Explore 2 manuals
Add to My Manuals
Save this manual to your list of manuals |
Page 42 highlights
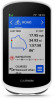
Marking Laps by Distance You can use the Auto Lap feature to mark the lap at a specific distance automatically. This feature is helpful for comparing your performance over different parts of a ride (for example, every 10 miles or 40 kilometers). 1 Select > Activity Profiles. 2 Select a profile. 3 Select Alerts and Prompts > Lap. 4 Turn on the Auto Lap alert. 5 Select Auto Lap Trigger > By Distance. 6 Select Lap At. 7 Enter a value. 8 Select . 9 If necessary, customize the lap data fields (Adding a Data Screen, page 34). Marking Laps by Time You can use the Auto Lap feature to mark the lap at a specific time automatically. This feature is helpful for comparing your performance over different parts of a ride (for example, every 20 minutes). 1 Select > Activity Profiles. 2 Select a profile. 3 Select Alerts and Prompts > Lap. 4 Turn on the Auto Lap alert. 5 Select Auto Lap Trigger > By Time. 6 Select Lap At. 7 Select the hours, minutes, or seconds value. 8 Select or to enter a value. 9 Select . 10 If necessary, customize the lap data fields (Adding a Data Screen, page 34). Customizing the Lap Banner You can customize the data fields that appear in the lap banner. 1 Select > Activity Profiles. 2 Select a profile. 3 Select Alerts and Prompts > Lap. 4 Turn on the Auto Lap alert. 5 Select Custom Lap Banner. 6 Select a data field to change it. Using Auto Pause You can use the Auto Pause® feature to pause the timer automatically when you stop moving or when your speed drops below a specified value. This feature is helpful if your ride includes stop lights or other places where you need to slow down or stop. NOTE: History is not recorded while the activity timer is stopped or paused. 1 Select > Activity Profiles. 2 Select a profile. 3 Select Timer > Auto Pause. 4 Select an option: • Select When Stopped to pause the timer automatically when you stop moving. • Select Custom to pause the timer automatically when your speed drops below a specified value. 5 If necessary, customize optional time data fields (Adding a Data Screen, page 34). 36 Customizing Your Device
-
 1
1 -
2
-
3
-
4
-
5
-
6
-
7
-
8
-
9
-
10
-
11
-
12
-
13
-
14
-
15
-
16
-
17
-
18
-
19
-
20
-
21
-
22
-
23
-
24
-
25
-
26
-
27
-
28
-
29
-
30
-
31
-
32
-
33
-
34
-
35
-
36
-
 37
37 -
 38
38 -
 39
39 -
 40
40 -
 41
41 -
 42
42 -
 43
43 -
 44
44 -
 45
45 -
 46
46 -
 47
47 -
48
-
49
-
50
-
51
-
52
-
53
-
54
-
55
-
56
-
57
-
58
-
59
-
60
-
61
-
62
 |
 |
