Garmin eTrex Legend C Owner's Manual
Garmin eTrex Legend C Manual
 |
UPC - 753759045555
View all Garmin eTrex Legend C manuals
Add to My Manuals
Save this manual to your list of manuals |
Garmin eTrex Legend C manual content summary:
- Garmin eTrex Legend C | Owner's Manual - Page 1
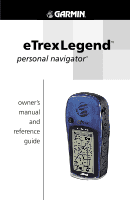
eTrex LegendTM personal navigator ® owner's manual and reference guide - Garmin eTrex Legend C | Owner's Manual - Page 2
organization of such changes or improvements. GARMIN®, AutoLocate®, TracBack®, and Personal Navigator® are registered trademarks, eTrex Legend™, and MapSource™ are trademarks of GARMIN Ltd. or its subsidiaries and may not be used without the express permission of GARMIN. April 2005 Part Number 190 - Garmin eTrex Legend C | Owner's Manual - Page 3
on screen) provides details about using the features of the eTrex Legend according to topic. The explanations for each feature in this section are divided into: (1) An overview that discusses the feature and how it functions and (2) A detailed Step-by-Step instruction for using the feature. The - Garmin eTrex Legend C | Owner's Manual - Page 4
different from that to which the receiver is connected. • Consult the dealer or an experienced radio/TV technician for help. The eTrex Legend does not contain any user-service- able parts. Repairs should only be made by an autho- rized GARMIN service center. Unauthorized repairs or modifications - Garmin eTrex Legend C | Owner's Manual - Page 5
manual. Do not mount the eTrex Legend in a place where the driver or passengers are likely to impact it in an accident or collision. The mounting hardware provided by GARMIN NOT BE USED AS AN AID TO DETERMINE GROUND PROXIMITY FOR AIRCRAFT NAVIGATION. Do Not Mount Over Air Bag Panels Do Not Mount in - Garmin eTrex Legend C | Owner's Manual - Page 6
affect the accuracy and performance of all GPS equipment. Although the eTrex Legend is a precision electronic NAVigation AID (NAVAID), any NAVAID can be misused or misinterpreted and, therefore, become unsafe. MAP DATA INFORMATION: One of the goals of GARMIN is to provide customers with the most - Garmin eTrex Legend C | Owner's Manual - Page 7
Software License Agreement Cleaning The eTrex Legend is constructed of high quality materials and does not require user maintenance other than cleaning. Clean the unit using back up important user data by recording it manually. Water Immersion The eTrex Legend is waterproof to IEC Standard 529 IPX7. - Garmin eTrex Legend C | Owner's Manual - Page 8
, for shipping instructions and an RMA tracking number. The unit should be securely packed with the tracking number clearly written on the outside of the package. The unit should then be sent, freight charges prepaid, to any GARMIN warranty service station. A copy of the original sales receipt is - Garmin eTrex Legend C | Owner's Manual - Page 9
, U.K. Phone: 44/1794.519944 FAX: 44/1794.519222 Product Registration Help us to better support you by completing our on-line registration today! Have the serial number of your eTrex Legend handy and connect to our website (www.garmin.com). Look for the Product Registration link on the Home Page - Garmin eTrex Legend C | Owner's Manual - Page 10
Features 1 Features and Button Function 2 Battery Installation 3 Backlighting and Contrast 3 The Main Pages Main Page Basics 4 Satellite The Main Page 5 Options 6-7 Navigating Navigating with eTrex Legend 8 Map The Main Page 9-10 Options 11-15 Using the Pan Map Option 12 Stop Navigation - Garmin eTrex Legend C | Owner's Manual - Page 11
to operating the eTrex Legend. Each page provides either a basic navigation function or access to features which enhance navigation or customize the unit's operation. This manual is arranged on the Main Pages structure with detailed instructions on using the eTrex Legend's features and their options - Garmin eTrex Legend C | Owner's Manual - Page 12
up or down. The FIND button: • Press to access the Find Menu Installing the lanyard Carry Lanyard Slot 2 Battery Compartment Cover NOTE: The eTrex Legend is designed to be held and operated in the left hand, but it can be held and operated using the right hand as well to suit your preference. - Garmin eTrex Legend C | Owner's Manual - Page 13
typically display less capacity than Alkaline batteries. Follow the battery manufacturer's instructions for proper care and disposal of used batteries. When using 'Battery Saver' or 'Use With GPS Off' mode when not navigating, Alkaline batter- ies can last up to 18 hours. Display Backlighting - Garmin eTrex Legend C | Owner's Manual - Page 14
Trip Computer Main Menu All of the information you need to operate the eTrex Legend can be found on five main pages (or display screens). You can press and release the PAGE button to cycle through the Satellite Page, Map Page, Navigation Page, Trip Computer, and Main Menu Page. While these five pages - Garmin eTrex Legend C | Owner's Manual - Page 15
is No. 35 and 'D' in Signal Bars for GPS Satellites Your location coordinates and Elevation The Satellite Page provides a picture of satellite signal tracking, tells you when the unit is ready for navigation, and shows your location coordinates. The Skyview graphic represents a view looking up - Garmin eTrex Legend C | Owner's Manual - Page 16
the page and then press it in to display the Options Menu. 2. Use the THUMB STICK to highlight the 'Use With GPS Off' option and then press it in to activate. The eTrex Legend stops tracking satellites and should not be used for navigation. However, the next time you turn the unit on, it returns to - Garmin eTrex Legend C | Owner's Manual - Page 17
. If you choose 'Use Map' a map page displays with instructions stating, "Point to your approximate location and press ENTER". Use the THUMB STICK to move the map pointer to your location on the map and press it in. The eTrex Legend relies on satellite signals to provide navigational guidance, so - Garmin eTrex Legend C | Owner's Manual - Page 18
Navigating Navigating with eTrex Legend A Goto A Track A Route When not navigating on a Goto, following a Track, or Route, your travel is indicated by the 'Pointer Icon' and a dotted line indicating your path. 8 Active Navigation is supported by three of the five Main Pages: the Map Page, - Garmin eTrex Legend C | Owner's Manual - Page 19
Position Icon Map Scale Map Features The Map Page displays your present position and direction of movement using a triangular 'Position Icon' that is centered on the map. As you travel, the map display leaves a track log ("trail") of your movements. The map also displays geographic details such - Garmin eTrex Legend C | Owner's Manual - Page 20
of the page can be programmed to provide a variety of travel and navigation information. More detailed map features as well as information about those features can be downloaded to the unit from an optional GARMIN MapSource CD-ROM. When using MapSource data, the word 'mapsource' displays below the - Garmin eTrex Legend C | Owner's Manual - Page 21
without making a selection, move the THUMB STICK to the left or right. Options On-screen Map Page Options Menu button Map Page Options Menu with 'Pan Map' selected. When no active navigation is being used, 'Stop Navigation' cannot be selected. If 'Show Data Fields' is selected, it is replaced by - Garmin eTrex Legend C | Owner's Manual - Page 22
a waypoint, or view the sun and moon phase from it. On-screen buttons at the bottom of the page allow you to Goto the map item, display it on the map or to select 'OK' and return to the Map Page. When using the panning arrow, pressing the FIND button displays items with the panning - Garmin eTrex Legend C | Owner's Manual - Page 23
view GPS navigation data in a window at the top of the page that lists the status of satellite tracking and accuracy of GPS positioning. When hidden, more map area then press in on the THUMB STICK. To program a data field: 1. Use the THUMB STICK to highlight the data field and then press it in to - Garmin eTrex Legend C | Owner's Manual - Page 24
navigating. Detail: Most, More, Normal, Less, or Least; controls how much map detail you see. This setting only applies to a map feature set to 'Auto'. Those features at which the feature should appear on the screen. Some types of data will display only to certain zoom scales. Goto Line: Bearing or - Garmin eTrex Legend C | Owner's Manual - Page 25
to display the options list for that feature. 4. Use the THUMB STICK to highlight the desired option and then press it in to activate. 5. Press the PAGE button or the on-screen 'X' button to return to the Map Page. The Measure Distance option To use the Measure Distance option: 1. Select 'Measure - Garmin eTrex Legend C | Owner's Manual - Page 26
Destination Straight Line Distance to the Destination Bearing Pointer Selectable Data Fields Compass Ring The Navigation Page provides the window at the top of the page displays the status of the GPS Receiver and the approximate accuracy of your current position. The Compass Ring displays your - Garmin eTrex Legend C | Owner's Manual - Page 27
in that direction. If you are using the 'Course Pointer' option instead and you drift away from the line of travel to your destination, the course. Navigation Options Navigation Page Options Menu Navigation Page with Course Pointer and Course Deviation Indicator (CDI) Scale active. Use the ZOOM - Garmin eTrex Legend C | Owner's Manual - Page 28
Page Data Fields Options Menu (The slider at the side of the menu indicates a multi-page list of options.) To Setup the Navigation Page: 1. With the Navigation Page displayed, use the THUMB STICK to highlight the Options Menu button at the top of the page. Then press it in to display the menu - Garmin eTrex Legend C | Owner's Manual - Page 29
Fields The Trip Computer Page displays up to eight different types of navigation data and are user programmable. Each data field is selectable and the page, you can customize the Trip Computer Page to meet your navigation needs. The Options Menu allows you to reset the Trip Computer data when you are ready - Garmin eTrex Legend C | Owner's Manual - Page 30
the THUMB STICK to select the option and place it in the data field. To access the page Options Menu: 1. Use the THUMB STICK to highlight the Options Menu on-screen button and press it in to display the Options Menu. 2. Highlight the desired option and then press in on the THUMB - Garmin eTrex Legend C | Owner's Manual - Page 31
Trip Time - Moving Trip Time - Stopped Trip Time - Total Turn Velocity Made Good Vertical Speed Trip Computer Options Data Field Options Menu NOTE: Use care when choosing the 'Delete' options, as all stored Tracks, Waypoints, and Routes can be permanently deleted when resetting the Trip Computer - Garmin eTrex Legend C | Owner's Manual - Page 32
Bar. To exit these pages, highlight the on-screen 'X' button and press in on the THUMB STICK. The Main Menu provides you with a directory of the eTrex Legend's advanced features. From the Main Menu page you can mark and create new waypoints; find map items such as cities, interstate exits, addresses - Garmin eTrex Legend C | Owner's Manual - Page 33
Using the Main Menu The Main Menu provides access to additional eTrex Legend feature pages. The pages listed below provide enhancements to eTrex Legend map pointer location. Find Menu - Allows you to locate, and Goto, or use as , heading selection and system software information. Accessories Page - - Garmin eTrex Legend C | Owner's Manual - Page 34
as a new waypoint, press the PAGE button before pressing any other to cancel. To create a waypoint using the map panning arrow: 1. With the Pan Map feature active, move the panning arrow (map pointer) to the map item you want and highlight it. 2. Press in and release the THUMB STICK to display the - Garmin eTrex Legend C | Owner's Manual - Page 35
a waypoint for your current location. To create a waypoint by manually entering its coordinates (lat/lon): 1. Press in and hold the THUMB STICK to Use the Find Menu to display the Waypoint Page for the waypoint you want to move. 2. Highlight and press the 'Map' on-screen button to display the map - Garmin eTrex Legend C | Owner's Manual - Page 36
can personalize a Waypoint by changing the Name field and map Symbol field to make them easier to recognize or can change the coordinates or elevation. It can also be deleted. To edit a waypoint: 1. Use the Find Menu to display the waypoint. 2. Use the THUMB STICK to highlight the Waypoint symbol field - Garmin eTrex Legend C | Owner's Manual - Page 37
are structured with a set of sub-menus and location information pages that guide you through the process of finding locations. Use them to construct a Route, establish a direct line of travel (Goto), or when gathering information. Find Any Map or Find Menu item can be saved as a Waypoint. Find Page - Garmin eTrex Legend C | Owner's Manual - Page 38
eTrex Legend can be found by selecting the "Waypoint' option from the Find Menu. You can find a waypoint from the list of waypoints using create a direct line of travel to the waypoint. Select 'Map' to view the waypoint location on the map or select 'OK' to close the page. 4. Use the Options Menu - Garmin eTrex Legend C | Owner's Manual - Page 39
Information Page for that item. 3. With the Information Page displayed, you can select 'Goto' to create a direct line of travel to the item. Select 'Map' to view the waypoint location or select 'OK'. 4. Use the page Options Menu to add the item to an existing route, project a new waypoint from this - Garmin eTrex Legend C | Owner's Manual - Page 40
the Information Page displayed, you can select 'Goto', 'Map', or 'OK' options. Finding an Exit You can use the Find Exit option to locate a nearby exit on fuel, mechanical and food services are available. To find an exit: 1. Press the FIND button to display the Find Menu. 2. Use the THUMB STICK to - Garmin eTrex Legend C | Owner's Manual - Page 41
for the selected service. The Exit Services Information Page displays the name of the service, its direction from the exit, and a list of the services available, each marked by a check. At the bottom of these Information Pages are onscreen buttons for 'Goto', 'Map', and 'OK'. 9. Use the Options Menu - Garmin eTrex Legend C | Owner's Manual - Page 42
to highlight your selection from the list and then press it in to display the Information Page for that item. 7. Use the on-screen buttons to 'Goto' or view on the 'Map', or use the page Options Menu. Finding an Address or Intersection You can enter a street number, choose a street name from a list - Garmin eTrex Legend C | Owner's Manual - Page 43
then press in on the THUMB STICK to display the Information Page for the intersection. Use the on-screen buttons at the bottom of the page to 'Goto', view the item on the 'Map', 'OK' to close, or use the Options Menu for other choices. Main Menu Find Options Find Intersection Page Find Street - Garmin eTrex Legend C | Owner's Manual - Page 44
selected to appear in those fields. 4. Use the PAGE button or Main Page Menu to access the Map Page and observe your movements and a dark line indicating the direct path from your current location to your destination. 5. Use the Bearing Pointer on the Navigation Page to maintain travel in the right - Garmin eTrex Legend C | Owner's Manual - Page 45
and Using a Route Route navigation allows you to create a sequence of intermediate waypoints which lead you to your final destination. The eTrex Legend stores 20 selected waypoint, city, exit, point of interest, etc. Highlight the on-screen 'OK' button and press in on the THUMB STICK to place it on - Garmin eTrex Legend C | Owner's Manual - Page 46
Main Menu Routes Options A Route Options Menu Route Area in Acres Routes List With Two Copied Routes Copied Routes have a '1' Suffix Delete Route Prompt 36 Editing a Route To remove all waypoints: 1. Select the Route Page options button and press the THUMB STICK in to access the Options Menu. 2. - Garmin eTrex Legend C | Owner's Manual - Page 47
access the Options Menu for the waypoint. 2. Highlight 'Review' and then press in on the THUMB STICK to display the Information Page. 3. Highlight the on-screen 'OK' button and then press in on the THUMB with Waypoint List Route Waypoint Options Menu Using the Find Menu to change a Route Waypoint 37 - Garmin eTrex Legend C | Owner's Manual - Page 48
waypoint. Press the on-screen 'OK' button to return to the map page and then press it again to place the new waypoint. To add a route waypoint within a route: 1. Follow steps 1 and 2 in the previous instruction. 2. Use the THUMB STICK to move the panning arrow to a route line. When the arrow touches - Garmin eTrex Legend C | Owner's Manual - Page 49
Adding a new waypoint within a Route Navigation Page with Bearing Pointer Navigating a Route A Route can be navigated using the Map Page or the Navigation Page. The Map Page displays your movement, the route line, and waypoints on the route. The Navigation Page shows compass direction and a bearing - Garmin eTrex Legend C | Owner's Manual - Page 50
in on the THUMB STICK to begin navigating the route. The screen changes to the Navigation Page. 3. Move to the Map Page to view the route and Time of sunset at a route waypoint. To select data field options: 1. Use the THUMB STICK to highlight a data field on the Route Page and then press in to - Garmin eTrex Legend C | Owner's Manual - Page 51
trail on the Map Page as you travel along. This bread crumb trail is the 'Track Log'. The Track Log contains information about points along its path, including time, and position. The eTrex Legend uses this information to allow you to navigate using the saved track. The 'TracBack' feature allows you - Garmin eTrex Legend C | Owner's Manual - Page 52
track, a 'Show on Map' option, and on-screen buttons for 'Map', 'OK', and 'Tracback'. 6. To enable the Tracback feature, highlight the 'Tracback' on the THUMB STICK to enable. Access the Map Page or the Navigation Page to navigate the Track. To use Track Log Setup options: 1. Highlight the Tracks - Garmin eTrex Legend C | Owner's Manual - Page 53
to customize your eTrex Legend to your personal eight US Time Zones, or 24 International Time Zones (nearest city or geographical region). Select 'Other' so you can enter the UTC Time Offset . To set the time: 1. Use the PAGE button to access the Main Menu. 2. Use the THUMB STICK to highlight the - Garmin eTrex Legend C | Owner's Manual - Page 54
earth's shape) and is usually listed in the title block of the map. If you are comparing GPS coordinates to a paper map, chart, or other reference, the map datum in this field must match the horizontal map datum used to generate the map or other reference. The default datum is WGS 84 (World Geodetic - Garmin eTrex Legend C | Owner's Manual - Page 55
time that the backlighting feature stays on and adjust the screen contrast. Backlighting Timeout - Choose from Stays On, to delays of 15 seconds, 30 seconds, one, or two minutes before timing out. Contrast Adjustment - Can be adjusted from light to dark using - Garmin eTrex Legend C | Owner's Manual - Page 56
Effective use of this feature requires a working knowledge of these formats: GARMIN - The proprietary format used to exchange waypoint, track, and map data with a PC. GARMIN DGPS - Allows DGPS input using a GARMIN beacon receiver and a standard RTCM SC-104 and DGPS tuning. NMEA In/Out - Supports the - Garmin eTrex Legend C | Owner's Manual - Page 57
updating and the 'Use With GPS Off' option stops satellite signal reception altogether. The 'Demo Mode' simulates navigation. WAAS - Switch display the current version of unit operating software and the Unit I.D. Number. To adjust System Page options: Use the THUMB STICK to highlight the field - Garmin eTrex Legend C | Owner's Manual - Page 58
Sun and Moon This feature provides you with a sunset, moonrise, and moonset. On-screen buttons at the bottom of this Use Map', a map page displays. Use the map pointer to identify the desired location and then press in on the THUMB STICK. If you choose 'Use Find Menu' follow instructions for using - Garmin eTrex Legend C | Owner's Manual - Page 59
Calendar This feature provides you with a monthly calendar with programmable reference notes dates. You can display one monthly calendar of days at a time and mark days on each with reference notes using the data entry keypad. You can create reference notes for multiple months and for months in - Garmin eTrex Legend C | Owner's Manual - Page 60
Fish Page 'New Location' Options Hunt and Fish This feature provides you with a listing of best times for hunting 'Use Map', a map page displays. Use the map pointer to identify the desired location and then press in on the THUMB STICK. If you choose 'Use Find Menu' follow instructions for using - Garmin eTrex Legend C | Owner's Manual - Page 61
to measure. As soon as you change direction, the eTrex Legend begins to display the area traversed thus far. 3. Continue to the end point, then use the THUMB STICK to stop the calculation. 4. Use the THUMB STICK to store the area as a saved track. To review the area of a saved track: On the Tracks - Garmin eTrex Legend C | Owner's Manual - Page 62
Rate: 1/second, continuous GPS Accuracy: - Garmin eTrex Legend C | Owner's Manual - Page 63
mounted on bicycle handle bars. (Shown at right) MapSource™ Map Data CD-ROMs: An excellent tool for creating waypoints and routes on your PC using a background map and downloading them to your eTrex Legend. See your GARMIN dealer for MapSource details. Owner's Manual or Quick Start Guide (Included - Garmin eTrex Legend C | Owner's Manual - Page 64
Definitions The following data field options are available on the Map, Navigation, and Trip Computer Main Pages. Bearing - The direction from your direction. Location (lat/lon) - Your current GPS position. Location (selected) - The lat/lon of point defined on map. Maximum Speed - The maximum second-by- - Garmin eTrex Legend C | Owner's Manual - Page 65
since the last reset of the trip timers. Turn - The angle difference (in degrees) between the bearing to your destination and your current line of travel. 'L' means turn Left. 'R' means turn Right. Velocity Made Good - The speed at which you are closing on a destination along a desired course - Garmin eTrex Legend C | Owner's Manual - Page 66
unit with maximum Find features and mapping capability. The eTrex Legend accepts up to 8 MB of map data from MetroGuide, Points of Interest, Fishing Hot Spots, Topographic maps, Roads and Recreation, and WorldMap mapping guides. Map data transfer requires the use of a PC, a GARMIN MapSource CD-ROM - Garmin eTrex Legend C | Owner's Manual - Page 67
Appendix E To resolve problems that cannot be remedied using this guide, contact GARMIN Customer Service at: 913-397-8200 or 800-800-1020 Symptom Probable Cause Troubleshooting Guide Remedy Unit does not turn on. Batteries are exhausted. Replace batteries. Unit does not turn ON, even with - Garmin eTrex Legend C | Owner's Manual - Page 68
the 'Data In' line. The GARMIN GBR 21 and GBR 23 are the recommended beacon receivers for use with the eTrex Legend. Other beacon receivers with the correct RTCM format may be used, but may not correctly display status or allow tuning control from the GPS unit. The eTrex Legend may be hard-wired - Garmin eTrex Legend C | Owner's Manual - Page 69
Used 47 Area Calculator 51 Arrow, Panning 2, 10-12, 29 Automotive Mounting Receiver Setup 46, 58 Bearing 13, 14, 18, 21, 54 Bearing Pointer 17 Bent Pointer 18 Big Compass 17 Big Numbers 17, 20 Buttons About 2 CDI Scale 17 Find 12, 27, 30, 32 Goto 12, 34 Main Page Menu 4 Map 38 On screen - Garmin eTrex Legend C | Owner's Manual - Page 70
Find Menu 23, 27 G GARMIN DGPS 46 Limited Warranty vi, vii Proprietary Sentences 58 Getting Started 1 Glide Ratio 21 Global Positioning System (GPS 3, 5, 47, 52, 58, iii Goto Cancelling (Stop Navigation) 11, 13, 34, 40 Functions 8, 12, 29, 34 Line 14 H Handlebar Mounting Bracket 53 Heading 14 - Garmin eTrex Legend C | Owner's Manual - Page 71
review a waypoint 37 review or remove a route waypoint 39 review the area of a saved track 51 save a Track Log 42 save Find Menu item as waypoints 27 save Map Menu item as waypoints 27 select a map navigating 13, 34, 40 transfer data 56 use Setup Map options 15 use the Measure Distance option 15 use - Garmin eTrex Legend C | Owner's Manual - Page 72
Maps Features 15 MapSource CD-ROMs 15, 53, 56 Map Datum 44 Map Page 4, 8, 9, 10 Map Page, Main 54 Map Page options 11-15 Map Scale 9, 10 Marking Location 12 Options 26 Waypoint 23, 24 Maximum Speed 14, 18, 21, 54 Measure Distance 11, 15 Memory Used 21, 54 62 On-screen Button 11, 12, Receiver - Garmin eTrex Legend C | Owner's Manual - Page 73
, 55 Trip Time Moving 14, 18, 21, 55 Stopped 14, 18, 21, 55 Total 14, 18, 21, 55 Troubleshooting 57 Turn 14, 18, 21, 55 Turning GPS Receiver "off 6 U Units of Measure 10, 23, 43, 44 Units Page 44 Unit I.D. Number 47 Use With GPS Off 6, 7 Using Find Menu 48 Goto 34 Main Menu 23 63 - Garmin eTrex Legend C | Owner's Manual - Page 74
Index Map 48 Route 35 Track Log 41, 42 V Velocity Made Good 14, 18, 21, 55 WGS84 (World Geodetic Survey 1984)..... 44 Wide Area Augmentation System (WAAS) ....... 1, 47 Wiring Diagram 58 www.GARMIN.com vii www.nima.mil 44 Z ZOOM IN 9, 10 ZOOM IN button 2 ZOOM OUT 9, 10 ZOOM OUT button 2 - Garmin eTrex Legend C | Owner's Manual - Page 75
- Garmin eTrex Legend C | Owner's Manual - Page 76
latest free software updates throughout the life of your GARMIN products, visit the GARMIN web site at www.garmin.com. © Copyright 2005 GARMIN Ltd. or its subsidiaries Garmin International, Inc. 1200 East 151st Street Olathe, KS 66062 U.S.A. Telephone: 913/397.8200 FAX: 913/397.8282 Garmin (Europe
-
 1
1 -
 2
2 -
 3
3 -
 4
4 -
 5
5 -
 6
6 -
 7
7 -
8
-
9
-
10
-
11
-
12
-
13
-
14
-
15
-
16
-
17
-
18
-
19
-
20
-
21
-
22
-
23
-
24
-
25
-
26
-
27
-
28
-
29
-
30
-
31
-
32
-
33
-
34
-
35
-
36
-
37
-
38
-
39
-
40
-
41
-
42
-
43
-
44
-
45
-
46
-
47
-
48
-
49
-
50
-
51
-
52
-
53
-
54
-
55
-
56
-
57
-
58
-
59
-
60
-
61
-
62
-
63
-
64
-
65
-
66
-
67
-
68
-
69
-
70
-
71
-
72
-
73
-
74
-
75
-
76
 |
 |

owner’s
manual
and
reference
guide
eTrex
Legend
TM
personal navigator
®