Garmin eTrex Legend C Owner's Manual - Page 25
To use Setup Map options, To use the Measure Distance option
 |
UPC - 753759045555
View all Garmin eTrex Legend C manuals
Add to My Manuals
Save this manual to your list of manuals |
Page 25 highlights
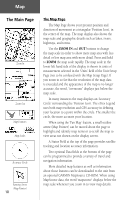
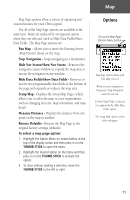
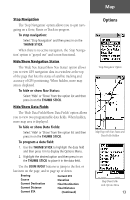
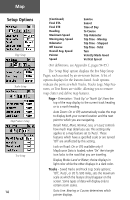
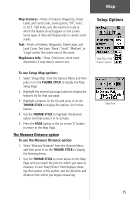
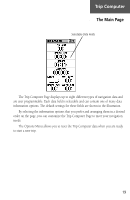
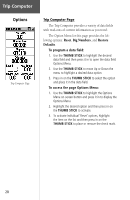
Map Map Features - Points of Interest, Waypoints, Street Label, and Land Cover, Scale options; 'Off', 'Auto', or 20 ft.-500 miles, sets the maximum scale at which the feature should appear on the screen. Some types of data will display only to certain zoom scales. Text - Points of Interest, Waypoints, Street Label, and Land Cover, Text sizes; 'None', 'Small', 'Medium', or 'Large'control the screen size of the name. MapSource Info - Show, Check box; check mark determines if map data is used or not. To use Setup Map options: 1. Select 'Setup Map' from the Options Menu and then press in on the THUMB STICK to display the Map Setup Page. 2. Highlight the desired sub-page button to display the features list for that sub-page. 3. Highlight a feature on the list and press in on the THUMB STICK to display the options list for that feature. 4. Use the THUMB STICK to highlight the desired option and then press it in to activate. 5. Press the PAGE button or the on-screen 'X' button to return to the Map Page. The Measure Distance option To use the Measure Distance option: 1. Select 'Measure Distance' from the Options Menu and then press in on the THUMB STICK to display the Panning Arrow. 2. Use the THUMB STICK to move about on the Map Page until you reach the point to which you want to measure. A new 'Map Pointer' field displays showing the location of the pointer and the direction and distance from where you began measuring. Setup Options Map Page Setup Feature Options Map Data 15
-
 1
1 -
2
-
3
-
4
-
5
-
6
-
7
-
8
-
9
-
10
-
11
-
12
-
13
-
14
-
15
-
16
-
17
-
18
-
19
-
 20
20 -
 21
21 -
 22
22 -
 23
23 -
 24
24 -
 25
25 -
 26
26 -
 27
27 -
 28
28 -
 29
29 -
 30
30 -
31
-
32
-
33
-
34
-
35
-
36
-
37
-
38
-
39
-
40
-
41
-
42
-
43
-
44
-
45
-
46
-
47
-
48
-
49
-
50
-
51
-
52
-
53
-
54
-
55
-
56
-
57
-
58
-
59
-
60
-
61
-
62
-
63
-
64
-
65
-
66
-
67
-
68
-
69
-
70
-
71
-
72
-
73
-
74
-
75
-
76
 |
 |
