Garmin eTrex Summit Owner's Manual - Page 25
Pointer Options - gps unit
 |
View all Garmin eTrex Summit manuals
Add to My Manuals
Save this manual to your list of manuals |
Page 25 highlights
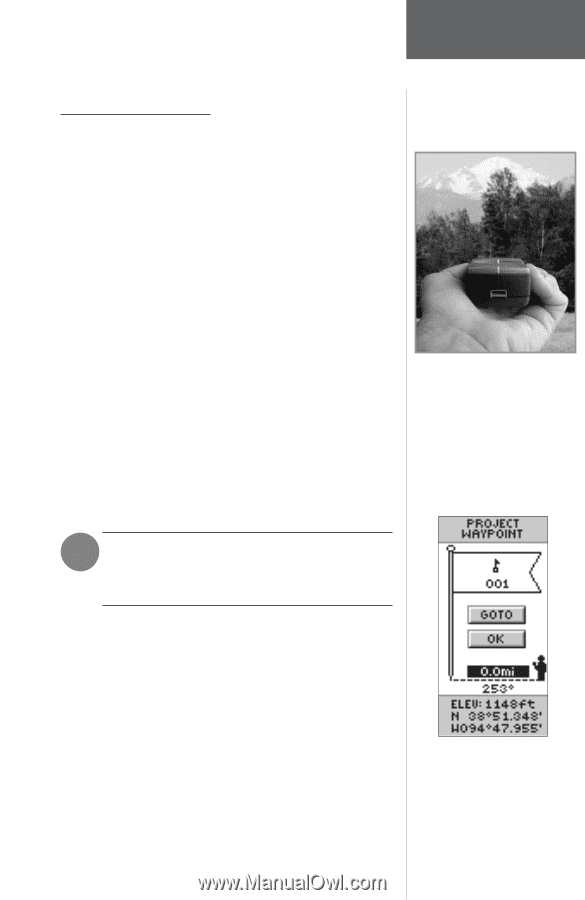
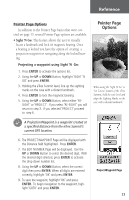
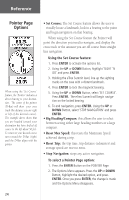
Reference Pointer Page Options In addition to the Pointer Page basics that were covered on page 13, several Pointer Page options are available: • Sight 'N Go: This feature allows the user to visually locate a landmark and lock it's magnetic bearing. Once a bearing is locked you have the option of creating a projection waypoint or navigating along the locked bearing. Projecting a waypoint using Sight 'N Go: 1. Press ENTER to activate the options list. 2. Using the UP or DOWN Button, highlight 'SIGHT 'N GO' and press ENTER. 3. Holding the eTrex Summit level, line up the sighting marks on the case with a distant landmark. 4. Press ENTER to lock the magnetic bearing. 5. Using the UP or DOWN Button, select either 'RE- SIGHT' or 'PROJECT'. If you select 'RE-SIGHT' you will return to step 3. If you selected 'PROJECT' proceed to step 6. F A Projection Waypoint is a waypoint created at a specified distance from the eTrex Summit's current GPS location. Pointer Page Options When using the 'Sight 'N Go' or 'Set Course' feature of the eTrex Summit, hold the unit level and align the Sighting Marks on the case with a distant landmark. 6. The PROJECT WAYPOINT Page will be displayed with the Distance field highlighted. Press ENTER. 7. The EDIT NUMBER Page will be displayed. Use the UP or DOWN Button to select the desired digit. With the desired digit selected, press ENTER to activate the drop down number list. 8. Using the UP or DOWN Button, select the correct digit then press ENTER. When all digits are entered correctly, highlight 'OK' and press ENTER. 9. To save the waypoint, highlight 'OK' and press ENTER. To begin navigation to the waypoint, highlight 'GOTO' and press ENTER. Project Waypoint Page 23
-
 1
1 -
2
-
3
-
4
-
5
-
6
-
7
-
8
-
9
-
10
-
11
-
12
-
13
-
14
-
15
-
16
-
17
-
18
-
19
-
 20
20 -
 21
21 -
 22
22 -
 23
23 -
 24
24 -
 25
25 -
 26
26 -
 27
27 -
 28
28 -
 29
29 -
 30
30 -
31
-
32
-
33
-
34
-
35
-
36
-
37
-
38
-
39
-
40
-
41
-
42
-
43
-
44
-
45
-
46
-
47
-
48
-
49
-
50
-
51
-
52
-
53
-
54
-
55
-
56
-
57
-
58
-
59
-
60
-
61
-
62
-
63
-
64
-
65
-
66
-
67
-
68
-
69
-
70
-
71
-
72
-
73
 |
 |