Garmin eTrex Summit Owner's Manual - Page 40
Tracks
 |
View all Garmin eTrex Summit manuals
Add to My Manuals
Save this manual to your list of manuals |
Page 40 highlights
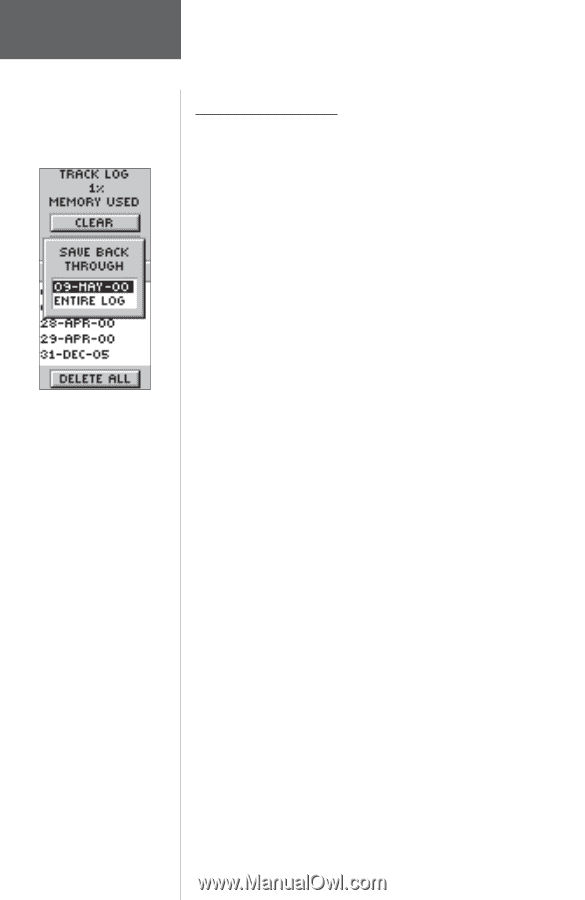
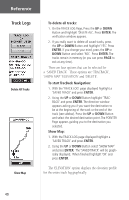
Reference Tracks You need to save the track log first before you can use the TracBack feature. NOTE: For effective use of the 'TRACBACK' feature, 'CLEAR' the track log before starting a new trip or after saving the track log. To clear the track log, follow the steps given on page 19, "Clearing a Cluttered Map Display". 38 What is a Track Log? The eTrex Summit draws an electronic breadcrumb trail on the Map Page as you travel along. This breadcrumb trail is the 'Track Log'. The 'Track Log' contains information about each point that it plots along the way, including time, position and elevation. After a Track Log is saved in the unit's memory, the eTrex Summit can use the Track Logs information to navigate, review the saved Track Log on the map or to review the Track Logs elevation profile. 'TracBack' allows you to return along a traveled path without marking any waypoints. When you are ready to return to where you started, eTrex Summit will take you back by following the Track Log that you left behind. You can save a total of ten Track Logs in the eTrex Summit. The Track Log starts recording as soon as the eTrex Summit gets a location fix. If you want to use the 'Tracback' feature it is recommend that you clear the Track Log before you start traveling. The percentage of memory used by the current Track Log is displayed at the top of the Tracks page. After the Track Log is 'CLEARED', it will show zero percent. When the display shows 99%, the most recent track points will start overwriting the beginning track points, in order to avoid losing any track points, you should save the Track Log before it reaches 99% of memory usage. Saved tracks can be used for navigation later. After a Track Log is saved, the saved track will have a beginning (BEGIN) point and an ending (END) point. Clearing the Current 'Track Log': 1. With the MENU page displayed, highlight 'TRACKS' and press ENTER. The TRACK LOG Page will appear. 2. Highlight the 'CLEAR' Button and press ENTER. 3. You will be asked 'DO YOU REALLY WANT TO CLEAR THE TRACK LOG?'. Highlight 'YES' and press ENTER to clear the current Track Log.
-
 1
1 -
2
-
3
-
4
-
5
-
6
-
7
-
8
-
9
-
10
-
11
-
12
-
13
-
14
-
15
-
16
-
17
-
18
-
19
-
20
-
21
-
22
-
23
-
24
-
25
-
26
-
27
-
28
-
29
-
30
-
31
-
32
-
33
-
34
-
 35
35 -
 36
36 -
 37
37 -
 38
38 -
 39
39 -
 40
40 -
 41
41 -
 42
42 -
 43
43 -
 44
44 -
 45
45 -
46
-
47
-
48
-
49
-
50
-
51
-
52
-
53
-
54
-
55
-
56
-
57
-
58
-
59
-
60
-
61
-
62
-
63
-
64
-
65
-
66
-
67
-
68
-
69
-
70
-
71
-
72
-
73
 |
 |