Garmin eTrex Summit Owner's Manual - Page 32
Mark Waypoint
 |
View all Garmin eTrex Summit manuals
Add to My Manuals
Save this manual to your list of manuals |
Page 32 highlights
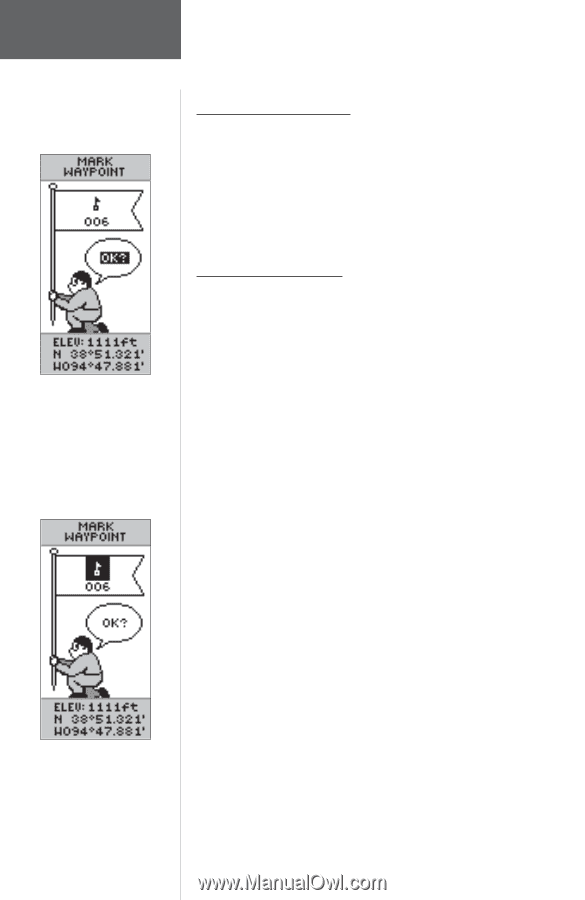
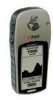
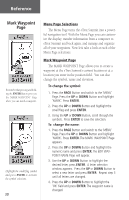
Reference Mark Waypoint Page Remember that pressing and holding the ENTER Button gives you the 'MARK WAYPOINT' Page where you can mark a waypoint. Highlight the small flag symbol and press ENTER to activate the symbol selections. 30 Menu Page Selections The Menu Page turns the eTrex Summit into a powerful navigation tool. With the Menu Page you can customize the display, transfer information from a computer to eTrex Summit and back again, and manage and organize all of your waypoints. Now let's take a look at each of the Menu Page selections. Mark Waypoint Page The MARK WAYPOINT Page allows you to create a waypoint at the eTrex Summit's current location or at a location you enter in the position field. You can also change the symbol, name and elevation. To change the symbol: 1. Press the PAGE Button and switch to the 'MENU' Page. Press the UP or DOWN Button and highlight 'MARK'. Press ENTER. 2. Press the UP or DOWN Button and highlight the small flag and press ENTER. 3. Using the UP or DOWN Button, scroll through the symbols. Press ENTER to save the selection. To change the name: 1. Press the PAGE Button and switch to the 'MENU' Page. Press the UP or DOWN Button and highlight 'MARK'. Press ENTER. The MARK WAYPOINT Page appears. 2. Press the UP or DOWN Button and highlight the numeric name and press ENTER. The EDIT WAYPOINT NAME Page will appear. 3. Use the UP or DOWN Button to highlight the desired letter, press ENTER. A letter selection window appears. Press the UP or DOWN Button to select a new letter and press ENTER. Repeat step 3 until all letters are changed. 4. Press the UP or DOWN Button to highlight the 'OK' field and press ENTER. The waypoint name is changed.
-
 1
1 -
2
-
3
-
4
-
5
-
6
-
7
-
8
-
9
-
10
-
11
-
12
-
13
-
14
-
15
-
16
-
17
-
18
-
19
-
20
-
21
-
22
-
23
-
24
-
25
-
26
-
 27
27 -
 28
28 -
 29
29 -
 30
30 -
 31
31 -
 32
32 -
 33
33 -
 34
34 -
 35
35 -
 36
36 -
 37
37 -
38
-
39
-
40
-
41
-
42
-
43
-
44
-
45
-
46
-
47
-
48
-
49
-
50
-
51
-
52
-
53
-
54
-
55
-
56
-
57
-
58
-
59
-
60
-
61
-
62
-
63
-
64
-
65
-
66
-
67
-
68
-
69
-
70
-
71
-
72
-
73
 |
 |