Gateway E-9510T Gateway 9510 Server User Guide - Page 3

Using the BIOS Setup Utility, Configuring your RAID solutions

Page 3 highlights

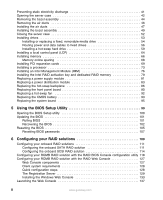
Preventing static electricity discharge 41 Opening the server case 42 Removing the bezel assembly 44 Removing the air ducts 46 Installing the air ducts 47 Installing the bezel assembly 49 Closing the server case 52 Installing drives 53 Installing or replacing a fixed, removable-media drive 54 Routing power and data cables to fixed drives 56 Installing a hot-swap hard drive 59 Installing a local control panel (LCP 64 Installing memory 66 Memory online sparing 68 Installing PCI expansion cards 69 Installing a processor 73 Installing an Intel Management Module (IMM 76 Installing the Intel RAID activation key and dedicated RAID memory 79 Replacing a power supply module 81 Replacing a power distribution module 83 Replacing the hot-swap backplane 86 Replacing the front panel board 90 Replacing a hot-swap fan 92 Replacing the CMOS battery 93 Replacing the system board 95 5 Using the BIOS Setup Utility 99 Opening the BIOS Setup utility 100 Updating the BIOS 101 Rolling BIOS 101 Recovering the BIOS 102 Resetting the BIOS 105 Resetting BIOS passwords 107 6 Configuring your RAID solutions 109 Configuring your onboard RAID solutions 111 Configuring the onboard SATA RAID solution 111 Configuring the onboard SCSI RAID solution 114 Configuring your ROMB RAID solution with the RAID BIOS Console configuration utility 118 Configuring your ROMB RAID solution with the RAID Web Console 127 Web Console components 127 Client system requirements 128 Quick configuration steps 128 The Registration Server 129 Installing the Windows Web Console 133 Launching the Web Console 137 ii www.gateway.com

  • 1
  • 2
  • 3
  • 4
  • 5
  • 6
  • 7
  • 8
  • 9
  • 10
  • 11
  • 12
  • 13
  • 14
  • 15
  • 16
  • 17
  • 18
  • 19
  • 20
  • 21
  • 22
  • 23
  • 24
  • 25
  • 26
  • 27
  • 28
  • 29
  • 30
  • 31
  • 32
  • 33
  • 34
  • 35
  • 36
  • 37
  • 38
  • 39
  • 40
  • 41
  • 42
  • 43
  • 44
  • 45
  • 46
  • 47
  • 48
  • 49
  • 50
  • 51
  • 52
  • 53
  • 54
  • 55
  • 56
  • 57
  • 58
  • 59
  • 60
  • 61
  • 62
  • 63
  • 64
  • 65
  • 66
  • 67
  • 68
  • 69
  • 70
  • 71
  • 72
  • 73
  • 74
  • 75
  • 76
  • 77
  • 78
  • 79
  • 80
  • 81
  • 82
  • 83
  • 84
  • 85
  • 86
  • 87
  • 88
  • 89
  • 90
  • 91
  • 92
  • 93
  • 94
  • 95
  • 96
  • 97
  • 98
  • 99
  • 100
  • 101
  • 102
  • 103
  • 104
  • 105
  • 106
  • 107
  • 108
  • 109
  • 110
  • 111
  • 112
  • 113
  • 114
  • 115
  • 116
  • 117
  • 118
  • 119
  • 120
  • 121
  • 122
  • 123
  • 124
  • 125
  • 126
  • 127
  • 128
  • 129
  • 130
  • 131
  • 132
  • 133
  • 134
  • 135
  • 136
  • 137
  • 138
  • 139
  • 140
  • 141
  • 142
  • 143
  • 144
  • 145
  • 146
  • 147
  • 148
  • 149
  • 150
  • 151
  • 152
  • 153
  • 154
  • 155
  • 156
  • 157
  • 158
  • 159
  • 160
  • 161
  • 162
  • 163
  • 164
  • 165
  • 166
  • 167
  • 168
  • 169
  • 170
  • 171
  • 172
  • 173
  • 174
  • 175
  • 176
  • 177
  • 178
  • 179
  • 180
  • 181
  • 182
  • 183
  • 184
  • 185
  • 186
  • 187
  • 188
  • 189
  • 190
  • 191
  • 192
  • 193
  • 194
  • 195
  • 196
  • 197
  • 198
  • 199
  • 200
  • 201
  • 202
  • 203
  • 204
  • 205
  • 206
  • 207
  • 208
  • 209
  • 210
  • 211
  • 212
  • 213
  • 214
  • 215
  • 216
  • 217
  • 218
  • 219
  • 220
  • 221
  • 222

ii
www.gateway.com
Preventing static electricity discharge
. . . . . . . . . . . . . . . . . . . . . . . . . . . . . . . . . . . . . . . . . 41
Opening the server case
. . . . . . . . . . . . . . . . . . . . . . . . . . . . . . . . . . . . . . . . . . . . . . . . . . . 42
Removing the bezel assembly . . . . . . . . . . . . . . . . . . . . . . . . . . . . . . . . . . . . . . . . . . . . . . . 44
Removing the air ducts
. . . . . . . . . . . . . . . . . . . . . . . . . . . . . . . . . . . . . . . . . . . . . . . . . . . . 46
Installing the air ducts
. . . . . . . . . . . . . . . . . . . . . . . . . . . . . . . . . . . . . . . . . . . . . . . . . . . . . 47
Installing the bezel assembly . . . . . . . . . . . . . . . . . . . . . . . . . . . . . . . . . . . . . . . . . . . . . . . . 49
Closing the server case . . . . . . . . . . . . . . . . . . . . . . . . . . . . . . . . . . . . . . . . . . . . . . . . . . . . 52
Installing drives . . . . . . . . . . . . . . . . . . . . . . . . . . . . . . . . . . . . . . . . . . . . . . . . . . . . . . . . . . . 53
Installing or replacing a fixed, removable-media drive
. . . . . . . . . . . . . . . . . . . . . . . . . 54
Routing power and data cables to fixed drives . . . . . . . . . . . . . . . . . . . . . . . . . . . . . . . 56
Installing a hot-swap hard drive . . . . . . . . . . . . . . . . . . . . . . . . . . . . . . . . . . . . . . . . . . . 59
Installing a local control panel (LCP) . . . . . . . . . . . . . . . . . . . . . . . . . . . . . . . . . . . . . . . . . . 64
Installing memory . . . . . . . . . . . . . . . . . . . . . . . . . . . . . . . . . . . . . . . . . . . . . . . . . . . . . . . . . 66
Memory online sparing
. . . . . . . . . . . . . . . . . . . . . . . . . . . . . . . . . . . . . . . . . . . . . . . . . 68
Installing PCI expansion cards . . . . . . . . . . . . . . . . . . . . . . . . . . . . . . . . . . . . . . . . . . . . . . . 69
Installing a processor . . . . . . . . . . . . . . . . . . . . . . . . . . . . . . . . . . . . . . . . . . . . . . . . . . . . . . 73
Installing an Intel Management Module (IMM)
. . . . . . . . . . . . . . . . . . . . . . . . . . . . . . . . . . 76
Installing the Intel RAID activation key and dedicated RAID memory
. . . . . . . . . . . . . . . . 79
Replacing a power supply module . . . . . . . . . . . . . . . . . . . . . . . . . . . . . . . . . . . . . . . . . . . . 81
Replacing a power distribution module
. . . . . . . . . . . . . . . . . . . . . . . . . . . . . . . . . . . . . . . . 83
Replacing the hot-swap backplane
. . . . . . . . . . . . . . . . . . . . . . . . . . . . . . . . . . . . . . . . . . . 86
Replacing the front panel board . . . . . . . . . . . . . . . . . . . . . . . . . . . . . . . . . . . . . . . . . . . . . . 90
Replacing a hot-swap fan
. . . . . . . . . . . . . . . . . . . . . . . . . . . . . . . . . . . . . . . . . . . . . . . . . . 92
Replacing the CMOS battery . . . . . . . . . . . . . . . . . . . . . . . . . . . . . . . . . . . . . . . . . . . . . . . . 93
Replacing the system board
. . . . . . . . . . . . . . . . . . . . . . . . . . . . . . . . . . . . . . . . . . . . . . . . 95
5
Using the BIOS Setup Utility
. . . . . . . . . . . . . . . . . . . . . . . . . . . . . . . . . . . . . . . . . . 99
Opening the BIOS Setup utility
. . . . . . . . . . . . . . . . . . . . . . . . . . . . . . . . . . . . . . . . . . . . . 100
Updating the BIOS . . . . . . . . . . . . . . . . . . . . . . . . . . . . . . . . . . . . . . . . . . . . . . . . . . . . . . . 101
Rolling BIOS
. . . . . . . . . . . . . . . . . . . . . . . . . . . . . . . . . . . . . . . . . . . . . . . . . . . . . . . . 101
Recovering the BIOS . . . . . . . . . . . . . . . . . . . . . . . . . . . . . . . . . . . . . . . . . . . . . . . . . . 102
Resetting the BIOS . . . . . . . . . . . . . . . . . . . . . . . . . . . . . . . . . . . . . . . . . . . . . . . . . . . . . . . 105
Resetting BIOS passwords
. . . . . . . . . . . . . . . . . . . . . . . . . . . . . . . . . . . . . . . . . . . . . 107
6
Configuring your RAID solutions
. . . . . . . . . . . . . . . . . . . . . . . . . . . . . . . . . . . . 109
Configuring your onboard RAID solutions . . . . . . . . . . . . . . . . . . . . . . . . . . . . . . . . . . . . . 111
Configuring the onboard SATA RAID solution
. . . . . . . . . . . . . . . . . . . . . . . . . . . . . . 111
Configuring the onboard SCSI RAID solution . . . . . . . . . . . . . . . . . . . . . . . . . . . . . . . 114
Configuring your ROMB RAID solution with the RAID BIOS Console configuration utility 118
Configuring your ROMB RAID solution with the RAID Web Console . . . . . . . . . . . . . . . . 127
Web Console components . . . . . . . . . . . . . . . . . . . . . . . . . . . . . . . . . . . . . . . . . . . . . . 127
Client system requirements . . . . . . . . . . . . . . . . . . . . . . . . . . . . . . . . . . . . . . . . . . . . . 128
Quick configuration steps
. . . . . . . . . . . . . . . . . . . . . . . . . . . . . . . . . . . . . . . . . . . . . . 128
The Registration Server . . . . . . . . . . . . . . . . . . . . . . . . . . . . . . . . . . . . . . . . . . . . . . . . 129
Installing the Windows Web Console
. . . . . . . . . . . . . . . . . . . . . . . . . . . . . . . . . . . . . 133
Launching the Web Console
. . . . . . . . . . . . . . . . . . . . . . . . . . . . . . . . . . . . . . . . . . . . . . . 137