HP 50g HP 50g_user's manual_English_HDPSG49AEM8.pdf - Page 14
Contents of the calculator’s display, Menus, The TOOL menu, RAD XYZ HEX R= 'X, HOME } - user s guide
 |
UPC - 882780502291
View all HP 50g manuals
Add to My Manuals
Save this manual to your list of manuals |
Page 14 highlights
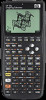
Contents of the calculator's display Turn your calculator on once more. At the top of the display you will have two lines of information that describe the settings of the calculator. The first line shows the characters: RAD XYZ HEX R= 'X' For details on the meaning of these symbols see Chapter 2 in the calculator's user's guide. The second line shows the characters { HOME } indicating that the HOME directory is the current file directory in the calculator's memory. At the bottom of the display you will find a number of labels, namely, @EDIT @VIEW @@RCL@@ @@STO@ !PURGE !CLEAR associated with the six soft menu keys, F1 through F6: ABCDEF The six labels displayed in the lower part of the screen will change depending on which menu is displayed. But A will always be associated with the first displayed label, B with the second displayed label, and so on. Menus The six labels associated with the keys A through F form part of a menu of functions. Since the calculator has only six soft menu keys, it only display 6 labels at any point in time. However, a menu can have more than six entries. Each group of 6 entries is called a Menu page. To move to the next menu page (if available), press the L (NeXT menu) key. This key is the third key from the left in the third row of keys in the keyboard. The TOOL menu The soft menu keys for the default menu, known as the TOOL menu, are associated with operations related to manipulation of variables (see section on variables in this Chapter): @EDIT A EDIT the contents of a variable (see Chapter 2 in this guide and Chapter 2 and Appendix L in the user's guide for more information on editing) @VIEW B VIEW the contents of a variable Page 1-3
-
 1
1 -
2
-
3
-
4
-
5
-
6
-
7
-
8
-
 9
9 -
 10
10 -
 11
11 -
 12
12 -
 13
13 -
 14
14 -
 15
15 -
 16
16 -
 17
17 -
 18
18 -
 19
19 -
20
-
21
-
22
-
23
-
24
-
25
-
26
-
27
-
28
-
29
-
30
-
31
-
32
-
33
-
34
-
35
-
36
-
37
-
38
-
39
-
40
-
41
-
42
-
43
-
44
-
45
-
46
-
47
-
48
-
49
-
50
-
51
-
52
-
53
-
54
-
55
-
56
-
57
-
58
-
59
-
60
-
61
-
62
-
63
-
64
-
65
-
66
-
67
-
68
-
69
-
70
-
71
-
72
-
73
-
74
-
75
-
76
-
77
-
78
-
79
-
80
-
81
-
82
-
83
-
84
-
85
-
86
-
87
-
88
-
89
-
90
-
91
-
92
-
93
-
94
-
95
-
96
-
97
-
98
-
99
-
100
-
101
-
102
-
103
-
104
-
105
-
106
-
107
-
108
-
109
-
110
-
111
-
112
-
113
-
114
-
115
-
116
-
117
-
118
-
119
-
120
-
121
-
122
-
123
-
124
-
125
-
126
-
127
-
128
-
129
-
130
-
131
-
132
-
133
-
134
-
135
-
136
-
137
-
138
-
139
-
140
-
141
-
142
-
143
-
144
-
145
-
146
-
147
-
148
-
149
-
150
-
151
-
152
-
153
-
154
-
155
-
156
-
157
-
158
-
159
-
160
-
161
-
162
-
163
-
164
-
165
-
166
-
167
-
168
-
169
-
170
-
171
-
172
-
173
-
174
-
175
-
176
-
177
-
178
-
179
-
180
-
181
-
182
-
183
-
184
 |
 |
