HP 9500hdn HP Color LaserJet 9500nand 9500hdn - User Guide - Page 54
Setting the media size and type, Configuring the trays for standard-size media
 |
UPC - 808736429689
View all HP 9500hdn manuals
Add to My Manuals
Save this manual to your list of manuals |
Page 54 highlights
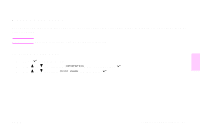
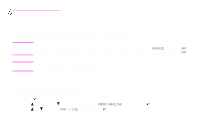
http://www.hp.com/support/lj9500 Setting the media size and type Whenever you open and close an input tray, you have the opportunity to set the type and size for the media in that tray. The printer automatically changes its internal settings to produce the best print quality for the media type you set. Make sure to set the media type and size at the printer's control panel and in the printer driver. Note If you have used previous HP LaserJet printers, you might be accustomed to configuring tray 1 to first mode or cassette mode. To duplicate the settings for first mode, configure tray 1 for Size = ANYSIZE and Type = ANY. To duplicate the settings for cassette mode, set either the size or type for tray 1 to a setting other than ANY. Note Printer-driver settings override control panel settings. Software application settings override both printerdriver settings and control panel settings. Configuring the trays for standard-size media Use the following instructions to configure the trays at the printer control panel. To set a standard media size and type for tray 1 1 Press (SELECT button) to open the menus. 2 Use (UP button) or (DOWN button) to scroll to PAPER HANDLING, and then press . 3 Use or to scroll to TRAY 1 SIZE, and then press . 52 Chapter 4 - Improving print quality Rev. 1.0
-
 1
1 -
2
-
3
-
4
-
5
-
6
-
7
-
8
-
9
-
10
-
11
-
12
-
13
-
14
-
15
-
16
-
17
-
18
-
19
-
20
-
21
-
22
-
23
-
24
-
25
-
26
-
27
-
28
-
29
-
30
-
31
-
32
-
33
-
34
-
35
-
36
-
37
-
38
-
39
-
40
-
41
-
42
-
43
-
44
-
45
-
46
-
47
-
48
-
 49
49 -
 50
50 -
 51
51 -
 52
52 -
 53
53 -
 54
54 -
 55
55 -
 56
56 -
 57
57 -
 58
58 -
 59
59 -
60
-
61
-
62
-
63
-
64
-
65
-
66
-
67
-
68
-
69
-
70
-
71
-
72
-
73
-
74
-
75
-
76
-
77
-
78
-
79
-
80
-
81
-
82
-
83
-
84
-
85
-
86
-
87
-
88
-
89
-
90
-
91
-
92
-
93
-
94
-
95
-
96
-
97
-
98
-
99
-
100
-
101
-
102
-
103
-
104
-
105
-
106
-
107
-
108
-
109
-
110
-
111
-
112
-
113
-
114
-
115
-
116
-
117
-
118
-
119
-
120
-
121
-
122
-
123
-
124
-
125
-
126
-
127
-
128
-
129
-
130
-
131
-
132
-
133
-
134
-
135
-
136
-
137
-
138
-
139
-
140
-
141
-
142
-
143
-
144
-
145
-
146
-
147
-
148
-
149
-
150
-
151
-
152
-
153
-
154
-
155
-
156
-
157
-
158
-
159
-
160
-
161
-
162
-
163
-
164
-
165
-
166
-
167
-
168
-
169
-
170
-
171
-
172
-
173
-
174
-
175
-
176
-
177
-
178
-
179
-
180
-
181
-
182
-
183
-
184
-
185
-
186
-
187
-
188
-
189
-
190
-
191
-
192
-
193
-
194
-
195
-
196
-
197
-
198
-
199
-
200
-
201
-
202
-
203
-
204
-
205
-
206
-
207
-
208
-
209
-
210
-
211
-
212
-
213
-
214
-
215
-
216
-
217
-
218
-
219
-
220
-
221
-
222
-
223
-
224
-
225
-
226
-
227
-
228
-
229
-
230
-
231
-
232
-
233
-
234
-
235
-
236
-
237
-
238
-
239
-
240
-
241
-
242
-
243
-
244
-
245
-
246
-
247
-
248
-
249
-
250
-
251
-
252
-
253
-
254
 |
 |
