HP LaserJet Enterprise P3015 HP LaserJet P3010 Series - Software Technical Ref - Page 177
Font Substitution Table, External Fonts
 |
View all HP LaserJet Enterprise P3015 manuals
Add to My Manuals
Save this manual to your list of manuals |
Page 177 highlights
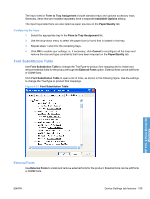
The trays listed in Form to Tray Assignment include standard trays and optional accessory trays. Generally, items that are installed separately have a separate Installable Options setting. The input trays listed here are also listed as paper sources on the Paper/Quality tab. Configuring the trays 1. Select the appropriate tray in the Form to Tray Assignment list. 2. Use the drop-down menu to select the paper size (or form) that is loaded in that tray. 3. Repeat steps 1 and 2 for the remaining trays. 4. Click OK to enable your settings, or, if necessary, click Cancel to reconfigure all the trays and remove the size and type constraints that have been imposed on the Paper/Quality tab. Font Substitution Table Use Font Substitution Table to change the TrueType-to-product font mapping and to install and remove external fonts for the product through the External Fonts option. External fonts can be soft fonts or DIMM fonts. Click Font Substitution Table to open a list of fonts, as shown in the following figure. Use the settings to change the TrueType-to-product font mappings. Figure 4-21 Font Substitution Table HP PCL 6 Print Driver for Windows External Fonts Use External Fonts to install and remove external fonts for the product. External fonts can be soft fonts or DIMM fonts. ENWW Device Settings tab features 159
-
 1
1 -
2
-
3
-
4
-
5
-
6
-
7
-
8
-
9
-
10
-
11
-
12
-
13
-
14
-
15
-
16
-
17
-
18
-
19
-
20
-
21
-
22
-
23
-
24
-
25
-
26
-
27
-
28
-
29
-
30
-
31
-
32
-
33
-
34
-
35
-
36
-
37
-
38
-
39
-
40
-
41
-
42
-
43
-
44
-
45
-
46
-
47
-
48
-
49
-
50
-
51
-
52
-
53
-
54
-
55
-
56
-
57
-
58
-
59
-
60
-
61
-
62
-
63
-
64
-
65
-
66
-
67
-
68
-
69
-
70
-
71
-
72
-
73
-
74
-
75
-
76
-
77
-
78
-
79
-
80
-
81
-
82
-
83
-
84
-
85
-
86
-
87
-
88
-
89
-
90
-
91
-
92
-
93
-
94
-
95
-
96
-
97
-
98
-
99
-
100
-
101
-
102
-
103
-
104
-
105
-
106
-
107
-
108
-
109
-
110
-
111
-
112
-
113
-
114
-
115
-
116
-
117
-
118
-
119
-
120
-
121
-
122
-
123
-
124
-
125
-
126
-
127
-
128
-
129
-
130
-
131
-
132
-
133
-
134
-
135
-
136
-
137
-
138
-
139
-
140
-
141
-
142
-
143
-
144
-
145
-
146
-
147
-
148
-
149
-
150
-
151
-
152
-
153
-
154
-
155
-
156
-
157
-
158
-
159
-
160
-
161
-
162
-
163
-
164
-
165
-
166
-
167
-
168
-
169
-
170
-
171
-
 172
172 -
 173
173 -
 174
174 -
 175
175 -
 176
176 -
 177
177 -
 178
178 -
 179
179 -
 180
180 -
 181
181 -
 182
182 -
183
-
184
-
185
-
186
-
187
-
188
-
189
-
190
-
191
-
192
-
193
-
194
-
195
-
196
-
197
-
198
-
199
-
200
-
201
-
202
-
203
-
204
-
205
-
206
-
207
-
208
-
209
-
210
-
211
-
212
-
213
-
214
-
215
-
216
-
217
-
218
-
219
-
220
-
221
-
222
-
223
-
224
-
225
-
226
-
227
-
228
-
229
-
230
-
231
-
232
-
233
-
234
-
235
-
236
-
237
-
238
-
239
-
240
-
241
-
242
-
243
-
244
-
245
-
246
-
247
-
248
-
249
-
250
-
251
-
252
-
253
-
254
-
255
-
256
-
257
-
258
 |
 |
