HP LaserJet M9040/M9050 HP LaserJet M9040/M9050 MFP - Software Technical Refer - Page 266
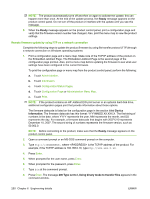
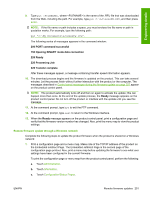
Remote firmware update by using FTP through a browser
 |
View all HP LaserJet M9040/M9050 manuals
Add to My Manuals
Save this manual to your list of manuals |
Page 266 highlights
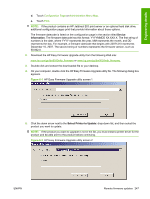
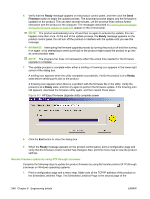
6. Verify that the Ready message appears on the product control panel, and then click the Send Firmware button to begin the update process. The download process begins and the firmware is updated on the product. This can take several minutes. Let the process finish without further interaction with the product or the computer. The messages described in Control panel messages during the firmware update on page 257 appear on the control panel. NOTE: The product automatically turns off and then on again to activate the update; this can happen more than once. At the end of the update process, the Ready message appears on the product control panel. Do not turn off the product or interfere with the update until you see this message. WARNING! Interrupting the firmware upgrade process by turning the product off and then turning it on again, or by attempting to send a print job to the product might cause the product to go into an unrecoverable state. NOTE: The progress bar does not necessarily reflect the actual time needed for the firmware upgrade to complete. 7. The update process is complete when either a smiling or frowning icon appears in the lower-right corner of the dialog box. A smiling icon appears when the utility completes successfully. Verify the product is at a Ready state before sending print jobs to the product. A frowning icon appears when there is a problem with the firmware file or the utility. Verify the product is at a Ready state, and then try again to perform the firmware update. If the frowning icon still appears, download the firmware utility again, and then repeat these steps. Figure 6-3 HP Easy Firmware Upgrade utility complete screen 8. Click the Exit button to close the dialog box. 9. When the Ready message appears on the product control panel, print a configuration page and verify that the firmware version number has changed. Also, print the menu map to view the product settings. Remote firmware update by using FTP through a browser Complete the following steps to update the product firmware by using file transfer protocol (FTP) through a browser on Windows operating systems: 1. Print a configuration page and a menu map. Make note of the TCP/IP address of the product on the Embedded Jetdirect Page. The Embedded Jetdirect Page is the second page of the 248 Chapter 6 Engineering details ENWW
-
 1
1 -
2
-
3
-
4
-
5
-
6
-
7
-
8
-
9
-
10
-
11
-
12
-
13
-
14
-
15
-
16
-
17
-
18
-
19
-
20
-
21
-
22
-
23
-
24
-
25
-
26
-
27
-
28
-
29
-
30
-
31
-
32
-
33
-
34
-
35
-
36
-
37
-
38
-
39
-
40
-
41
-
42
-
43
-
44
-
45
-
46
-
47
-
48
-
49
-
50
-
51
-
52
-
53
-
54
-
55
-
56
-
57
-
58
-
59
-
60
-
61
-
62
-
63
-
64
-
65
-
66
-
67
-
68
-
69
-
70
-
71
-
72
-
73
-
74
-
75
-
76
-
77
-
78
-
79
-
80
-
81
-
82
-
83
-
84
-
85
-
86
-
87
-
88
-
89
-
90
-
91
-
92
-
93
-
94
-
95
-
96
-
97
-
98
-
99
-
100
-
101
-
102
-
103
-
104
-
105
-
106
-
107
-
108
-
109
-
110
-
111
-
112
-
113
-
114
-
115
-
116
-
117
-
118
-
119
-
120
-
121
-
122
-
123
-
124
-
125
-
126
-
127
-
128
-
129
-
130
-
131
-
132
-
133
-
134
-
135
-
136
-
137
-
138
-
139
-
140
-
141
-
142
-
143
-
144
-
145
-
146
-
147
-
148
-
149
-
150
-
151
-
152
-
153
-
154
-
155
-
156
-
157
-
158
-
159
-
160
-
161
-
162
-
163
-
164
-
165
-
166
-
167
-
168
-
169
-
170
-
171
-
172
-
173
-
174
-
175
-
176
-
177
-
178
-
179
-
180
-
181
-
182
-
183
-
184
-
185
-
186
-
187
-
188
-
189
-
190
-
191
-
192
-
193
-
194
-
195
-
196
-
197
-
198
-
199
-
200
-
201
-
202
-
203
-
204
-
205
-
206
-
207
-
208
-
209
-
210
-
211
-
212
-
213
-
214
-
215
-
216
-
217
-
218
-
219
-
220
-
221
-
222
-
223
-
224
-
225
-
226
-
227
-
228
-
229
-
230
-
231
-
232
-
233
-
234
-
235
-
236
-
237
-
238
-
239
-
240
-
241
-
242
-
243
-
244
-
245
-
246
-
247
-
248
-
249
-
250
-
251
-
252
-
253
-
254
-
255
-
256
-
257
-
258
-
259
-
260
-
 261
261 -
 262
262 -
 263
263 -
 264
264 -
 265
265 -
 266
266 -
 267
267 -
 268
268 -
 269
269 -
 270
270 -
 271
271 -
272
-
273
-
274
-
275
-
276
-
277
-
278
-
279
-
280
-
281
-
282
-
283
-
284
-
285
-
286
-
287
-
288
-
289
-
290
-
291
-
292
-
293
-
294
-
295
-
296
-
297
-
298
-
299
-
300
-
301
-
302
-
303
-
304
-
305
-
306
-
307
-
308
-
309
-
310
 |
 |
