HP LaserJet M9040/M9050 HP LaserJet M9040/M9050 MFP - Software Technical Refer - Page 98
Setting up client computers running Windows 2000, Setting up client computers running Windows XP
 |
View all HP LaserJet M9040/M9050 manuals
Add to My Manuals
Save this manual to your list of manuals |
Page 98 highlights
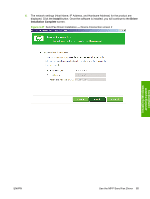
Setting up client computers running Windows 2000 1. Click the Start menu, click the Settings option, and then click the Printers option. 2. Double-click the Add Printer icon to open the Add Printer Wizard. 3. Click the Next button to start the wizard. 4. Click the Network Printer option, and then click the Next button. 5. Type in the path and share name of the product to which you want to connect. -orClick the Browse button and navigate to find the product to which you want to connect. Click the Next button. 6. Select either the Yes or No option when asked if you want to use this product as your default printer for Windows-based programs, and then click the Next button. 7. Click the Finish button to complete the installation and close the Add Printer Wizard. NOTE: You might need to use the product software CD to complete the printer driver installations. Setting up client computers running Windows XP 1. On the Start menu, click one of the following options: Printers and Faxes (Windows XP Professional) -orPrinters and Other Hardware Devices (Windows XP Home) 2. On the left-hand column, under Printer Tasks, click the Add a printer option to open the Add Printer Wizard. 3. Click the Next button to start the wizard. 4. Click the A network printer or a printer attached to another computer option, and then click the Next button. 5. Type in the path and share name of the product to which you want to connect. -orClick the Browse button and navigate to find the product to which you want to connect. Click the Next button. 6. Click either the Yes or No option when asked if you want to use this product as your default printer for Windows-based programs, and then click the Next button. 7. Click the Finish button to complete the installation and close the Add Printer Wizard. 80 Chapter 3 Install Windows printing-system components ENWW
-
 1
1 -
2
-
3
-
4
-
5
-
6
-
7
-
8
-
9
-
10
-
11
-
12
-
13
-
14
-
15
-
16
-
17
-
18
-
19
-
20
-
21
-
22
-
23
-
24
-
25
-
26
-
27
-
28
-
29
-
30
-
31
-
32
-
33
-
34
-
35
-
36
-
37
-
38
-
39
-
40
-
41
-
42
-
43
-
44
-
45
-
46
-
47
-
48
-
49
-
50
-
51
-
52
-
53
-
54
-
55
-
56
-
57
-
58
-
59
-
60
-
61
-
62
-
63
-
64
-
65
-
66
-
67
-
68
-
69
-
70
-
71
-
72
-
73
-
74
-
75
-
76
-
77
-
78
-
79
-
80
-
81
-
82
-
83
-
84
-
85
-
86
-
87
-
88
-
89
-
90
-
91
-
92
-
 93
93 -
 94
94 -
 95
95 -
 96
96 -
 97
97 -
 98
98 -
 99
99 -
 100
100 -
 101
101 -
 102
102 -
 103
103 -
104
-
105
-
106
-
107
-
108
-
109
-
110
-
111
-
112
-
113
-
114
-
115
-
116
-
117
-
118
-
119
-
120
-
121
-
122
-
123
-
124
-
125
-
126
-
127
-
128
-
129
-
130
-
131
-
132
-
133
-
134
-
135
-
136
-
137
-
138
-
139
-
140
-
141
-
142
-
143
-
144
-
145
-
146
-
147
-
148
-
149
-
150
-
151
-
152
-
153
-
154
-
155
-
156
-
157
-
158
-
159
-
160
-
161
-
162
-
163
-
164
-
165
-
166
-
167
-
168
-
169
-
170
-
171
-
172
-
173
-
174
-
175
-
176
-
177
-
178
-
179
-
180
-
181
-
182
-
183
-
184
-
185
-
186
-
187
-
188
-
189
-
190
-
191
-
192
-
193
-
194
-
195
-
196
-
197
-
198
-
199
-
200
-
201
-
202
-
203
-
204
-
205
-
206
-
207
-
208
-
209
-
210
-
211
-
212
-
213
-
214
-
215
-
216
-
217
-
218
-
219
-
220
-
221
-
222
-
223
-
224
-
225
-
226
-
227
-
228
-
229
-
230
-
231
-
232
-
233
-
234
-
235
-
236
-
237
-
238
-
239
-
240
-
241
-
242
-
243
-
244
-
245
-
246
-
247
-
248
-
249
-
250
-
251
-
252
-
253
-
254
-
255
-
256
-
257
-
258
-
259
-
260
-
261
-
262
-
263
-
264
-
265
-
266
-
267
-
268
-
269
-
270
-
271
-
272
-
273
-
274
-
275
-
276
-
277
-
278
-
279
-
280
-
281
-
282
-
283
-
284
-
285
-
286
-
287
-
288
-
289
-
290
-
291
-
292
-
293
-
294
-
295
-
296
-
297
-
298
-
299
-
300
-
301
-
302
-
303
-
304
-
305
-
306
-
307
-
308
-
309
-
310
 |
 |
