HP LaserJet Pro 300 HP LaserJet Pro 300 and 400 Color M351 and M451 - Software - Page 118
Click here for more install options, Connection Type
 |
View all HP LaserJet Pro 300 manuals
Add to My Manuals
Save this manual to your list of manuals |
Page 118 highlights
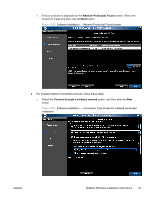
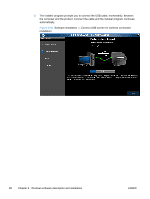
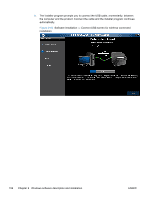
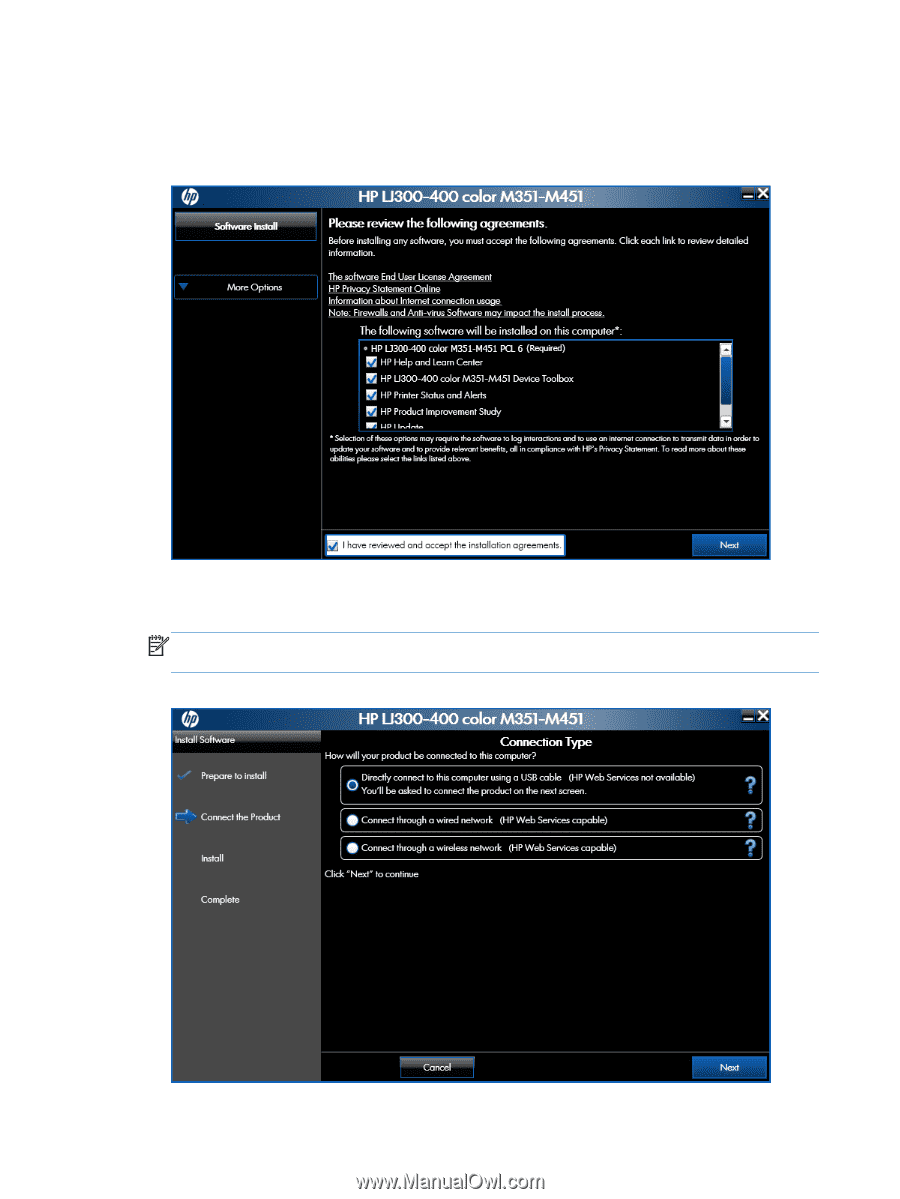
4. Select Click here for more install options to customize the software components that are installed with the product. When you are finished customizing the installation, click the Next button to continue to the Connection Type screen. Figure 2-59 Software installation - Customize software instllation 5. Select a connection type option on the Connection Type screen, based on how the product connects to the computer. NOTE: If you are installing a base unit (which does not have a network connection option), this screen does not appear. Proceed to the next step. Figure 2-60 Software installation - Connection Type screen 102 Chapter 2 Windows software description and installation ENWW
-
 1
1 -
2
-
3
-
4
-
5
-
6
-
7
-
8
-
9
-
10
-
11
-
12
-
13
-
14
-
15
-
16
-
17
-
18
-
19
-
20
-
21
-
22
-
23
-
24
-
25
-
26
-
27
-
28
-
29
-
30
-
31
-
32
-
33
-
34
-
35
-
36
-
37
-
38
-
39
-
40
-
41
-
42
-
43
-
44
-
45
-
46
-
47
-
48
-
49
-
50
-
51
-
52
-
53
-
54
-
55
-
56
-
57
-
58
-
59
-
60
-
61
-
62
-
63
-
64
-
65
-
66
-
67
-
68
-
69
-
70
-
71
-
72
-
73
-
74
-
75
-
76
-
77
-
78
-
79
-
80
-
81
-
82
-
83
-
84
-
85
-
86
-
87
-
88
-
89
-
90
-
91
-
92
-
93
-
94
-
95
-
96
-
97
-
98
-
99
-
100
-
101
-
102
-
103
-
104
-
105
-
106
-
107
-
108
-
109
-
110
-
111
-
112
-
 113
113 -
 114
114 -
 115
115 -
 116
116 -
 117
117 -
 118
118 -
 119
119 -
 120
120 -
 121
121 -
 122
122 -
 123
123 -
124
-
125
-
126
-
127
-
128
-
129
-
130
-
131
-
132
-
133
-
134
-
135
-
136
-
137
-
138
-
139
-
140
-
141
-
142
-
143
-
144
-
145
-
146
-
147
-
148
-
149
-
150
-
151
-
152
-
153
-
154
-
155
-
156
-
157
-
158
-
159
-
160
-
161
-
162
-
163
-
164
-
165
-
166
-
167
-
168
-
169
-
170
-
171
-
172
-
173
-
174
-
175
-
176
-
177
-
178
-
179
-
180
-
181
-
182
-
183
-
184
-
185
-
186
-
187
-
188
-
189
-
190
-
191
-
192
-
193
-
194
-
195
-
196
 |
 |
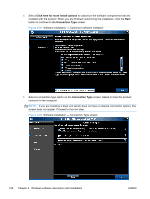
4.
Select
Click here for more install options
to customize the software components that are
installed with the product. When you are finished customizing the installation, click the
Next
button to continue to the
Connection Type
screen.
Figure 2-59
Software installation — Customize software instllation
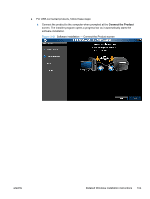
5.
Select a connection type option on the
Connection Type
screen, based on how the product
connects to the computer.
NOTE:
If you are installing a base unit (which does not have a network connection option), this
screen does not appear. Proceed to the next step.
Figure 2-60
Software installation — Connection Type screen
102
Chapter 2
Windows software description and installation
ENWW